Amber Frost Crochet Cardigan – Free Pattern

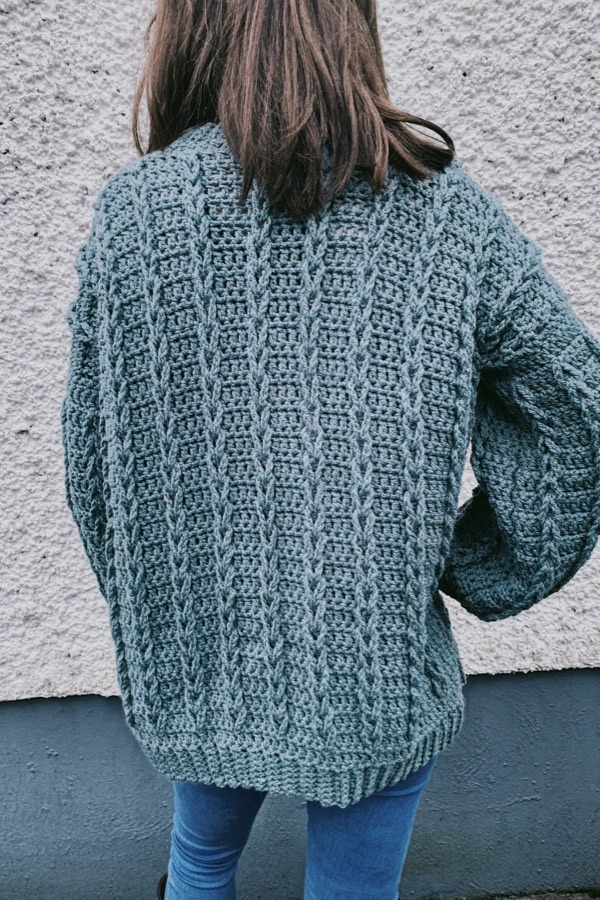
The Amber Frost Crochet Cardigan is a beautifully textured, button-up cardigan featuring a distinctive faux cable stitch that creates the appearance of knitted cables. This free crochet cardigan pattern combines classic styling with a modern design, making it a lovely addition to your handmade wardrobe.
Worked sideways, using DK weight yarn, the cardigan features a flattering textured body, long sleeves, ribbed edging and button front closure. The unique stitch pattern creates beautiful vertical detailing without traditional crochet cables.
Available in six sizes, from S to 3XL, this intermediate crochet pattern includes detailed written instructions and a step-by-step video tutorial to guide you through the construction process.
Amber Frost Crochet Cardigan at a Glance
- Skill Level: Intermediate
- Sizes: S, M, L, XL, 2XL, 3XL
- Yarn Weight: DK / Weight 3
- Recommended Yarn: Drops Lima (65% wool, 35% alpaca)
- Crochet Hook: 4.5 mm
- Construction: Worked sideways in separate panels
- Stitch Pattern: Textured faux cables created using yarn over slip stitches and the Wrap Around stitch
- Design Features: Long sleeves, ribbed edging and a button front closure
- Terminology: US crochet terms
Purchase the Ad-Free Amber Frost Crochet Cardigan PDF
Prefer a printable version of this pattern? The ad-free Amber Frost Crochet Cardigan PDF is available to purchase in our Etsy shop.
Enjoy following the pattern without ads, with the convenience of having the instructions saved for whenever you’re ready to crochet.
Purchase the Amber Frost Crochet Cardigan PDF on Etsy
Choosing the right yarn
The Amber Frost Crochet Cardigan is made using Drops Lima, a DK weight yarn containing 65% wool and 35% alpaca. This beautiful yarn has a soft, slightly rustic finish that compliments the cardigan’s textured faux cable design.
I especially love Drops Lima for crochet garments because it creates a warm, comfortable fabric while allowing the stitch definition to stand out.
You can substitute another DK yarn, provided you achieve the correct gauge. I recommend choosing a yarn with good stitch definition so the Wrap Around stitches remain clearly visible. Try to avoid very fluffy or fuzzy yarns, as these can make the textured stitches more difficult to work and may obscure the cable pattern.

Yarn Requirements
The Amber Frost Crochet Cardigan uses Drops Lima Dk weight yarn, a blend of 65% wool and 35% alpaca. Each 50g ball contains approximately 100m (109yds) of yarn.
| Size | Balls | Meters | Yards |
|---|---|---|---|
| S | 16 | 1,600 | 1,744 |
| M | 18 | 1,800 | 1,962 |
| L | 18 | 1,800 | 1,962 |
| XL | 19 | 1,900 | 2,071 |
| 2XL | 19 | 1,900 | 2,071 |
| 3XL | 20 | 2,000 | 2,180 |
Materials Needed
- 4.5 mm crochet hook
- Yarn needle for seaming and weaving in ends
- 3 buttons, approximately 1 inch (2.5 cm) in diameter
- Stitch markers
- Measuring tape
- Scissors
Stitches & Abbreviations
- ch – chain
- yoslst – yarn over slip stitch
- yoslst3L – yarn over slip stitch in the third loop
- hdc – half double crochet
- blo – back loop only
- slst – slip stitch
- WA – wrap around
- rep – repeat
- st(s) – stitch(es)

SPECIAL STITCHES
Wrap Around (WA): yarn over, insert hook into designated stitch (from the back of work to the front) in the third row of horizontal “Vs”. You will be inserting the hook under the bottom leg of the V. Yarn over and pull through. Pull your yarn up slightly so it’s the same height of other stitches. You should now have 4 loops on hook. Pull the top loop through second loop. You should have three loops on hook now. Yarn over and pull through remaining three loops. Please refer to the video tutorial for a better understanding of the stitch.
The below images show you step-by-step how to create the stitch. Image 6 shows where to insert hook for the second row of WA.
It is highly recommended to follow the free Youtube video tutorial when following this free crochet cardigan pattern.


Yarn over slip stitch (yoslst): yarn over and insert hook into designated stitch, yarn over and pull up a loop. You should have three loops on hook now. Pull the last loop through the other two loops on your hook.
Yarn over slip stitch in the third loop (yoslst3L): looking at your work you will notice the usual place where you insert your hook. We will call this the V of the stitch. If you lay your work down flat you will notice a horizontal bar to the front. This is the third loop. So, yarn over, insert hook into the third loop of designated stitch, pull up a loop. You should have three loops on hook now. Pull the last loop through the other two loops on your hook.
Video Tutorial For The Amber Frost Crochet Cardigan
If you are a visual learner, we would recommend you take a look at our Youtube video tutorial. This video will guide you through every step of the process on how to create your new cardigan. You will learn how to create the yarn over slip stitch (yoslst), working into the third loop and also creating the wrap around stitch.
It is highly recommended you join us for the video tutorial to help you along the way to help throughout creating this free crochet cardigan pattern.
Size Chart
| Size | S | M | L | XL | 2XL | 3XL |
|---|---|---|---|---|---|---|
| Finished bust (in) | 36 | 40 | 44 | 48 | 52 | 56 |
| Length (in) | 22 | 22 | 23 | 24 | 24 | 25 |
| Arm circ. (in) | 15 | 16 | 16 | 17 | 17 | 18 |
Gauge
19 sts x 5 “cables” = 4×4″
CROCHET AMBER FROST CARDIGAN
Back Panel
S(M, L, XL, 2XL, 3XL)
Ch 105(105, 111, 117, 117, 123)
Row 1: Yoslst in 2nd ch from hook and in each ch across, turn. [104(104, 110, 116, 116, 122) sts]
Row 2: Ch 1, 9 yoslstBLO, hdcBLO in each remaining st across, turn.
Row 3: Ch 1, yoslst3L in each st across until 9 sts remain, 9 yoslstBLO, turn.
Row 4: Ch 1, 11 yoslstBLO, WA, *5 yoslstBLO, WA, rep from * across until 2 sts remain, yoslstBLO, turn.
Row 5: Ch 1, yoslstBLO in each st across, turn.
Row 6: Ch 1, 9 yoslstBLO, hdcBLO in each remaining st, turn.
Row 7: Ch 1, yoslst3L in each st across until 9 sts remain, 9 yoslstBLO, turn.
Row 8: Ch 1, 14 yoslstBLO, *WA, 5 yoslstBLO, rep from * across, turn.
Rep Rows 1-8 until you have a total of 22(25, 27, 30, 32, 35) “cables” completed. You must end on either a Row 4 or Row 8 depending on how many “cables” you need to complete for your size.
Fasten off.
Front Panel (Make 2)
Ch 105(105, 111, 117, 117, 123)
Rep Rows 1-8 as for Back Panel until you have a total of 9(10, 11, 12, 14, 15) “cables”. Fasten off leaving a long tail.
Sleeves (Make 2)
Ch 87
Row 1: Yoslst in 2nd ch from hook and in each ch across until 9 sts remain, slst 9 sts, turn. [86 sts]
Row 2: Ch 1, 9 slstBLO, hdcBLO in each remaining st, turn.
Row 3: Ch 1, yoslst3L in each st across intil 9 sts remain, 9 slstBLO, turn.
Row 4: Ch 1, 9 slstBLO, yoslstBLO 2, *WA, yoslstBLO 5, rep from * across until 2 sts remain, 2 yoslstBLO, turn.
Row 5: Ch 1, yoslstBLO in each st across until 9 sts remain, 9 slstBLO, turn.
Row 6: Ch 1, 9 slstBLO, hdcBLO in each remaining st, turn.
Row 7: Ch 1, yoslst3L in each st across until 9 sts remain, 9 slstBLO, turn.
Row 8: Ch 1, 9slstBLO, 5 yoslstBLO, *WA, 5 yoslstBLO, rep from * across, turn.
Rep Rows 1-8 until you have a total of 18(19, 19, 20, 20, 21) “cables” completed.
Fasten off leaving a long tail. Fold the sleeve in half lengthways making sure the right side in in the inside. Using a yarn needle and your yarn tail seam the edges of the sleeve together.
Assembly
Lay the back panel on a flat surface with the right side facing up. Next lay the two front panels (wrong side facing up) on top of the back panel. Seam across the shoulders to connect the pieces together. Next seam up along the sides leaving a 7.5(8, 8, 8.5, 8.5, 9) opening for the armholes. Sew the sleeves, with the seam of sleeves facing downward, to the armhole.
Button Up Collar
Ch 10
Row 1: yoslst in 2nd ch from hook and in each ch across, turn. [9 sts]
Row 2: Ch 1, yoslstBLO in each st across, turn.
Row 3: Ch 1, 4 yoslstBLO, ch 3, skip next st, yoslstBLO in remaining 4 sts, turn.
Row 4: Ch 1, yoslstBLO in each st across placing 1 yoslst in the ch 3 space, turn. [9 sts]
Rows 5-11: Ch 1, yoslstBLO in each st across, turn.
Row 12: Ch 1, 4 yoslstBLO, ch 3, skip next st, yoslstBLO in remaining 4 sts, turn.
Row 13: Ch 1, yoslstBLO in each st across placing one yoslst in the ch 3 space, turn. [9 sts]
Rows 14-20: Ch 1, yoslstBLO in each st across, turn.
Row 21: Ch 1, 4 yoslstBLO, ch 3, skip 1, yoslstBLO in remaining 4 sts, turn.
Row 22: Ch 1, yoslstBLO in each st across placing one yoslst in the ch 3 space, turn. [9 sts]
Row 23: Ch 1, yoslstBLO in each st across, turn.
Rep Row 23 until the ribbed collar is long enough t go around the entire inner edge of the crochet cardigan.
Using a yarn needle and some yarn, sew the ribbed collar to the inner edge of the cardigan. Sew in your buttons.
Weave in all your ends.