Easy Crochet V-Neck Crop Top – Free Eden Pattern

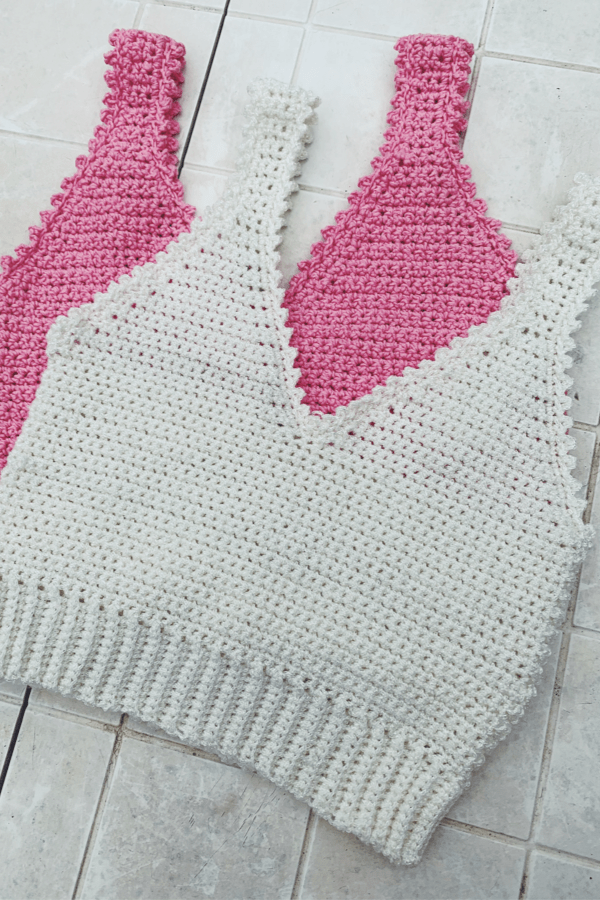
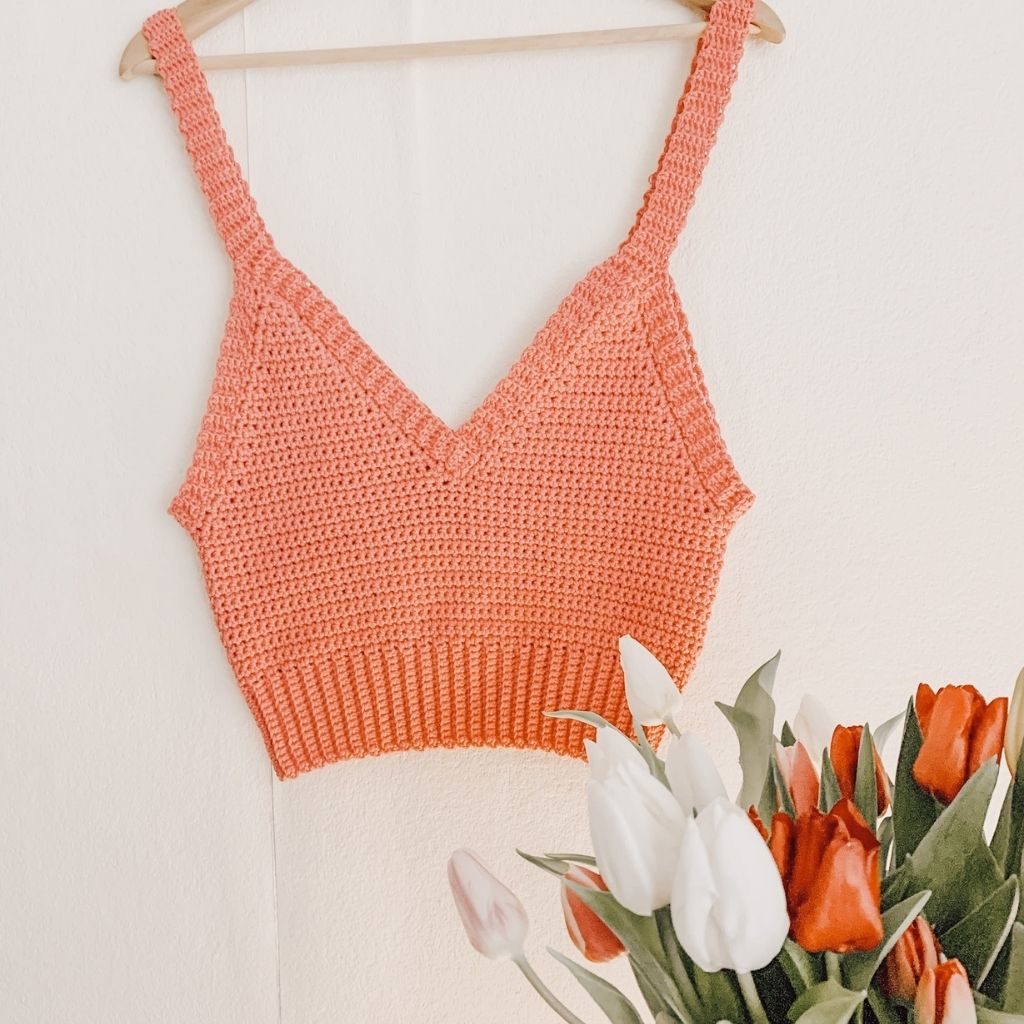
The Crochet Eden Crop Top is a simple, stylish summer top featuring a flattering V-neckline, wide shoulder straps and a beautifully ribbed waistband. With its cropped length and clean, fitted shape, it’s an easy piece to pair with jeans, shorts or skirts.
This free crochet crop top pattern is beginner-friendly, using basic single crochet stitches and very little shaping. The design starts with a ribbed waistband before moving into the main body, making it a great introduction to crocheting your own summer clothing.
One of my favorite details is the matching ribbed edging around the V-neckline, armholes and straps. It gives the finished top a neat, polished appearance without adding complicated techniques.
Whether you choose a bright summer shade or a soft neutral, the Eden Crop Top is a versatile addition to your handmade wardrobe.
Yarn
The Eden crop top uses Paintbox Cotton Dk which is light/weight 3 yarn. It is 100% cotton and is machine washable, perfect for use in summer garments, breathable yet holds it’s shape very well. Another yarn I used was Drops Cotton Light (the green top) and that works up perfectly too for this pattern.
Both yarns come in a very large selection of colours so I’m sure there is a perfect colour for everyone.

Sizing
This pattern follows sizes S(M, L, XL)
GAUGE: 15 sc by 21 rows using 5mm hook
Materials
Yarn – Paintbox Cotton Dk – light/weight 3/DK/8 ply ~50g/1.8oz/125m/137yds
Approximately 4(4, 5, 5) balls
Other yarn suggestions Drops Cotton Light
3.5mm crochet hook
5mm crochet hook
Stitch marker
Scissors
Yarn needle

Stitches & Abbreviations
ch = chain
sc = single crochet
sc2tog = single crochet two together
sc3tog = single crochet three together
slst = slip stitch
BLO = back loop only
rep =. repeat
Crochet Eden Crop Top Pattern
YOU CAN NOW PURCHASE THE AD FREE PDF IN MY ETSY
Using 3.5mm hook
Ch 16
Row 1: sc in 2nd ch from hook, sc in each ch to end. Turn.
Row 2: ch 1, sc in BLO in each st across. Turn.
Repeat row 2 until you reach row 102(110, 118, 126).
Slst the two ends together to form a circle. We will now be working in rounds.
Change to 5mm crochet hook
Round 1: ch 1, make 102(110, 118, 126) sc evenly around the top edge of ribbing. TURN.
Round 2: ch 1, sc in each st around. TURN.
Repeat round 2 until you have completed round 16(18, 20, 22). TURN
Mark the 51st(55th, 59th, 63rd) st.
Continuing on from where you are now:
Next row: ch 1, sc2tog, sc in each st across until you reach the second st from st marker, sc2tog. Turn.
Next row: ch 1, sc2tog, sc in each st across until 2 sts remain, sc2tog. Turn.
You should now have 47(51, 55, 59) sts.
Now mark the 23rd(25th, 27th, 29th) st.
Next row: ch 1 sc across to st marker. Turn.
Next row: ch 1, sc2tog, sc in each st until 2 sts remain, sc2tog. Turn.
Next row: ch 1, sc in each st across. Turn.
Next row: ch 1, sc2tog, sc in each st across until 2 sts remain, sc2tog. Turn.
Rep last 2 rows until 3 sts remain. Turn.
Next row: ch 1 sc in each of the 3 sts. Turn.
Next row: ch 1, sc3tog. Turn.
Next row: ch 1, sc in that last st.
Fasten off.
For the 2nd “triangle”:
Skip the st directly beside the last “triangle and attach yarn to the next st.
Next row: ch 1, sc in each of the next 23(25, 27, 29) sts.
Next row: ch 1, sc2tog, sc in each st across until 2 sts remain, sc2tog. Turn.
Next row: ch 1, sc in each st across. Turn.
Next row: ch 1, sc2tog, sc in each st across until 2 sts remain, sc2tog. Turn.
Rep last 2 rows until 3 sts remain. Turn.
Next row: ch 1, sc in each of next 2 sts. Turn.
Next row: ch 1, sc3tog. Turn.
Next row: ch 1, sc in last remaining st.
Fasten off.
Now turn your work and begin working on the two back “triangles”.
You should have 51(55, 59, 63) unworked here.
Attach your yarn to the stitch next to triangle that you just finished.
Next row: ch 1, sc2tog, sc in each st across until 2 sts remain, sc2tog. Turn.
Next row: ch 1, sc2tog, sc in each st across until 2 sts remain, sc2tog. Turn.
Mark the 23rd(25th, 27th, 29th) st.
Next row: ch 1, sc in each st across until you reach marker. Turn.
Next row: ch 1, sc2tog, sc in each st across until 2 sts remain, sc2tog. Turn.
Next row: ch 1, sc in each st across. Turn.
Next row: ch 1, sc2tog, sc in each st across until 2 sts remain, sc2tog. Turn.
Rep last 2 rows until 3 sts remain. Turn.
Next row: ch 1, sc in each of 3 sts. Turn.
Next row: ch 1, sc3tog. Turn.
Next row: ch 1, sc in last remaining st.
Fasten off.
Now we make the 2nd back “triangle”
Skip the st directly beside the triangle just worked and attach yarn to the next st.
Next row: ch 1, sc in each of remaining 23(25, 27, 29) sts. Turn.
Next row: ch 1, sc2tog, sc in each st across until 2 sts remain, sc2tog. Turn.
Next row: ch 1, sc in each st across. Turn.
Next row: ch 1, sc2tog, sc in each st across until 2 sts remain, sc2tog. Turn.
Rep last 2 rows until 3 sts remain. Turn.
Next row: ch 1, sc in each of the 3 sts. Turn.
Next row: ch 1, sc3tog. Turn.
Next row: ch 1, sc in last remaining st. DO NOT FASTEN OFF
Next row: ch 1 and sc all the way around the 4 triangles. Slst to first sc you made.
Change to 3.5mm crochet hook
**Ch 5, sc in 2nd ch from hook, sc in next 3 chains, slst in next 2 sc on the side of “triangle”, * turn, skip 2 slsts, sc in BLO in each of next 4 sts, turn, ch 1, sc in BLO in next 4 sts, slst in next 2 sc on side of “triangle”, rep from * all the way around arrmhole until you reach the peak of the triangle directly behind. Fasten off.
Attach yarn to the peak of the other front “triangle and rep from **.
Next attach yarn to the unworked middle st between the two front “triangles”
****Ch 5, sc in 2nd ch from hook, sc in next 3 chains, slst in next 2 sc on side of “triangle,* turn, skip 2 slsts, sc in BLO in next 4 sts, turn, ch 1 sc in BLO in next 4 sts, slst in next 2 sc on side of triangle, rep from * all the way up along the inner edge of the triangle. The top of the triangle should be worked like shown in photo below.
Next row: ch 1, turn. Sc in BLO of next 2 slsts, sc in BLO in next 4 sc. Turn (6 sc).
Next row: ch 1, sc in BLO in each of next 6 sc. Turn.
Rep last row until you have a further 24 rows completed. Fasten off leaving a long tail.****
Now attach your yarn to the next available middle st between the two front triangles and rep from **** to ****.
Now it’s time to work the ribbing towards the back of the top. This is done in the same way as the front so just follow those steps again but when you finish the straps on this side there is no need to leave a long tail when fastening off.
Now with your tail and yarn needle make a few sts to secure the the inner “v” ribbing like shown below on both the front and back of the top.
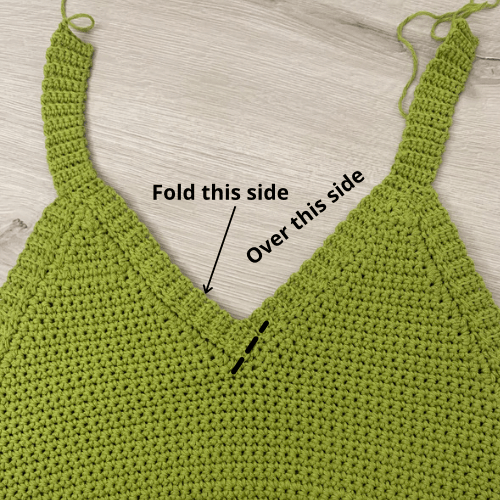
Now turn your top wrong side out and with your yarn needle and long tail, stitch the front (shoulder)strap to the back strap creating one continuous strap. Rep on the other side.
You are now finished making your Eden Crop Top.
EXTRA NOTES
The stitch count is just a suggestion but I do realise that all our bodies are in different shapes in sizes. To make sure you do get an accurate fit please follow these guidelines:
- Make the ribbed band long enough to go around your under bust/waist. Slip st ends together.
- If it took let say 108 rows of single crochet ribbing to reach around your waist you need to make 108 single crochet around the band using your 5mm hook. Rep this round for whatever number of rows is stated in the pattern. For eg. 16 rounds for size small. If you want the top longer add more rounds here.
- Now you need to half the number of stitch you have. So half of 108 is 54. mark that st and continue as stated in pattern.
- To figure out how many sts you need for each “triangle” you need to , for eg take 54- 4= 50, then divide 50 by 2. Continue on as what is stated in the pattern.
- If you find the bust area of the top is too small/big you can always go up or down a hook size.