
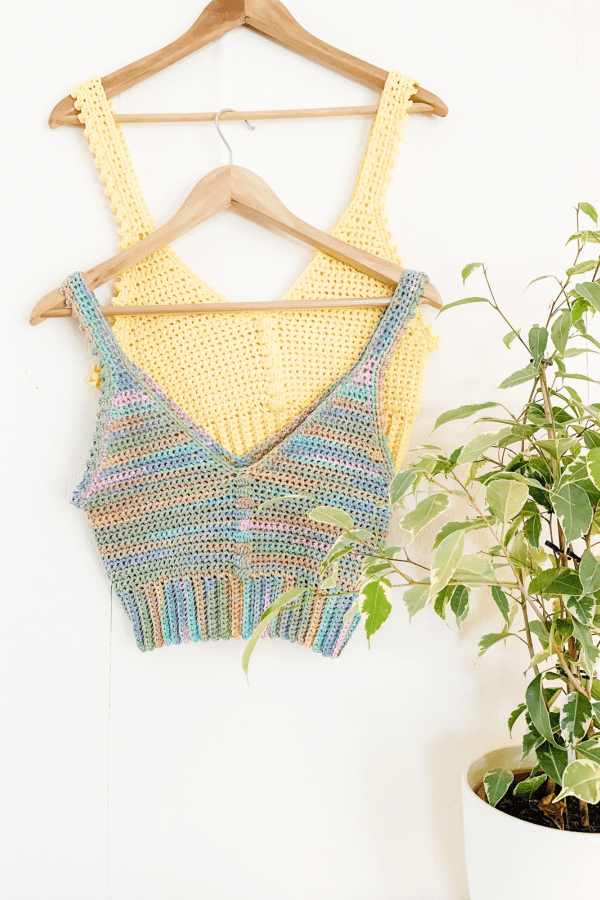
Learn to crochet this super quick and easy crochet Lyra crop top. Perfect for the hot summer months ahead this top is a must have in any wardrobe.
This free written pattern is accompanied with a step by step video tutorial. Scroll down to end of page.
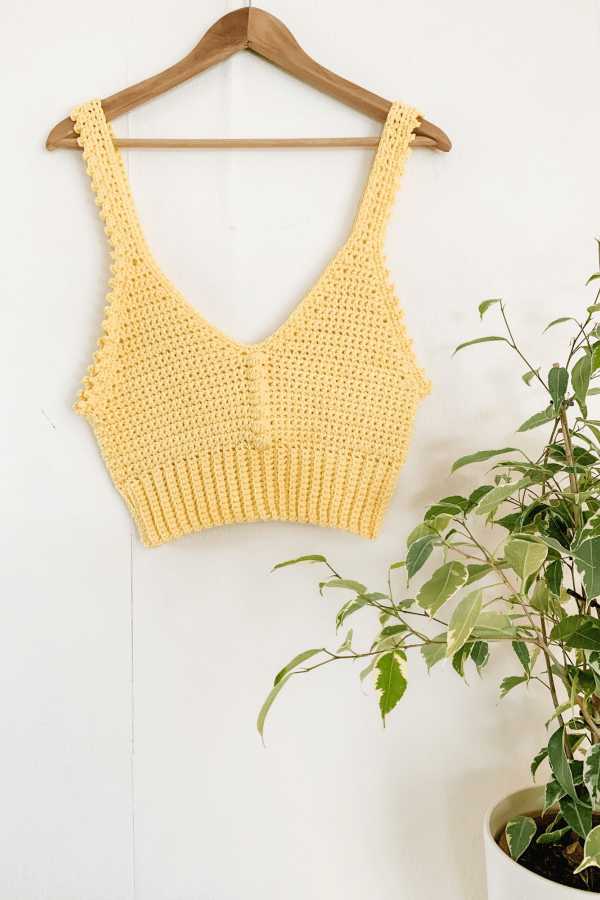
This crochet crop top is perfect worn with jeans, shorts, skirts and even some yoga pants. I designed the pattern to be completely versatile for any shape or size. Though I do not give exact stitch counts throughout this pattern, you can fully customize it to fit your own body.
The Lyra Top is crocheted in one piece. We will begin by working the ribbed band, stitching the ends together to form a circle and then crocheting upwards until we are happy with the coverage. After that we will be separating the top into four triangle, stitching the straps together and finally adding a bit of a picot border. It’s very easy!
MATERIALS
**This post contains affiliated links for which I make a small commission. It is of no extra cost to you but it does help me out**
Yarn – Rico Design Creative Colour Coated Cotton – weight 4/ worsted/ 10 ply – 50g/125m/137yds
I used just under 3 balls for a size small. More yarn needed for bigger sizes.
4.5mm and 5.5mm crochet hooks
2 stitch markers
Scissors
Yarn needle
STITCHES & ABBREVIATIONS
ch = chain
sc = single crochet
slst = slip stitch
sc2tog = single crochet two together
BLO = back loop only
rep = repeat
SPECIAL STITCH: POPCORN STITCH: (yo, insert hook in designated st, yo and draw up loop, yo draw through 2 loops on hook) 5 times, yo draw through 6 loops on hook.
CROCHET LYRA TOP PATTERN
YOU CAN NOW PURCHASE THE AD FREE PATTERN ON MY ETSY
Using 4.5mm hook
Ch 15
ROW 1: sc in 2nd ch from hook, sc in each ch to end. Turn.
ROW 2: ch 1, sc in BLO in each st across. Turn
Repeat row 2 until ribbed band is long enough to go around your waist. Keep note of the number of rows you made.
Once band is long enough slst ends together to form a circle. Turn band right side out so the seam is in the inside.
CHANGE TO 5.5mm HOOK
NEXT ROUND: ch 1, sc all the way around the upper edge of the ribbing. You need to make the same number of sc here as you did rows for the ribbed band. Eg. if you did 100 rows for your band you need to do 100 sc along the top edge of band. TURN.
NEXT ROUND: You need to divide the number of stitches you have in half. Place a stitch marker into that stitch that marks the halfway point but at the same time make sure it’s an odd number. So counting from where your hook is now to the stitch marker should be an odd number of stitches.
Next you need to place a stitch marker in the middle stitch between where your hook is now and the first stitch marker you placed.
Continuing on from where you are now, sc until you reach the stitch before your nearest marker, then popcorn stitch into the stitch with marker (move your marker up) then sc all the way around until you meet the first sc you made. Make sure to move both markers up a row. Slst into first sc to close the round. TURN
NEXT ROUND: ch 1, sc in each st around. Slst to first sc to close round. TURN
NEXT ROUND: ch 1, sc in each st until the st before marker, popcorn st in next st, sc in each st around until end of round. Slst to first sc to close round. TURN
Repeat last two rounds until top covers the half of your chest.
NEXT ROW: ch 1, sc in each st until you reach the stitch before stitch marker (the popcorn st). Turn
NEXT ROW: ch 1, sc2tog, sc in each st across until 2 sts rem, sc2tog. Turn.
NEXT ROW: ch 1, sc in each st across. Turn.
Rep last 2 rows until you have 2 sts remaining.
Ch 1, sc in each of the 2 sts. Turn. Repeat until strap measures 5 inches. This should be half the length of strap you need to go over your shoulder. Add more rows here if needed. Fasten off leaving long tail.
SECOND FRONT TRIANGLE:
Flip your top over so the back of top is facing you. Attach yarn to the st directly beside the stitch marker (popcorn st),
NEXT ROW: ch 1, sc in each st across placing last sc into the stitch with the other st marker. Turn.
NEXT ROW: ch 1 sc2tog, sc in each st across until 2 sts remain, sc2tog. Turn
NEXT ROW: ch 1, sc in each st across. Turn.
Rep last 2 rows until 2 sts remain.
NEXT ROW: ch 1, sc in each of the 2 sc. Turn
Rep last row until strap measures 5 inches. Fasten off leaving long tail.
BACK TRIANGLES:
Turn the top over so the back is facing you. With a stitch marker mark the middle stitch,
Continuing on from where you are now:
NEXT ROW: ch 1, sc in each st across, placing last sc in the st with marker. Turn.
NEXT ROW: ch 1, sc2tog, sc in each st across until 2 sts remain, sc2tog. Turn.
NEXT ROW: ch 1, sc in each st across. Turn
Rep last 2 rows until 2 sts reamain.
NEXT ROW: ch 1, sc in each of next 2 sts, turn. Rep this row until strap measures 5 inches. Fasten off.
LAST BACK TRIANGLE
Attach yarn to next available st right beside triangle just completed.
NEXT ROW: ch 1, sc in each st across. Turn.
NEXT ROW: ch 1, sc2tog, sc in each st across until 2 sts rem, sc2tog. TURN
NEXT ROW: ch 1, sc in each st across. Turn.
Rep last 2 rows until 2 sts remain.
NEXT ROW: ch 1, sc in each of the next 2 sc. Turn. Rep this row until strap measures 5 inches. Fasten off.
CHANGE TO 4.5MM HOOK
Attach yarn to armhole (shown in video)
Ch 1, sc around armhole and up along outer edge of strap. Continue with sc until you meet the first sc. Slst to first sc to close round.
NEXT ROUND: ch 1, sc in same st, *ch 3, slst to first ch you made, sc in next 2 sts, rep from * all the way around armhole. Slst to first sc to close round. Fasten off
Repeat this same process for the other armhole.
Now turn your top over so the back is facing you. Attach yarn to the middle of the two back triangles.
Ch 1, sc in same st, sc all the way around inner edge of top. Slst to first sc to close the round. Fasten off.
Weave in all ends
Is the amount of starting chain the same if you want a bigger size.
Hi how do i convert this to a size 40 bust please
;; when you make the ribbed band. Keep making rows until the bottom of the band wraps around your waist. Then just follow the directions
If I want to make the top longer ?
Would I add more rows after completing the band ?
id just do a longer starting chain