
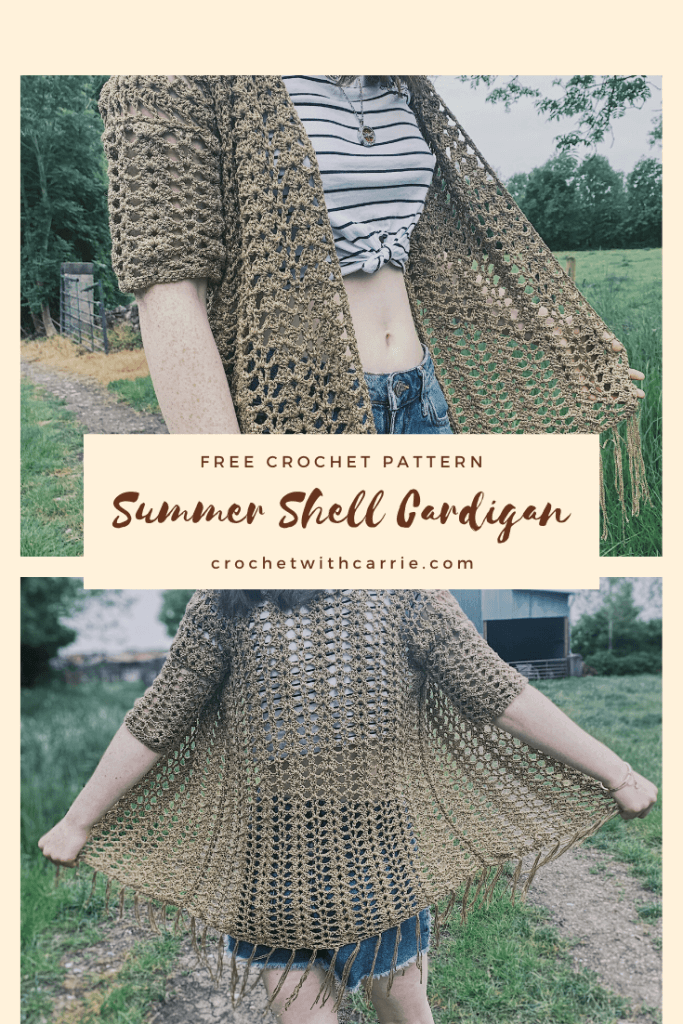
Simple and stylish, this crochet shell boho cardigan is perfect this summer! This easy crochet shell cardigan pattern comes with a video tutorial for those who more of a visual learner. Scroll down the page to find it.
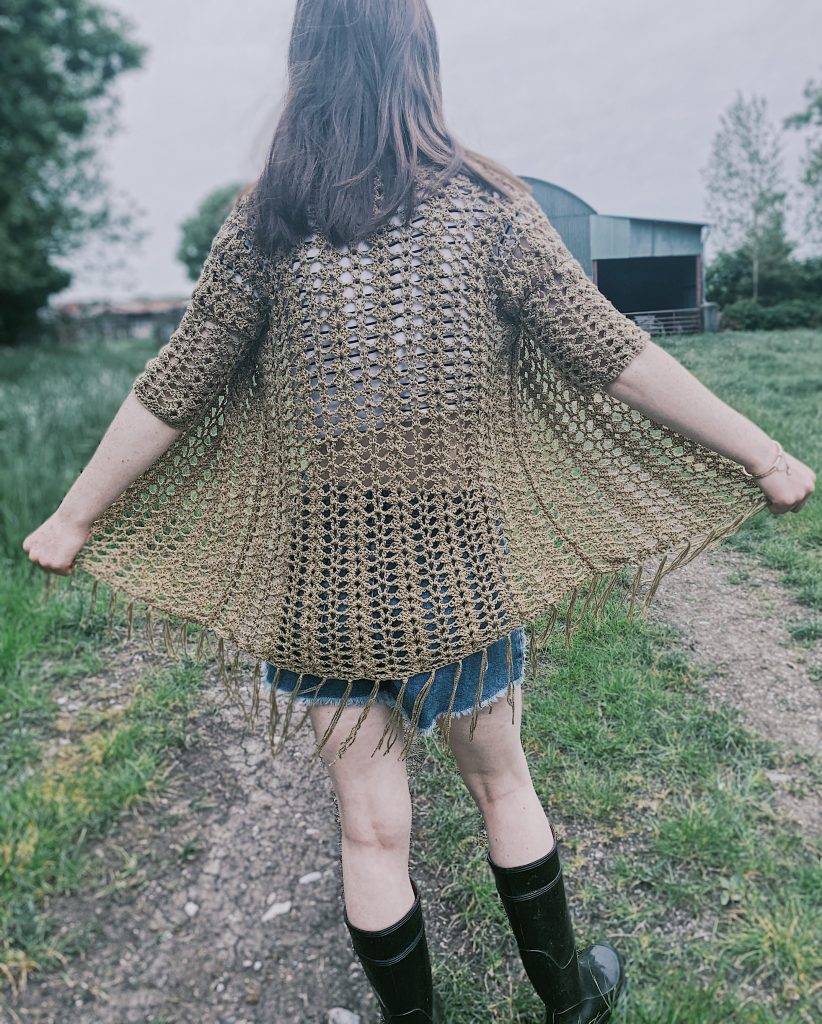
This easy crochet shell cardigan is made from the bottom up, starting on the back panel, then two front panels followed by two sleeves. There is no increasing whatsoever, so this pattern requires very little concentration, perfect to have in your hands whilst watching your favorite Netflix show!
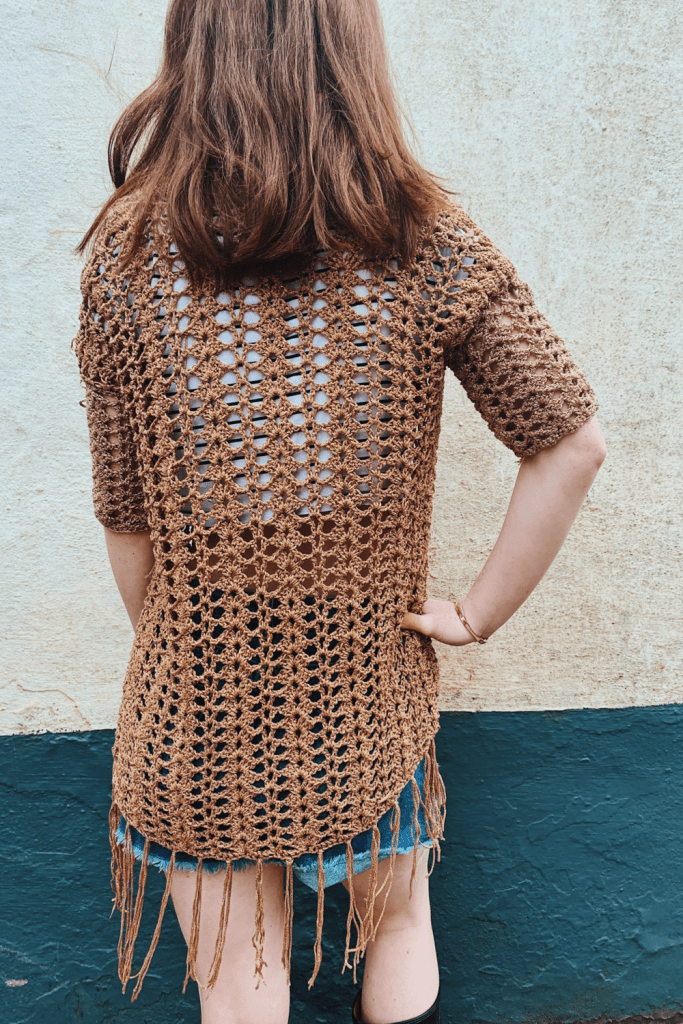
I would recommend this pattern for any beginner crochet lover due to the repetitiveness of the one row that forms the pattern for the shell cardigan.
The sizing guide follows S( M, L, XL, 2XL, 3XL, 4XL, 5XL)
This pattern uses standard American crochet terms.
Level: Easy+
Materials:
Any weight 3/ Dk/ 10 ply, 500(500, 550,550, 600, 600, 650, 650)g
5mm crochet hook
Yarn needle
Stitch markers
Measuring tape
STITCHES & ABBREVIATIONS:
Ch = chain
Slst = slip stitch
Sc = single crochet
Dc = double crochet
Special stitches: Shell st (3 dc, ch 2, 3 dc) in designated st.
V-stitch (V-st): (dc, ch 2, dc) in designated st.
MEASUREMENTS:
To fit bust: 34(36, 38, 40, 42, 46, 48, 50) inches
GAUGE: 1 shell = 1 inch
PATTERN:
Back panel:
Ch 82( 102, 112, 122, 142, 162, 182, 202)
Row 1: sc in 2nd ch from hook, sc across to end. Turn.
Row 2: Ch 3 (counts as 1st dc here and throughout), dc in same st, *ch 1, skip 4, shell in next st, ch 1, skip 4,** V-st in next, repeat from * across, ending last repeat at **, 2 dc in last st. Turn.
Row 3: Ch 3, dc in first dc, *ch 1, Shell in ch-2 sp of next Shell, ch 1**, V-st in ch-2 sp of next V-st, rep from * across ending last rep at **, 2 dc on top of turning ch. Turn.
Repeat row 3 until your back panel measures 25-26 ” long. This will determine the length of your crochet shell cardigan. Add or subtract rows here for and alternative length.
Next row: Ch 1, sc in same st, *ch 4, sc in ch-2 sp of next Shell, ch 4, sc in ch-2 sp of next V-st, rep from * across, ending the row with a ch 4, sc on top of ch3 turning ch. Turn.
Next row: Ch 1, sc in same st, *4 sc in ch-4 sp, sc in next sc, rep from * to end.
Fasten off leaving a long tail.
Front panels (make 2):
Ch 42(52, 57, 62, 72, 82, 92, 100)
Row 1: sc in 2nd ch from hook, sc across to end. Turn.
Row 2: Ch 3 (counts as 1st dc here and throughout), dc in same st, *ch 1, skip 4, shell in next st, ch 1, skip 4,** V-st in next, repeat from * across, ending last repeat at **, 2 dc in last st. Turn.
Row 3: Ch 3, dc in first dc, *ch 1, Shell in ch-2 sp of next Shell, ch 1**, V-st in ch-2 sp of next V-st, rep from * across ending last rep at **, 2 dc on top of turning ch. Turn.
Repeat row 3 until you have 25-26″ in length or whatever number of rows you had for the back panel
Next row: Ch 1, sc in same st, *ch 4, sc in ch-2 sp of next Shell, ch 4, sc in ch-2 sp of next V-st, rep from * across, ending the row with a ch 4, sc on top of ch3 turning ch. Turn.
Next row: Ch 1, sc in same st, *4 sc in ch-4 sp, sc in next sc, rep from * to end.
Fasten off leaving a long tail.
Sleeves (make 2):
Ch 62(62, 72, 72, 82, 82, 92, 92)
Row 1: sc in 2nd ch from hook, sc across to end. Turn.
Row 2: Ch 3 (counts as 1st dc here and throughout), dc in same st, *ch 1, skip 4, shell in next st, ch 1, skip 4,** V-st in next, repeat from * across, ending last repeat at **, 2 dc in last st. Turn.
Row 3: Ch 3, dc in first dc, *ch 1, Shell in ch-2 sp of next Shell, ch 1**, V-st in ch-2 sp of next V-st, rep from * across ending last rep at **, 2 dc on top of turning ch. Turn.
Rows 4 – 10: rep row 3. This determines the length of your sleeve. Add or subtract more rows here for your preferred sleeve length.
Next row: Ch 1, sc in same st, *ch 4, sc in ch-2 sp of next Shell, ch 4, sc in ch-2 sp of next V-st, rep from * across, ending the row with a ch 4, sc on top of ch3 turning ch. Turn.
Next row: Ch 1, sc in same st, *4 sc in ch-4 sp, sc in next sc, rep from * to end.
Fasten off leaving a long tail.
Assembly:
Lay you back panel on a flat surface. Next lay your front panels on top of the back panel and slst or use a yarn needle and yarn to attach at the shoulders. Fasten off.
Once your front panels are attached to your back panel lay the entire piece out flat, wrong side facing up. Grab one of your sleeves and place a stitch marker the middle stitch. Line this marker up with the shoulder seam and attach that marked stitch to the shoulder seam. Next slst across attaching the sleeve to the cardigan. Repeat for the other side.
Next fold your cardigan over and slst the edges of the sleeves closed and down along the long edge of the cardigan. Repeat on the other side.
Now all you have left to do is weave in all your ends and turn the cardigan right side out. You are now finished.
I love all of these, but how do I get a copy of the written pattern, I want to try these later, I am working from my phone, thank you for all your help
Is it possible to see a picture of the finished garment not on a model but laid flat. There does not seem to be. Gap between the two shoulder seams at the back neck. When you put the garment on the seams then go to the back of the body and it pulls quite tight? Have i done something wrong.
.
Your comments please.
Jennifer
Me too the seams are tight and go at the back.
My daughter is trying her first crotchet project and
wants to try your darling sweater….
Need to know how much yarn she should get
and letter size crotchet needles. H and L?
You’re so cool, your ideas are cool, you’re beautiful and you have a great website, also very beautiful, cool photos, thank you for sharing with us, I’m thrilled (I’m from Russia, sorry for the mistakes)
very clear videos and descriptions, finally learn how to croche fashion things.
All your content has such a unique style, something rustic or cowboy in the coolest meaning way possible. And these awesome photos….. oh, these awesome photos, “careless”, but very exciting.
Is there anyway you can show a diagram on how to attach the sleeve
Thank you
What brand name yarn did you use
Love shell stitch patterns. However not at all fond of the sleeves on this. They look very tight and uncomfortable. Might try this pattern with just a finishing border around the sleeve opening or find a way to make the sleeves more lose. Any ideas?