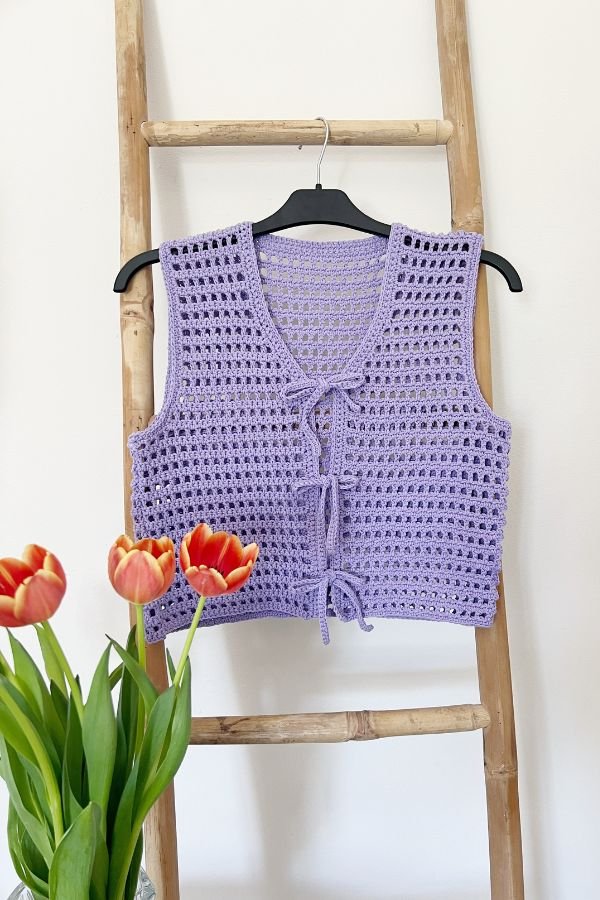
Crochet V-Neck Vest Top – Free Pattern

Create a versatile handmade wardrobe staple with this Crochet V-Neck Vest Top, a lightweight, slightly fitted design that’s ideal for spring and summer. Featuring a flattering V-neckline, a ribbed hem and near ribbed edging, this sleeveless crochet top is easy to dress up or down.
Made primarily using simple half double crochet stitches, this free crochet vest top pattern has minimal shaping and an easy construction. It’s a lovely project for crocheters who are ready to try making a fitted garment without tackling complicated stitch patterns.
I previously designed the Grandpa Vest, which became one of my most popular crochet patterns. For this design, I wanted to create something a little different: a slightly cropped vest that was more fitted and an upgraded V-neckline.
Wear you finished vest over a T-shirt or long sleeved top for a layered look, or style it on its own during warmer summer months.
Scroll down for the free crochet vest top pattern and step-by-step video tutorial or purchase the ad-free pattern on my Etsy here.
How the Crochet V-Neck Vest Top was Constructed
The Crochet V-Neck Vest Top is made using two separate panels: one front panel and one back panel. Both are worked from the bottom up, beginning with a ribbed hem.
Once the ribbing is complete, you’ll crochet along the long edge to begin the main body. The vest is worked primarily in rows of half double crochet, with minimal shaping to create its slightly fitted silhouette.
After completing both panels, you’ll seam the shoulders and sides together, leaving openings for the arms.
The V-neck edging is crocheted separately using ribbed stitches and then sewn around the neckline. Finally, you’ll create matching ribbed edging for each armhole and attach it in the same way.

Sizing & Measurements
S(M, L, XL, 2XL, 3XL)
Finished bust: 84(92, 100, 108, 116, 126)cm
Total length: 47(49, 51, 53, 55, 57)cm

Stitches & Abbreviations
ch = chain
sc = single crochet
hdc = half double crochet
scblo = single crochet back loop only
hdc2tog = half double crochet two together
slst = slip stitch
rem = remaining
rep = repeat
st(s) = stitch(es)
tch = turning chain

Materials
Yarn – Drops Karisma – dk/light/weight 3 – 100m/109yds/50g per ball
Approximately 6(6, 6, 7, 7, 8) balls
Hook – 4.5mm
Notions: yarn needle
Notes
- This pattern is written in standard US crochet terms
- The beginning chain 1 does not count as a stitch
GAUGE: 16 hdc x 12 rows = 10 x 10 cm
Crochet V-Neck Vest Top Pattern
Back Panel
Ribbed hem
Ch 10
Row 1: sc in 2nd ch from the hook, sc in each ch across, turn. [9 sc]
Row 2: ch 1, scblo into each st across, turn.
Rep row 2 until the end of row 68(74, 80, 86, 92, 100).
Turn your work to begin working across the ends of the rows you just completed.
Body
Row 1: ch 1, work 1 hdc into the end of each row you just completed, turn. [68(74, 80, 86, 92, 100) hdc]
Row 2: ch 1, hdc into each st across, turn.
Rep row 2 until the end of row 20(20, 22, 22, 24, 26)
Row 21(21, 23, 23, 25, 27): slst into next 11(13, 13, 15, 15, 17)sts, ch 1, hdc in same st, hdc in each st across leaving last 10(12, 12, 14, 14, 16) hdc unworked, turn. [48(50, 56, 58, 64, 68)hdc].
Row 22(22, 24, 24, 26, 28): ch 1, hdc2tog, hdc in each st across until 2 sts rem, hdc2tog, turn [46(48, 54, 56, 62, 66)hdc]
Row 23(23, 25, 25, 27, 29: ch 1, hdc2tog, hdc in each st across until 2 sts rem, hdc2tog, turn [44(46, 52, 54, 60, 64)hdc]
Row 24(24, 26, 26, 28, 30: ch 1, hdc in each st across, turn.
Rep last row a further 26(28, 30, 30, 32, 34) rows.
The total number of rows for the body should be 50(52, 56, 56, 60, 64)
Fasten off.
Front Panel
Ribbed hem
Ch 10
Row 1: sc in 2nd ch from hook, sc in each ch across, turn. [9 sc]
Row 2: ch 1, scblo in each st across, turn.
Rep row 2 until the end of row 68(74, 80, 86, 92, 100).
Turn your work to begin crocheting into the rows you just completed.
Body
Row 1: ch 1, work 1 hdc into the end of each row you just completed, turn. [68(74, 80, 86, 92, 100) hdc]
Row 2: ch 1, hdc into each st across, turn.
Rep row 2 until the end of row 20(20, 22, 22, 24, 26)
Row 21(21, 23, 23, 25, 27): slst into next 11(13, 13, 15, 15, 17)sts, ch 1, hdc in same st, hdc in each st across leaving last 10(12, 12, 14, 14, 16) hdc unworked, turn. [48(50, 56, 58, 64, 68)hdc].
Row 22(22, 24, 24, 26, 28): ch 1, hdc2tog, hdc in each st across until 2 sts rem, hdc2tog, turn [46(48, 54, 56, 62, 66)hdc]
Row 23(23, 25, 25, 27, 29: ch 1, hdc2tog, hdc in each st across until 2 sts rem, hdc2tog, turn [44(46, 52, 54, 60, 64)hdc]
Row 24(24, 26, 26, 28, 30): ch 1, hdc in next 22(23, 26, 27, 30, 32) sts, turn.
Row 25(25, 27, 27, 29, 31): ch 1, hdc2tog, hdc in each st across, turn.
Row 26(26, 28, 28, 30, 31): ch 1, hdc in each st across, turn.
Rep last 2 rows until you have 8(9, 10, 12, 14, 15) sts.
Fasten off leaving a long tail.
Left side
Attach yarn into the next available st (just beside the right side you just completed)
Row 1: ch 1, hdc into each of the next 22(23, 26, 27, 30, 32) sts, turn.
Row 2: ch 1, hdc in each st across until 2 sts rem, hdc2tog, turn.
Row 3: ch 1, hdc in each st across, turn.
Rep last 2 rows until 8(9, 10, 12, 14, 15) sts rem.
The total number of rows for the body should be 50(52, 56, 56, 60, 64).
Fasten off leaving a long tail.
Assembly
Lay the front panel directly on top of the back panel. Using your yarn needle and tail ends, seam across both shoulders connecting the two pieces together. Seam up along the sides making sure to leave the armholes open.
Neckband
Ch 6
Row 1: sc in 2nd ch from hook, sc in each ch across, turn. [5 sc].
Row 2: ch 1, scblo in each st across, turn.
Rep row 2 until the neckband is long enough to go around the neckline when slightly stretched. Fasten off leaving a long tail.
Turn your sweater right side out (seams on the inside).
Place the beginning of the neckband at the “v” of the neckline and sew the ribbed neckband along the neckline using the whipstitch. Once you have sewn the neckband all the way around the neckline you will next fold the beginning and end of the band in the inside of the sweater and sew these two parts together.
Armhole Ribbing
Make 2
Ch 6
Row 1: sc in 2nd ch from the hook, sc in each ch across, turn. [5 sc]
Row 2: ch 1, scblo in each st across, turn.
Rep row 2 until the ribbed band is long enough to go around the entire armhole, slightly stretched.
Fasten off leaving a long tail.
Place the beginning of the band on the bottom end of the armhole (towards the side seam of the top). Sew using the whipstitch all the way around the armhole. Sew the beginning and end of the ribbed band together. Fasten off and weave in ends. Rep the same process for the second armhole.
You are now finished your crochet vest top. Enjoy!