
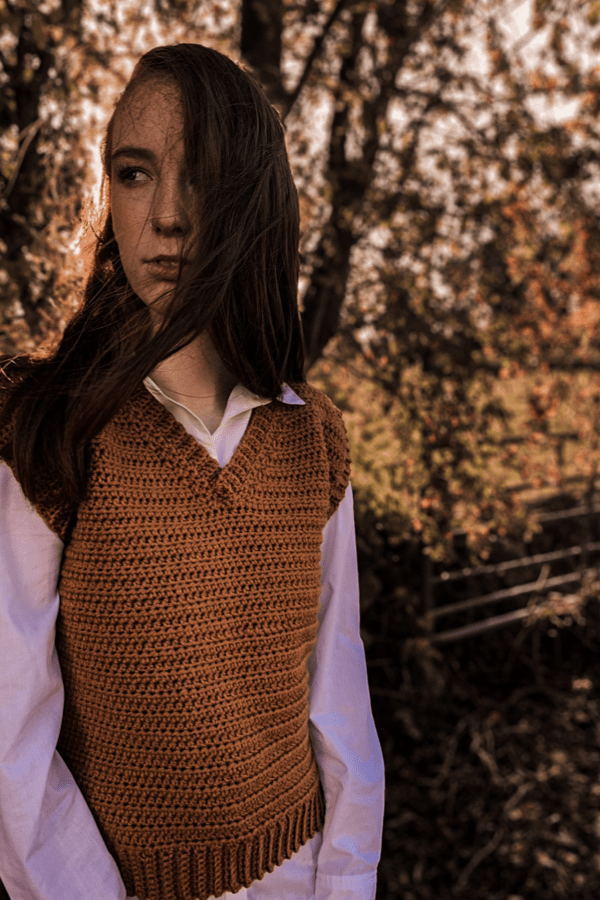
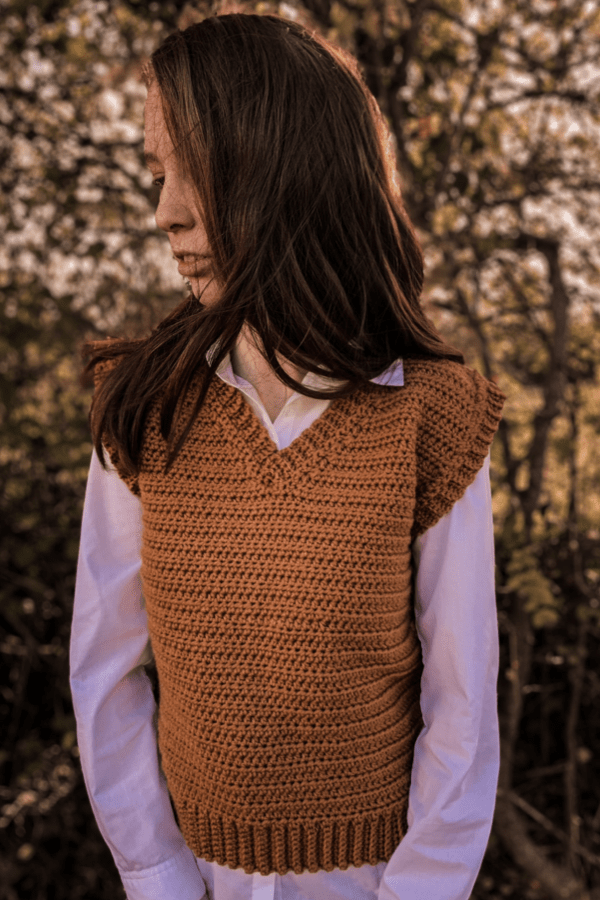
Learn to crochet this quick and easy crochet sweater vest. I’ve noticed recently that these sweater vests are quickly becoming a Fall favourite and highly fashionable. As I scroll through my recommended on Instagram I am met with an abundance of sweater vests in all colours and stitch patterns. So here I am sharing with you all my version of the vest.
I designed it so even a beginner crocheter could make. Made with basic stitches and minimal decreasing, you will find yourself working your way through this in a day or two.
This crochet sweater vest pattern is accompanied with a step by step video tutorial. Please scroll down the page to view the video.
First we will begin by crocheting the ribbed hemline and then working along the long edge of the ribbing we begin with the main body of the vest. Once the front and back panels are sewn together we begin the ribbing along the neckline, and finally finishing with the armhole ribbing.
YARN
**These materials contain affiliate links for which I earn a small commission. It is at no extra cost to you but it does help me out, and it makes shopping for you easier!**
This crochet sweater vest was crocheted using Lion Brand Vanna’s Choice in the color Honey. It is a weight 4 yarn and comes in a large range of colors.
NOTES
- The sizing guide is S(M, L, XL, 2XL)
- The turning ch 1 DOES NOT count as a stitch.
- This pattern uses standard Us crochet terms.
Level
Easy
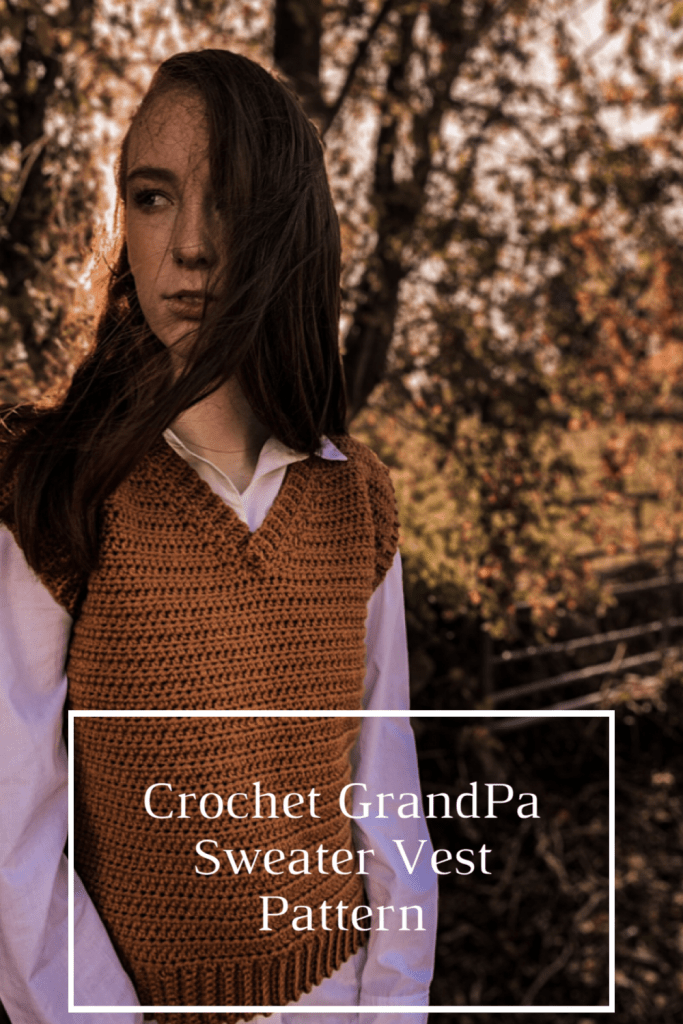
PIN ME FOR LATER!
Measurements
To fit bust 32-34(36-38, 40-42, 44-46, 48-54) inches
Back width: 18(19.5, 21.5, 24, 27) inches
Length: 23(23, 24, 24, 25) inches
MATERIALS
Yarn – Lion Brand Vanna’s Choice – weight 4/medium/aran/10 ply
Approximately 850(900, 1020, 1050, 1070) yards
5 mm crochet hook
Measuring tape
Yarn needle
Stitch marker
STITCHES & ABBREVIATIONS
Ch = chain
sc = single crochet
hdc = half double crochet
slst = slip stitch
st = stitch
hdc2tog = half double crochet two together
BLO = back loop only
Gauge: 13sts by 11 rows in 4″
Crochet GrandPa Sweater Vest Pattern
BACK PANEL
Ch 10
Row 1: sc in 2nd ch from hook, sc to end. Turn
Row 2: ch 1, sc in BLO in every stitch across. Turn.
Repeat row 2 until you have 61(63, 69, 77, 87) in total.
Now we will crochet along the long edge of the ribbing:
Next row: ch 1, make 61(63, 69, 77, 87) hdc across. Turn.
Next row: ch 1, hdc in each st across. Turn.
Repeat last row until entire piece measures 15(15, 15, 16, 16) inches long. Do not fasten off.
Armhole shaping:
Next row: slst in next 5(5, 7, 7, 9) sts, ch 1, hdc in same st, hdc in each stitch across leaving last 4(4, 6, 6, 8) sts unworked. Turn.
Next row: ch 1, hdc in each st across. Turn.
Repeat last row until you have 8(8, 9, 9, 9.5)” from armhole upwards.
Fasten off.
FRONT PANEL
Ch 10
Row 1: sc in 2nd ch from hook, sc to end. Turn
Row 2: ch 1, sc in BLO in each st across. Turn.
Repeat row 2 until you have a total of 61(63, 69, 77, 87) rows. Turn.
Now we will crochet along the long edge of the ribbing:
Next row: ch 1, hdc in same st, hdc in each st across. Turn
Repeat last row until entire piece measures 15(15, 15, 16, 16) inches long.
Armhole shaping:
Next row: slst into next 5(5, 7, 7, 9) sts, ch 1, hdc in same st, hdc in each st across leaving last 4(4, 6, 6,8) sts unworked.
Next row: Place a stitch marker into the 27th(28th, 29th, 33rd, 36th) st. This is your middle stitch.
Ch 1, hdc in each st across until 2sts remain before stitch marker, hdc2tog. Turn.
Next row: ch1, hdc2tog, hdc in each st to end of row. Turn.
Next row: ch 1, hdc in each st across until 2 sts remain, hdc2tog. Turn.
Repeat last 2 rows until you have 13( 13, 13, 14, 14) sts.
Next row: ch 1, hdc in each st across. Turn. Repeat this row 5(5, 6, 6, 7) more times.
Fasten off leaving a long tail.
Now skip the next 2 sts next to the neck edge and attach yarn to the next st.
Next row: ch 1, hdc in each st across. Turn.
Next row: ch 1, hdc in each st across until 2 sts remain, hdc2tog. Turn.
Next row: ch 1, hdc2tog, hdc in each st across. Turn.
Repeat last 2 rows until 13(13, 13, 14, 14) sts remain.
Next row: ch 1 hdc in each st across. Turn. Repeat this row a further 5(5, 6, 6, 7) times. Fasten off leaving a long tail.
ASSEMBLEY:
Place the front panel on top of the back panel and using a yarn needle and mattress st, sew along the shoulders and down along the sides of the vest. Turn right ride out now:
Attach yarn to the centre of the v neck. Ch 1, sc all the way around the neck line. Slst to first sc to close.
Next round: ch 5, sc in 2nd ch from hook, sc in next 3 chains, slst to next 2 sc on the neckline, **turn, sc in BLO in next 4 sc making sure not to work into the two slip stitches, ch 1, turn, sc in next 4 sc in BLO, slst in next 2 sc on the neckline, repeat from ** all the way around the entire neckline. Fasten off leaving long tail.
Armhole ribbing:
Attach yarn to the bottom edge of armhole. ch 1, sc all the way around arm hole. Slst to first sc to close round.
Next round: ch 5, sc in 2nd ch from hook, sc in next 3 chains, slst into next 2 sc on armhole,**turn, sc in BLO in next 4 sc making sure not to work into the 2 slip sts, ch 1, turn, sc in next 4 sc in BLO, slst in next 2 sc on the armhole, repeat from ** all the way around the entire armhole. Using yarn and yarn needle stitch closed using mattress stitch. Repeat for the other armhole.
Weave in all ends and you are now ready to wear your new crochet sweater vest.
Thank you so, so much for this easy pattern which a beginner can easily follow.
I have tried to reach “Carrie” several times via email. I see so many posts with questions, etc., but there is no reply. I hope Carrie is ok. But, is there an actual “Carrie”? Free isn’t free if it costs me this much time tracking down non-existent patterns, not to mention the frustration. I’ll go back to purchasing patterns so I’ll have support when I have questions.
Thank you thank you thank you for this tutorial ! I usually have no patience and I never make anything beyond scarves and hats … And with your cIear, step by step instructions I actually managed to make the whole thing without giving up <3. I changed the color and added a few sripes and It's looking bomb !
I love this. My front piece is 3 inches shorter than my back piece from armhole up? i have done the neck shaping and 5 additional rows. i will fix it by moving the neck hole higher or extending the front strap but just wondering how this could have been avoided? thankyou so much
That sounds beautiful! Can you share pictures?
That sounds beautiful! Can you share pictures?
Same thing happened to me after I finished the first shoulder. Might be an error in the pattern. I just added more rows to the shoulder section
How tall should the first part of the back be before going inwards? Thank you!
Would it make a large difference if I were to use 8 ply yarn instead of 10?
Thank you in advance!
Hi, thank you for this pattern 😁 If I like to make this vest in large, where can I see the recipe for that? 🤗
Thank you so much for this pattern. I looked at sweater vests, but they are so expensive. So i decided to make one. This is simple and I hope I can make it nice and wear it.
I had the very same problem with my front panel..5 rows after decrease mine was shorter aswel, i pulled the work out a couple of times thinking i made a mistake ..what a disaster, anyway i will try fix it, its just a pity because its such a nice pattern
Did you just continue with the 13 stitches until your piece matched the back
PLEASE HELP
Yes, Ms Carelse. Good luck.
Well done. The armhole/shoulder of the front panel must measure the same amount of inches as the armhole/shoulder of the back panel. 8(8, 9, 9, 9.5)”.
Depending on your size it should measure 15(15, 15, 16, 16) inches. Good luck.
As far as I can see there’s no error in the pattern with regard to the armhole/shoulder of the front panel. It clearly states “Next row: ch 1 hdc in each st across. Turn. Repeat this row a further 5(5, 6, 6, 7) times. Fasten off leaving a long tail.” after the final decrease just so you can reach the same height as the armhole/shoulder of the back panel.
Hi,thank you
Could you please tell me, can I crochet this pattern vest by faux fur yarn? Will be nice as yours?
If you go to measurements at the top of the page it will show you different sizes you can do. As you go into the pattern need to pay attention to the size you need inside the parenthesis.
Thank you so very much for this pattern! Eventhough it’s a simple, straightforward vest there are enough “learning moments” for first-time garment crocheters to keep it interesting.