
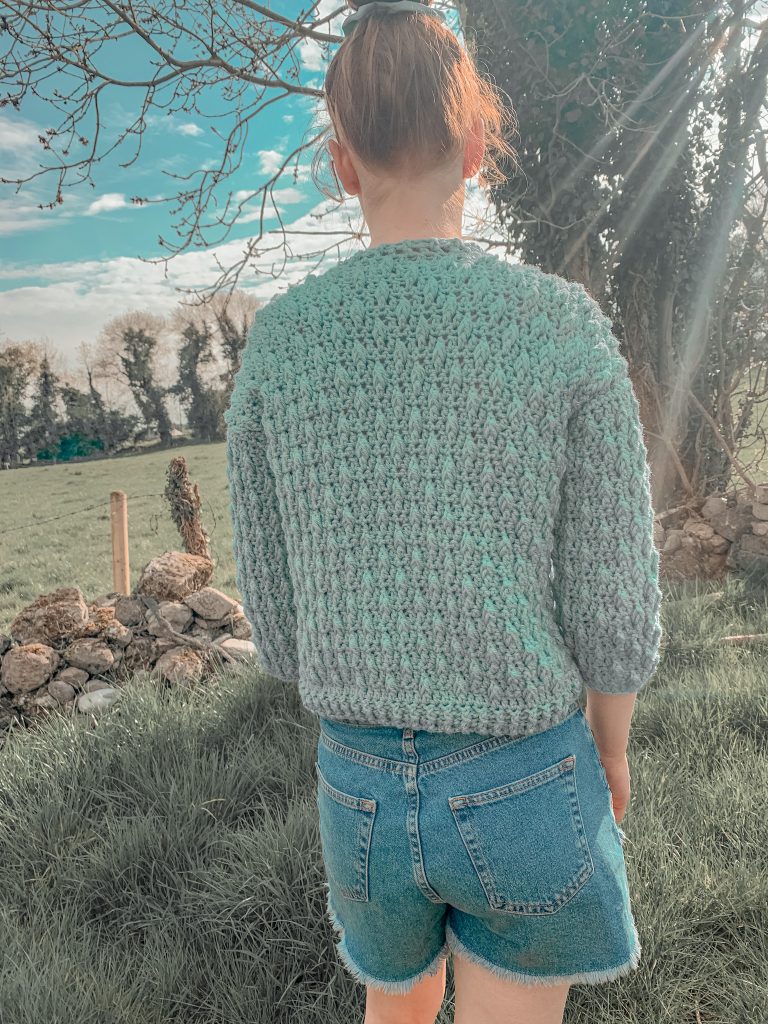
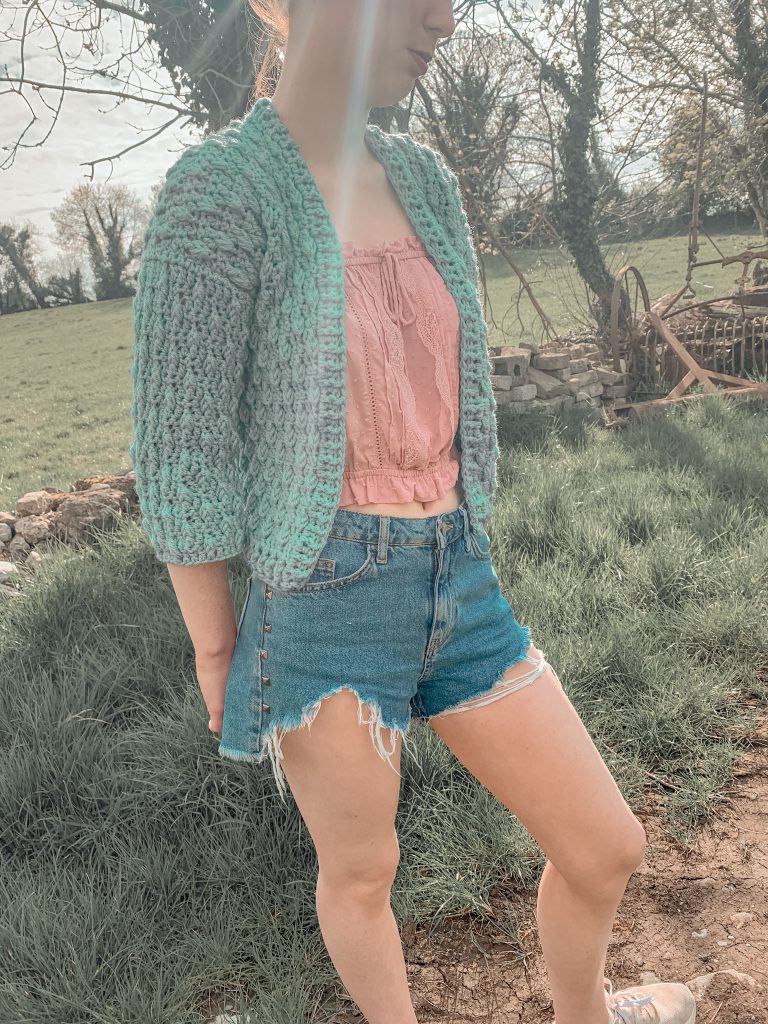
I’m so happy to share with you the free pattern for my Crochet Clodagh [cloda] Cardigan. Included with this pattern is a free youtube video tutorial so please go and check that out if you are more of a visual learner. Keep scrolling down to find it.
Materials:
Any weight 4/aran/10 ply yarn of your choice (approx. 350, 400, 450, 500, 550, 550, 600, 600 g)
Size 6mm crochet hook or size needed to obtain gauge.
Tapestry needle
Measuring tape
Stitch markers
Sizes:
S(M, L, XL, 2XL, 3XL, 4XL, 5XL)
Abbreviations (US terms):
ch – chain
sc- single crochet
dc- double crochet
fpdc – front post double crochet
bpdc – back post double crochet
DP – double post
Notes: This cardigan fits true to size. For a looser look I suggest you make a size bigger.
The pattern is worked up by making the back panel, continuing on by adding the front panels without seaming, then working the sleeves seperately then seaming them on. Finally we add some hemline and neckline ribbing.
Gauge: 12 sts in dc = 4″
Dimensions:
Width across back: 15(17, 19, 21, 23, 25, 27, 29)”
Special stitch: Double post (DP): (YO insert hook around post of dc 2 rows below, yo and draw up a loop to 1″) twice (5 loops on hook), yo draw through 4 loops on hook, yo, draw through 2 loops on hook.
Back panel:
Ch 53 (57, 61, 65, 69, 73, 77, 81)
Row 1: dc in 4th ch from hook, dc to end. Turn.
Row 2: ch 3, (fpdc in next st, bpdc in following st, repeat from * across. Your last st will be a dc on top of turning chain. Turn.
Row 3: ch 3, *bpdc in next st, fpdc in the following, repeat from * across. Your last st will be a dc on top of the turning chain. Turn.
Row 4: Ch 3, dc in every stitch across. Turn.
Row 5: ch 3 (counts as dc throughout) dc in next 2 sts, *DP, skip sc behind st just made, dc in next 3 sc, repeat from * across, turn.
Row 6: ch 1, sc in each st across, turn.
Row 7: ch 3, DP in 2nd dc 2 rows below, *dc in next 3 sc, DP, skip sc behind stitch just made, rep from * across to last st, dc in last sc, turn.
Row 8: ch 1, sc in each st across, turn.
Repeat rows 5-8 until back panel is your required length. I stopped after 18-19 inches. Measure from the top of your shoulders to where you want the cardigan to fall, but make sure you DO NOT FINISH ON A SC ROW
Once you are happy with your length for the back panel we will continue on from where we are now:
Row 1: ch 1, sc 25(25, 29, 29, 33, 33, 37, 37). Turn
Row 2: ch 3 (counts as dc throughout) dc in next 2 sts, *DP, skip sc behind st just made, dc in next 3 sc, repeat from * across, turn.
Row 3: ch 1, sc in each st across, turn.
Row 3: ch 3, DP in 2nd dc 2 rows below, *dc in next 3 sc, DP, skip sc behind stitch just made, rep from * across to last st, dc in last sc, turn.
Row 4: ch 1, sc in each st across, turn.
Repeat rows 1-4 until front panel is same length as back panel but make sure NOT TO END ON A SC ROW
Next row: ch 3, dc in every st across, turn.
Next row: ch 3, *fpdc in next st, bpdc in following st, repeat from * across to end. Your last st will be a regular dc on top of the turning chain. Turn.
Next row: ch 3, *bpdc in next st, fpdc into following st, repeat from * across. Your last st will be a dc on top of the turning chain, turn.
Fasten off.
Other front panel:
Count 25(25, 29, 29, 33, 33, 37, 37) sts in from the edge and attach yarn to that st.
Next row: ch 1 sc 25(25, 29, 29, 33, 33, 37, 37) across, turn
Next row: ch 3 (counts as dc throughout) dc in next 2 sts, *DP, skip sc behind st just made, dc in next 3 sc, repeat from * across, turn.
Next row: ch 1, sc in each st across, turn.
Next row: ch 3, DP in 2nd dc 2 rows below, *dc in next 3 sc, DP, skip sc behind stitch just made, rep from * across to last st, dc in last sc, turn.
Next row: ch 1, sc in each st across, turn.
Repeat last 4 rows until you have the same length as the other front panel and also making sure NOT TO END ON A SC ROW and keeping in mind we have yet to make the ribbed hem.
Next row: ch 3, dc in every st across, turn.
Next row: ch 3, *fpdc in next st, bpdc in the following st, repeat from * across, turn.
Next row: ch 3, *bpdc in next st, fpdc in the following st, repeat from * across, turn.
Fasten off.
Sleeves:
Ch 33( 37, 41, 45, 49, 53, 57, 57)
Row 1: dc in 4th ch from hook, dc across, turn
Row 2: ch 3 (counts as dc throughout) dc in next 2 sts, *DP, skip sc behind st just made, dc in next 3 sc, repeat from * across, turn.
Row 3: ch 1, sc in each st across, turn.
Row 4: ch 3, DP in 2nd dc 2 rows below, *dc in next 3 sc, DP, skip sc behind stitch just made, rep from * across to last st, dc in last sc, turn.
Row 5: ch 1, sc in each st across, turn.
Repeat rows 2-5 until you have youre preffered length of sleeve. I wanted a 3/4 length sleeve so I made mine 12-13″ long. Fasten off leaving a long tail.
Assembly:
Lay your main body face down (textured side facing down) on a flat surface. Grab one of your sleeves and mark the middle st. Now line that stitch up with row 1 of the front panel and attach there. Now single crochet across to attach the sleeve to the body. Repeat to the other side.
Next fold your cardigan over and single crochet along the sides.
Turn cardigan right side out. Attach yarn to bottom inner corner of one of the front panels. Ch 3, and dc all the way around the inner edge of cardigan until you reach other side.
Next row: Ch 3, *fpdc in next st, bpdc in following st, repeat from * all the way around. Repeat this row 2-3 more times.
Fasten off and weave in all ends.
You are now finished your Crochet Clodagh Cardigan!
Is row number four supposed to be SC or DC??? I really want to make one of these.
Thank you its really nice
Oh my I just saw your work for the first time! So beautiful. Right up my alley. Ty ty I have not been this excited in a long time over much of anything.
From looking at the video, I’d say single crochet. I frogged the row and am redoing it…hope it’s right! I had the same question!!
Started mine and for the first time, I could do this stitch.your instructions are clear on the tutorial. Thank you.
I am making my second sweater following your instructions…. You are a really good teacher… Thanks for the beautiful patterns and explaining the same in a very easy way. I have a request can you please explain how to add buttons to a cardigan. I will be very grateful to you..
Truly appreciate your work! QUESTION: After the first row of DC, I’m left with 50 stitches, which means I end with a BPDC and DC on top of turning ch in the next row. When I turn work, the pattern calls for BPDC, however that would mean a BPDC on top of a FPDC, and I see the piece shows BPDC on top of a BPDC. The only way it works is with an odd number of stitches. WHAT AM I DOING WRONG?
SC… I made one.
Could you please share the name of the yarn used in your beautiful pattern. I am hoping to find a lavender or purple yarn for this pattern. Thank you for sharing your talents!