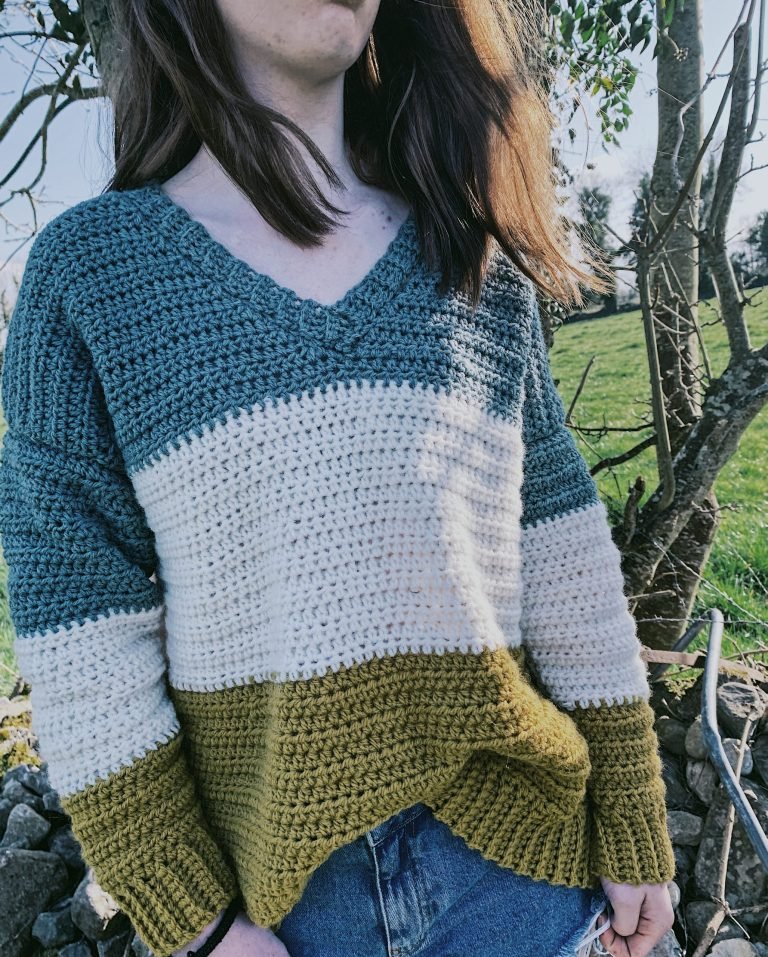
Crochet Fall Sweater

Firstly I want to wish everyone a Happy New Year. I wish you all the best in 2020. So to get this year started here in the Crochet Fall Sweater pattern.
Materials:
Any weight 4/aran/10 ply yarn. You will need 500g for sizes s/m, 550g for sizes l/xl, 600g for 2XL/3XL and 700g for sizes 4XL/5XL.
6 mm crochet hook
Abbreviations:
ch. chain
sl st. slip stitch
dc. double crochet
fpdc. front post double crochet
bpdc. back post double crochet
Sizes:
S(M,L, XL, 2XL,3XL,4XL,5XL)
To fit bust sizes:
32-34″(36-38″,40-42″,44-46″,48-50″,52-54″,56-58″,60-62″)
This pattern is designed to be slightly oversized with a 6″ positive ease.
Pattern is worked in flat panels from the bottom up – 2 front and back panels and 2 identical sleeve panels that are seamed together at the end before working the collar neckline.

Back panel:
Ch 63( 69, 75, 81, 87, 93, 99, 105)
Row 1: dc into 4th ch from hook and in each st across. Turn.
Row 2: Ch 1 (counts as first st), *dc into next, sl st into next, repeat from * across to end. Turn.
Row 3: Ch 3 (counts as first st), dc in next st and in each st across. Turn.
Repeat rows 2-3 until back panel measures 21-22″.
Fasten off and place to one side.
Front panel:
Repeat as for back panel but do 2 less rows than the back panel.
Next row: Ch 3, dc in next 16( 18, 22, 26, 28, 30, 34, 36) sts. Turn.
Next row: Ch 1, *dc in next, sl st in next, repeat from * across.
Fasten off leaving a long tail for sewing.
Turn your panel the right way around so the textured side is facing you. Now we will work on the other shoulder:
Count 17( 19, 23, 27, 29, 31, 35, 37) sts in from the outer edge of the panel. Attach yarn:
Ch 3, make 16( 18, 22, 26, 28, 30, 34, 36) dc. Turn.
Ch 1, *dc into next, sl st into next, repeat from * across. Turn.
Fasten off leaving a long tail for sewing later.
Sleeves:
Ch 47( 49, 53, 57, 63, 69, 71, 71)
Row 1: dc into 4th ch, dc to end. Turn.
Row 2: Ch 1 (counts as first st), *dc in next, sl st in next, repeat from * to end. Turn
Row 3: Ch 3(counts as first st), dc into each st to end. Turn.
Repeat rows 2-3 until you have 32 rows completed.
Decrease row:
Ch 3 (counts as first st), dc2tog, dc in each st until 3 sts remain, dc2tog, dc into last st. Turn.
Next row: Ch 1(counts as first st), *dc in next, sl st into next, repeat from * to end. Turn.
Next row: Ch 3(counts as first st), dc into each st across. Turn.
Repeat last 2 rows until you have a further 7 rows completed. Add more rows here if you need sleeve longer.
Fasten off leaving a long tail for sewing.
Assembling the sweater:
Lay the back panel down so the textured side is facing you, then grab the front panel and lay that on top of the back panel with the textured side facing down. Sew the shoulders to the back panel.
Now lay the sweater out flat, textured side facing down. Grab a sleeve and fold it lengthwise to find the middle stitch. Mark the middle st with a stitch marker and attach to the sea of the shoulder. Now sew sleeve to the sweater. Repeat for other side. Now fold sweater over and sew the under edge of sleeve and the sides of the sweater.
Turn sweater right side out.
Neckline ribbing:
Attach yarn to the corner of the neckline and ch 3, the dc all the way around the neckline. Sl st to the beginning ch 3 to close the round.
Next round: Ch 3, *fpdc in next st, bpdc in next, repeat from * all the way around. Sl st to beginning ch3 to close round. Repeat this row a further 3-4 more times depending on how thick you want the neckline to be.
Fasten off and weave in all ends.
You are now finished your sweater. This pattern is also available on my YouTube channel if you would like a visual tutorial.