
Stay warm and cosy with the Saoirse [ser-sha] crochet slouchy cardigan
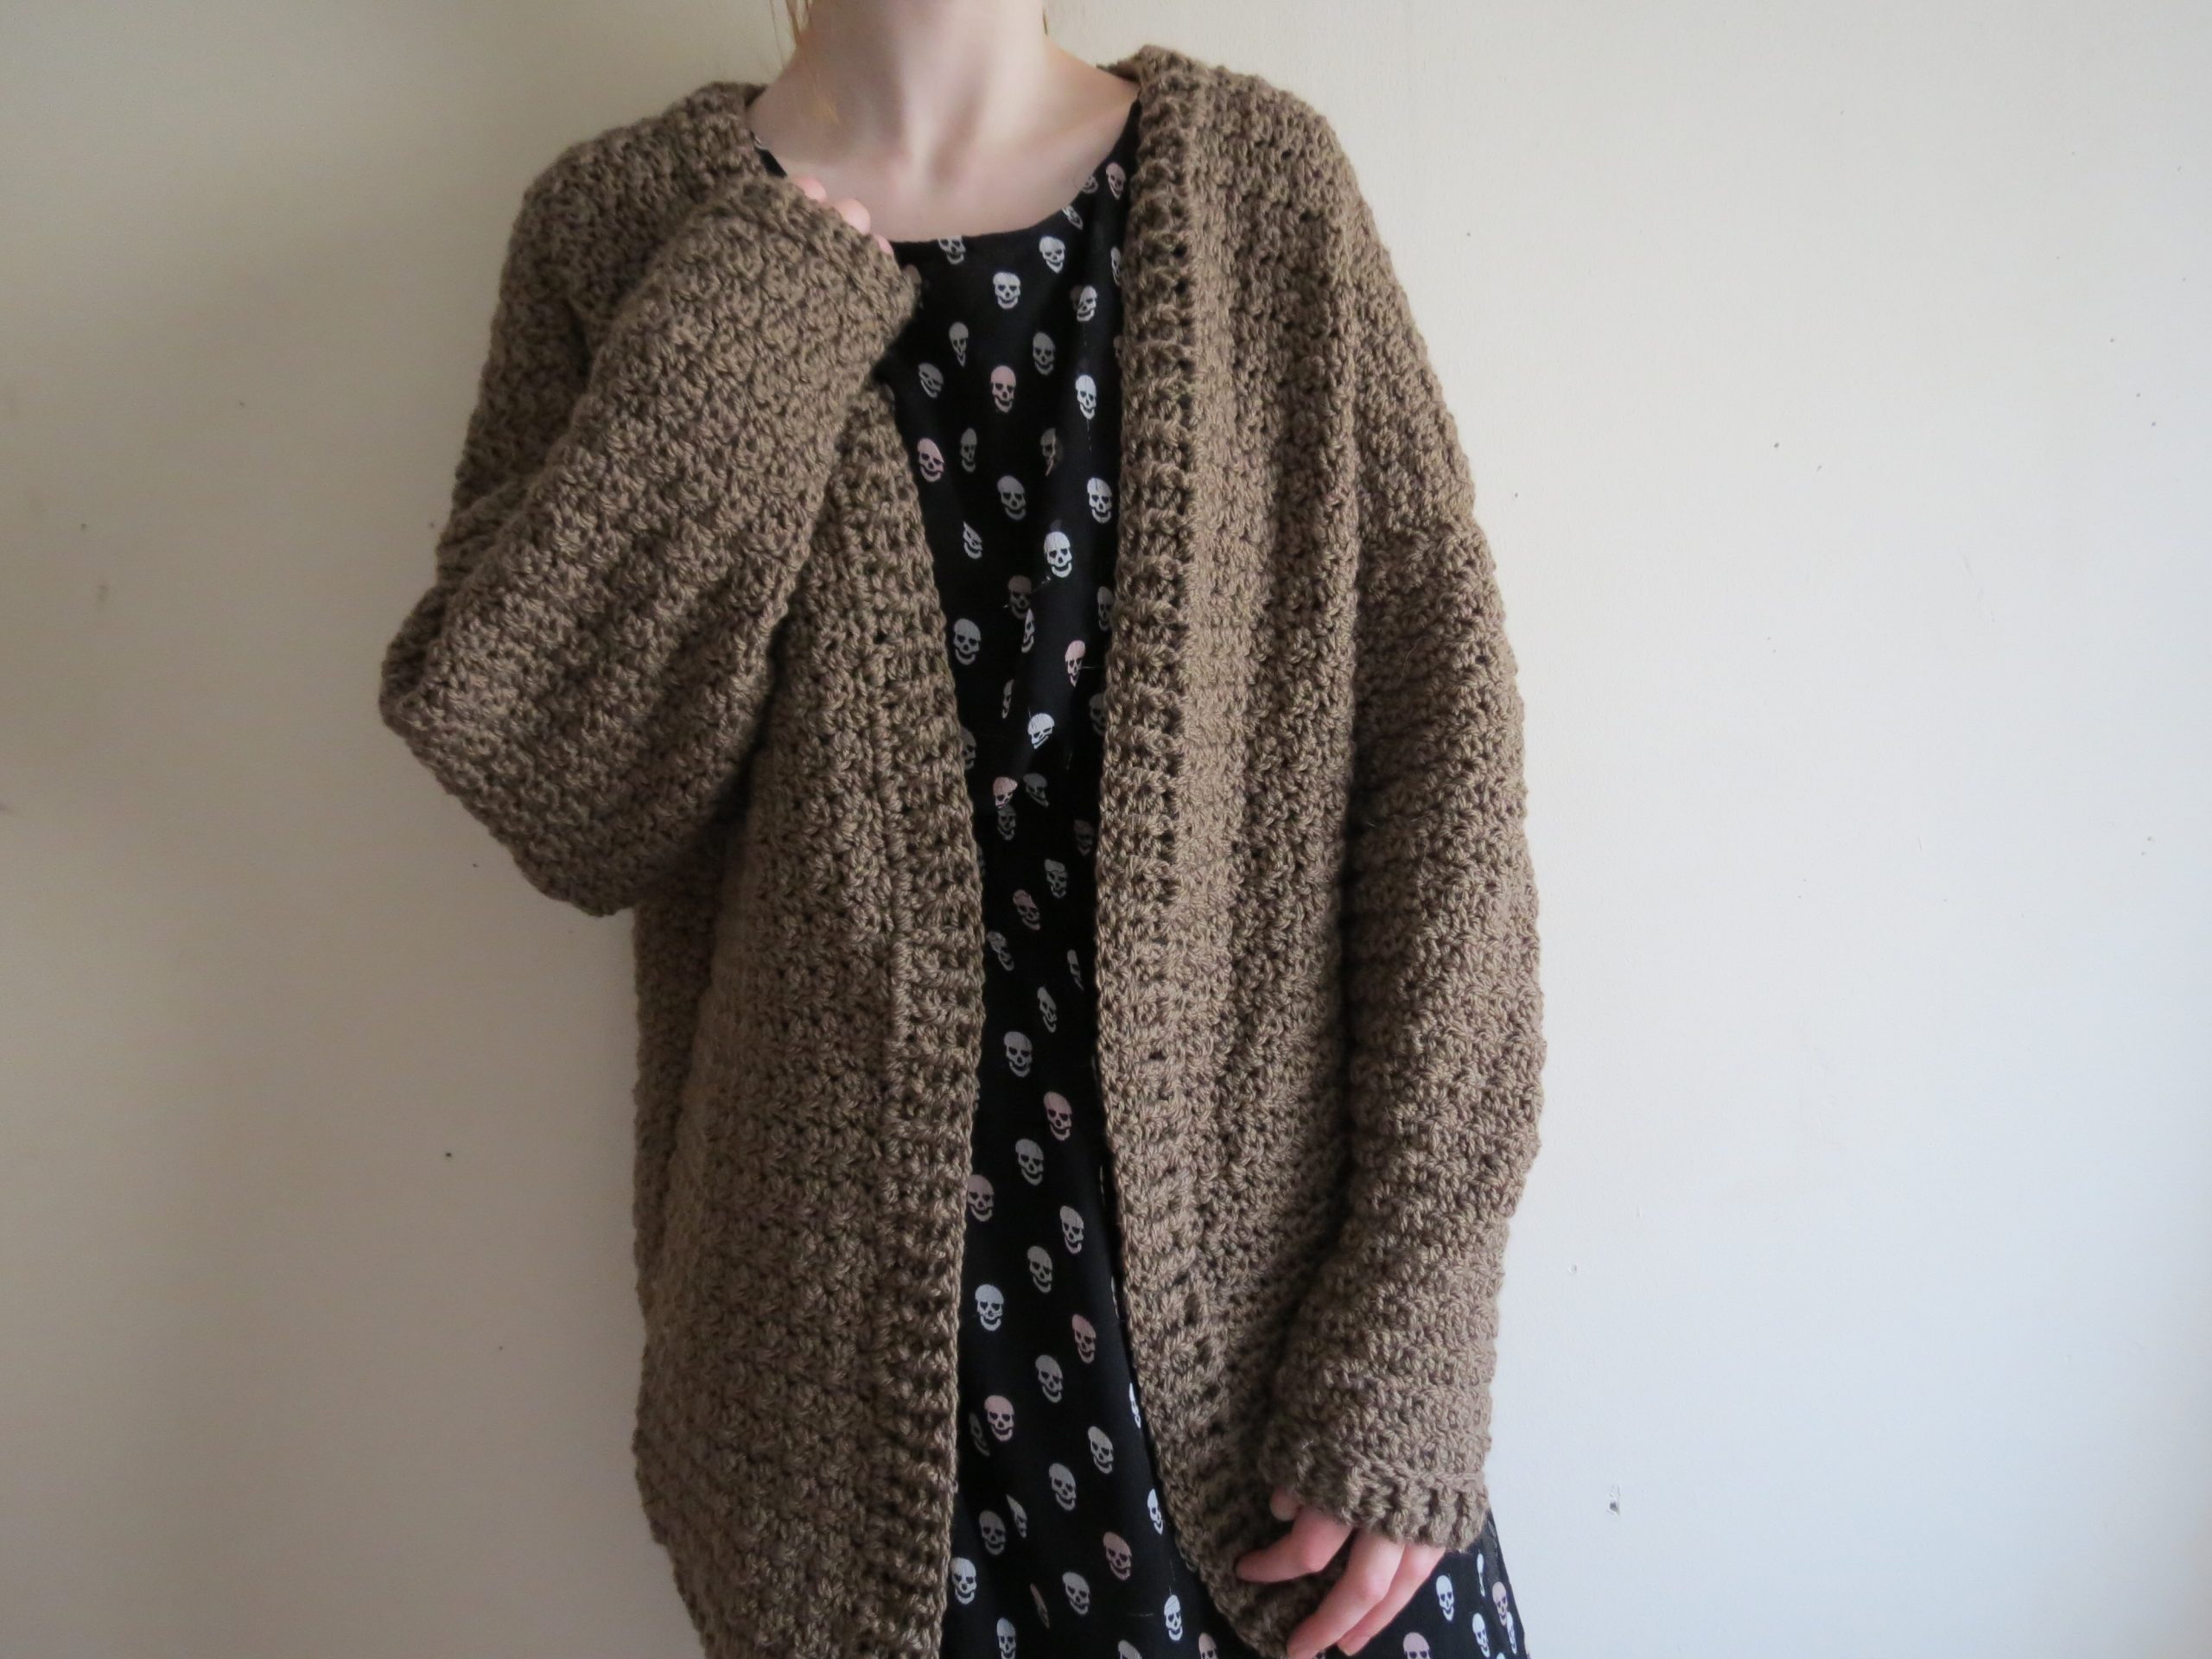
The Saoirse cardigan is designed to be slouchy and oversized, with loose sleeves and ribbed hemline. It is the perfect crochet cardigan to wear as Spring arrives. Pair it with a simple tee and jeans or layer over your favorite dress.
The Saoirse slouchy crochet cardigan is a relatively easy piece to make. It is worked using simple single crochet and double crochet stitches. The pattern is worked from the back panel bottom up and without breaking the yarn you will continue on with the front panel. You will then rejoin your yarn and work the second front panel. The sleeves are worked separately and then seamed to armhole.
Materials:
Any weight 4/worsted/aran yarn
6mm crochet hook
Stitch markers
Measuring tape.
I would recommend 700-800g for S/M, 800-850g for L/XL, 850-900g for 2XL/3XL, and 900g for 4XL/5XL
All pattern instructions will be listed for different sizes in ( ).
Sizes:
S(M, L, XL, 2XL, 3XL, 4XL, 5XL)
Back panel:
Ch 71(73, 75, 75, 79, 79, 81, 81)
Row 1: dc into 3rd ch from hook, dc in every stitch across. Turn.
Row 2: Ch 2, *fpdc around next dc, bpdc around the following dc, repeat from * across. Your last stitch will be a regular dc on top of the ch 2. Turn.
Row 3-5: Ch 2 and continue in fpdc, bpdc across.
Row 6: Ch 1 (not counted as a stitch), sc in the first st, dc into the next st, *sc into next st, dc into next st, repeat from * across the row. You will end the row with a dc on top of the ch 2 from previous row. Turn
Repeat row 6 until the back panel measures 25-26 inches long.
Continue to first front panel without breaking your yarn
First front panel:
Row 1: Ch 1, *sc in next st, dc into next, repeat from * until you have worked across 28(28, 30, 30, 32, 32, 34, 34) sts. Make sure you end with a dc. Turn.
Row 2: Ch 1, *sc into next st, dc into following st, repeat from * across. Turn
Repeat row 2 until the first front panel is the same length as the back panel minus the ribbed hemline.
Next row: Ch 2 (counts as first dc), dc into every st across. Turn.
Next row: Ch 2, fpdc around next dc, bpdc around the following dc, repeat from * across. End the row with a dc on top of ch 2.
Repeat last row 3 more times. Fasten off.
Second front panel:
With right side facing, count in 28(28, 30, 30, 32, 32, 34, 34) sts in on the opposite side. Attach your yarn to your indicated st, then:
Row 1: Ch 1,*sc into next st, dc into following st, repeat from *across. Turn. Repeat this row until it measures the same as the first front panel minus the ribbed hemline.
Next row: Ch 2 (counts as first dc), dc into every st across. Turn.
Next row: Ch 2, *fpdc around next dc, bpdc around the following dc, repeat from * across. End the row with a dc on top of the ch 2. Turn.
Repeat last row 3more times. Fasten off.
Sleeves:
Make two!
Ch 31.
This will be the foundation row of the sleeve cuff. If you want it bigger just add more chains but make sure you chains are an odd number.
Row 1: dc into 3rd ch from hook, dc into every ch across. Turn.
Row 2: Ch 2 (counts as first dc), *fpdc around next dc, bpdc around the following dc, repeat from * across. End the row with a dc on top of the ch 2. Turn.
Row 3-4: Repeat row 2.
Row 5: (increase row) Ch 1(not counted as st) sc into next st, dc into same st, *sc into next st, dc into following st, repeat from * until 1 st remains, (sc, dc) into last st. Turn.
Row 6: Ch 1, *sc into next st, dc into following st, repeat across. Turn.
Repeat rows 5-6 until you have 54(56, 60, 64, 70, 74, 78, 78) sts.
Next row: Ch 1, *sc into next st, dc into following st, repeat from * across. Turn.
Repeat last row until sleeve measures 17-18 inches long. If you need shorter/longer sleeves just subtract/add more rows here. Fasten off leaving long tail.
Assembly:
Lay the cardigan out flat on a hard surface with the front panels folded over the back panel. Add a stitch marker where it folds at the shoulder area. Do the same on the other side.
Now lay the cardigan out completely flat and grab a sleeve. Insert a stitch marker into the middle st of the sleeve. Now attach the sleeve to the stitch marker on the main body of the cardigan. Make sure the st marker on the main body and the st marker on the sleeve are aligned correctly. Now sc across to attach the sleeve to the body. Repeat on the other side.
Now fold you cardigan over and seam up along the sides of the cardigan. Fasten off and weave in all ends.
Turn your cardigan right side out so all seams are facing inward. Lay your cardigan out on a flat surface. Attach your yarn to the bottom corner of one of the front panels then:
Ch 2, dc all the way along the inner edge of your cardigan until you reach the opposite corner of the other front panel. Turn.
Next row: Ch 2 ( counts as first dc), *fpdc around next dc, bpdc around the following dc, repeat from * all the way around to the other side. Repeat this row another 2 more times.
Fasten off and weave in all ends.
You are now finished!
I want to try this cardigan but , do you have a chart for sizes?How many inches is xl?
Hi, I am having trouble with the sleeve. The rate of increases on my sleeves is rather large. Do you have any measurements on its length and width?
how many yards of yarn for a L/XL?
What are the finished measurements for the small?
She states this at the top of the pattern 🙂
850-900g this all depends on what you buy just check the chart of the yarn if it is 100 yard Gina it will also say how many grands it is …But it depends on how tight or loose you crochet i have found …I’ just a follower but i hope this helps
I’m following all of these questions. I would love to start this cardigan but need more info about the sizing before I give it a go
Could you please provide gauge measurements? I want to make sure I have the right size before I start. Thanks for sharing all your designs are beautiful
So do i. because I’m a beginner
Hello Carrie , I would like to try the slouchy cardigan and was given a gift of some lovely double knitting yarn! Yat! Will this pattern work with this yarn using a smaller hook and choosing a larger size? Much love always. Lyn
Hello Carrie , I would like to try the slouchy cardigan and was given a gift of some lovely double knitting yarn! Yat! Will this pattern work with this yarn using a smaller hook and choosing a larger size? Much love always. Lynĺ
Hello Carrie, I would really like to make the slouchy cardigan using double knitting wool and a 4mm crochet hook and choosing a larger size for me. I wouldon’t appreciate any advice . ThankYou. Merry Christmas
Hi did you ever get a reply for the sizing please.
Thanks
Noelle
Do you have a sizing guide please
I have just completed this cardigan in a Medium and using Stylecraft Aran witb Hayfield Aran, the finished article fits a UK 14/16 Bust 38/42. An XL I think will come up about a UK size 16/18. I hope that helps.
Hi there. I’ve started in UK crochet but am now thinking it should’ve been US?
The sleeve pattern does not make sense to me. With the increases, the sc then lands on top of sc’s, when in each row a sc should be on top of a dc and a dc should be on top of a sc in order to maintain the pattern. What am I missing?
Hi the pattern for the sleeve doesn’t make sense to me it says increases to 78 stitches for 4x-5x size and the do normal pattern again until sleeve is 16-18 inches…. My sleeve is already way past that with just doing the alternating rows! What am I doing wrong … please help
I’m in the same pickle you are currently but I watched the tutorial on YouTube and that’s what she does. The tutorial is called “crochet slouchy cardigan all sizes”. My best guess is that the sleeve pattern of one stitch being on the opposite kind resumes after the initial increase section.
you have such beautiful patterns! glad they’re not mostly double crochets which make them look too pedestrian.
Thanks for the sizes info, I was wondering what I would do.