
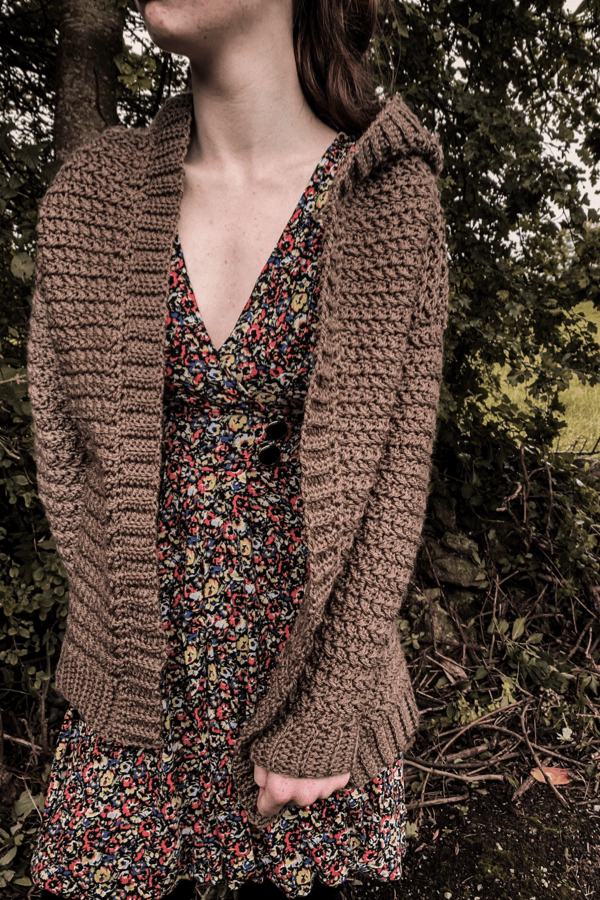
The amount of requests I’ve received to design a crochet hooded cardigan has literally been through the roof! So what a better time to introduce to you my latest creation.

This crochet hooded cardigan is designed from the bottom up, beginning with the ribbed hem and then working along the top edge of the hem to create a back panel and then two separate front panels. The sleeves are then sewn in later followed by attaching the yarn to the top of a front panel and creating the hood. Lastly we will be created a ribbed inner edge all the way around the cardigan.
YARN
The yarn I used was So Crafty Aran which is an Aldi own brand. I have heard that Aldi in some countries do not sell this yarn or any yarn for that matter, so I would suggest perhaps Lion Brand or Paintbox Aran but with that said, any weight 4 yarn will work.
SIZES
The sizing guide follows size S(M, L, XL, 2XL, 3XL).
MEASUREMENTS
To fit bust 34(38, 40, 44, 48, 52) inches
Width of cardigan: 20(20.5, 22.5, 24.5, 27.5, 31.5) inches
Length of cardigan: 22(22, 23, 23, 24, 24) inches
Length of sleeve 17(17, 17.5, 17.5, 18, 18.5) inches
LEVEL
Easy
MATERIALS
Yarn – any weight 4/aran/10 ply yarn, 1,600(1600, 1800, 1900, 2000, 2000) meters.
5.5 mm crochet hook
6 mm crochet hook
Yarn needle
Measuring tape
2/3 stitch markers
STITCHES & ABBREVIATIONS
Ch = chain
Sc = single crochet
Dc = double crochet
Hdc = half double crochet
BLO = back loop only
This pattern uses standard US crochet terms
PIN IT FOR LATER!
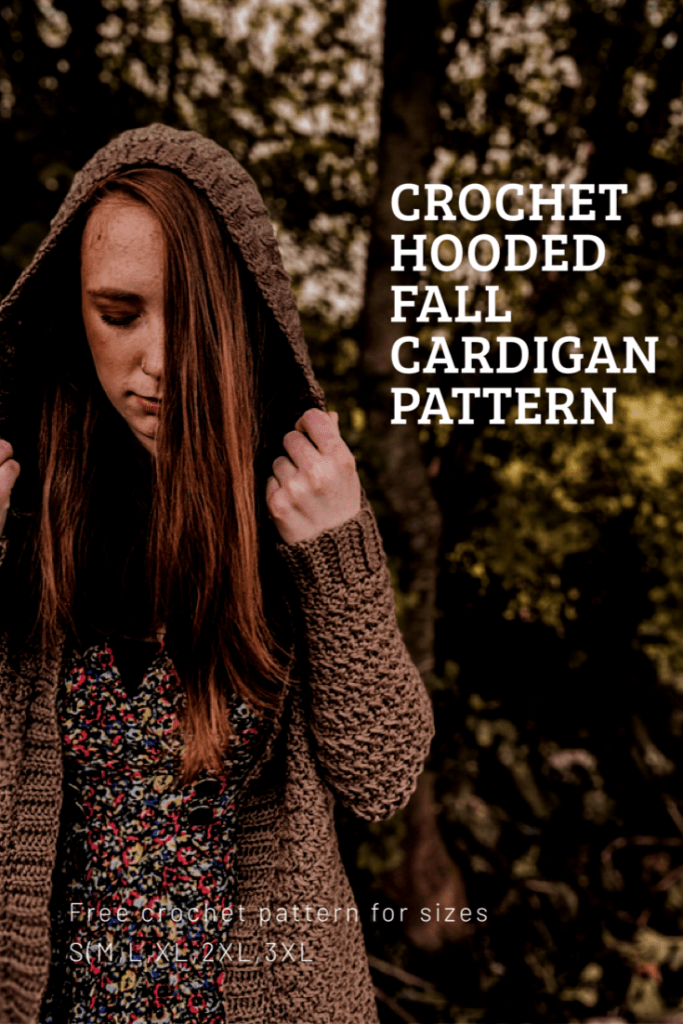
CROCHET HOODED FALL CARDIGAN PATTERN
BACK PANEL
With 5.5mm hook:
CH 9
Row 1: hdc in 2nd ch from hook, hdc in each ch across. Turn.
Row 2: ch 1 (not counted as stitch) hdc in BLO across. Turn.
Repeat row 2 until ribbing measures 19(20.5, 22.5, 24.5, 27.5. 31.5) inches. DO NOT STRETCH TO TAKE MEASUREMENT
Working along the top edge of the ribbing:
CHANGE TO 6MM HOOK
Next row: Ch1, sc 64(68, 74, 82, 90, 98) evenly across. Turn.
Next row: Ch 2 (counts as a hdc here and throughout), *skip next st, sc in next, dc in skipped st, repeat from * across ending with a hdc in last st. Turn.
Next row: Ch 2, *skip next st, sc in next st, dc in skipped st, repeat from * across, ending with a hdc on top of turning chain. Turn.
Repeat last row until back panel measures 22(22, 23, 23, 24, 24) inches.
Fasten off.
Front Panels
Using 5.5mm hook:
Ch 9
Row 1: hdc in 2nd ch from hook, hdc across. Turn
Row 2: ch 1, hdc in BLO across. Turn.
Repeat row 2 until ribbing measures 9.5(10, 11, 12, 13, 15.5) inches UNSTRETCHED.
Change to 6mm hook:
Working along the top edge of the ribbing:
Next row: Ch 1, sc 32(34, 36, 40, 44, 48) evenly across. Turn.
Next row: Ch 2 (counts as hdc here and throughout), *skip next st, sc in next, dc in skipped st, repeat from * across, ending with a hdc in last st. Turn.
Next row: Ch 2, skip next st, sc in next, dc in skipped st, repeat from * across ending row with a hdc on top of ch 2. Turn.
Repeat last row until your front panel measures 22(22, 23, 23, 24, 24) inches long. Fasten off leaving a long tail.
Now go ahead and make your second front panel in the same way!
Sleeves:
Using 5.5mm hook:
Ch 9
Row 1: hdc in 2nd ch from hook, hdc across to end. Turn.
Row 2: ch 1, hdc in BLO across. Turn.
Repeat row 2 until ribbing measures 9.5(9.5, 10, 10, 10.5, 10.5) inches long.
CHANGE TO 6MM HOOK:
Working along the top edge of the ribbing:
Next row: ch 1, sc 30(30, 32, 32, 34, 36) evenly across. Turn.
Next row: Ch 2 (counts as hdc here and throughout) *skip next st, sc in next, dc in skipped st, repeat from * across ending row with a hdc in last st. Turn.
Next row: Ch 2, hdc in same st (inc made), *skip next st, sc in next, dc in skipped st, repeat from * across ending the row with 2hdc (inc made) in last st. Turn.
Repeat last 2 rows until you have 50(50, 56, 56, 58, 60) sts.
Next row: ch 2, *skip next st, sc in next, dc in skipped st, repeat from * across, ending with hdc in last st. Turn.
Repeat last row until entire sleeve measures 17(17, 17.5, 17.5, 18, 18.5) inches long.
Fasten off leaving long tail
Assembly
Lay your back panel flat on a hard surface. Place both front panels on top of the back panel and using a yarn needle sew across 16( 17, 18, 20, 22, 24) from the outer edge in. Leave remaining sts untouched. Repeat on the other side.
Next lay your cardigan out completely flat. Grab one of your sleeves and place a stitch marker in the middle stitch. Line that stitch marker with the shoulder seam and connect. Place more stitch markers for more security. Using a yarn needle stitch the sleeve to the main body. Repeat on other side. Next fold sweater over and sew along the edge of cardigan and up along the underneath of sleeve. Turn cardigan right side out.
Hood
Using your 6mm hook
Attach yarn to the top inner corner of one of your front panels.
Row 1: Ch 2, *skip next st, sc in next, dc in skipped st, repeat from * across. You will be working along the skipped stitches of the front panels and along the stitches of the back panel. Place a hdc in last st. Turn.
Repeat last row until you have about 36 rows. Add more rows here for a larger hood. Fasten off leaving long tail.
With a yarn needle sew the hood from the inside so the seam is in the inside. For a better understanding of how to sew the hood I suggest you watch my video.
Inner ribbing
Using 6mm hook:
Attach yarn to bottom inner edge of one of the front panels. Ch 1, sc evenly up along the inner edge of the entire cardgian including around the hood. Keep going with sc all the way around until you reach the other side.
Change to 5.5mm hook
Next row: Ch 7, hdc in 2nd ch from hook, hdc in next 5 sts, slip stitch into next 2 sc, turn
Next row: hdc in BLO of next 6 hdc. Turn
Next row: ch 1, hdc in BLO across next 6 hdc, slip stitch in next 2 sc. Turn
Repeat last 2 rows all the way around the inner edge of sweater, including the hood untill you reach the other side. Fasten off and weave in all ends.
You are now finished your crochet hooded fall cardigan. I would love to see all of your creations on instagram via hey_carriex
Hi! I love the pattern, I’m always looking for a nice cardigan to crochet, especially as we’re moving into Autumn. I was wondering if you could tell me which shade of brown your Aldi So Crafty is please? I have 3 different So Crafty Aran brown shades in my stash (helpfully called Brown, Dark Brown & Russet Brown!) & a Mink Brown Aran yarn from Kirkton House which Aldi used to sell a few years ago. I really like the colour of your cardigan, hopefully it’s one of the browns I have stashed!
Thank you for sharing! I am excited to start on this fall project.
I love the hooded fall cardigan. Can you confirm that you chain 9 to start the back panel and the front panels and the sleeves. I want to make sure the directions are correct before I start. Thank you so much. Can’t wait to start it.
Hello!!! I love your work! Do you sell your patterns as a PDF by chance? I sure would love to buy yours. I’m trying to learn how to read patterns. ♥️
why does pattern differ at end than what u say
Can I mix the lengths of the cardigan? Example, I would like the XL length but with the rest of cardigan being in size Large. Could that work? I could go through and do the whole thing and find out that it doesn’t work, that’s why I’m asking lol
Super lindo trabajo me gustó, fácil de elaborar espero tener listo mis estambres para realizar los gracias
Super lindo trabajo me gustó, fácil de elaborar espero tener listo mis estambres para realizar los gracias
Hi, I love the cardigan. Question, 17inc is the total length of her arm. I’m doing this cardigan for my son. He’s small and 5.8 tall.
Thank you,
Patricia.
Does anyone know how I could add buttons to this? could I just skip a stitch where I would put this buttons on the other side?
How many balls of wool is needed for this hoody please?
Hi,
Love the sweater! Do you have any suggestions on how to add pockets?
Thank you,
Millie
If I wanted to make this longer, which areas would I need to adjust size wise?
Hi Carrie..I was just starting to make your hooded cardigan in XL. I am trying to figure out how to evenly distribute 82 sts to fit in the 58 rows that I have. Not sure how to figure that. Any suggestions??? After doing some calculations, it said every 1.4 rows, or .7 inches. I’m worried it won’t come out even.
Thank you, Marci
My sleeves are coming out a lot wider than yours. Are they supposed to increase by two stitches each row?
Hi there! In the beginning of the pattern for the back panel part, right after you finish the ribbing, it says to chain two and skip a stitch and single crochet into the next and then go back in DC into the skip stitch. It says to repeat from there. How do I do that? When I end the stitch I end it by completing the DC into the skipped stitch what do I do from there? Do I skip the next stitch which is a single crochet and then make another single crochet in the one right after it and then go back and do a double crochet into the skip stitch that has a single crochet in it? I just don’t understand. So sorry! Please help!
I am making the medium, I think (the first number within the parenthesis). I have made it to the first sleeve. It almost seems too skinny. I was thinking of making it bigger (my daughter wanted slightly baggy sleeves). I am afraid the numbers won’t line up when it is time to attach later. Do you know if this will work?
I am going to add pockets by crocheting a square then attaching
Mine are too skinny. I think it only increases every other row. That is what it sounds like in the video. She says, this is the increase
I am up the ribbing for the edge around the whole cardigan. Mine looks like it is wanting to start ruffling? Should I be skipping that first stitch and slip stitching into the next like you started the ribbing? It seems like it needs to be stretching out.
Is there a way to print the pattern
Thank you for this beautiful pattern and post!