
Learn to crochet this quick and easy crochet textured sweater. The Juniper Sweater is designed to be oversized, light and airy making it perfect for cool summer evenings or even as a throw on as Fall starts to creep in later in the year.
This free crochet sweater pattern is accompanied with a step by step video tutorial. Please scroll down to view it.
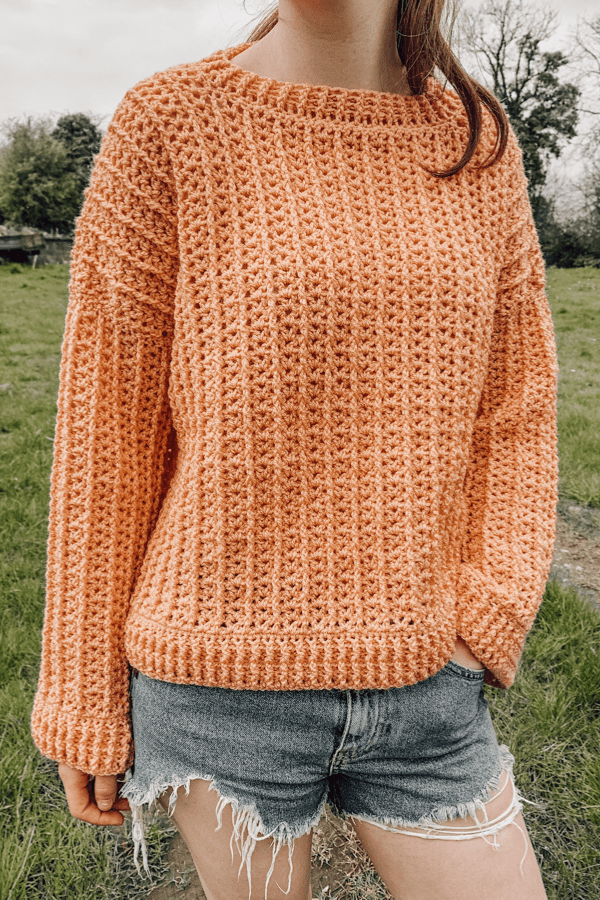
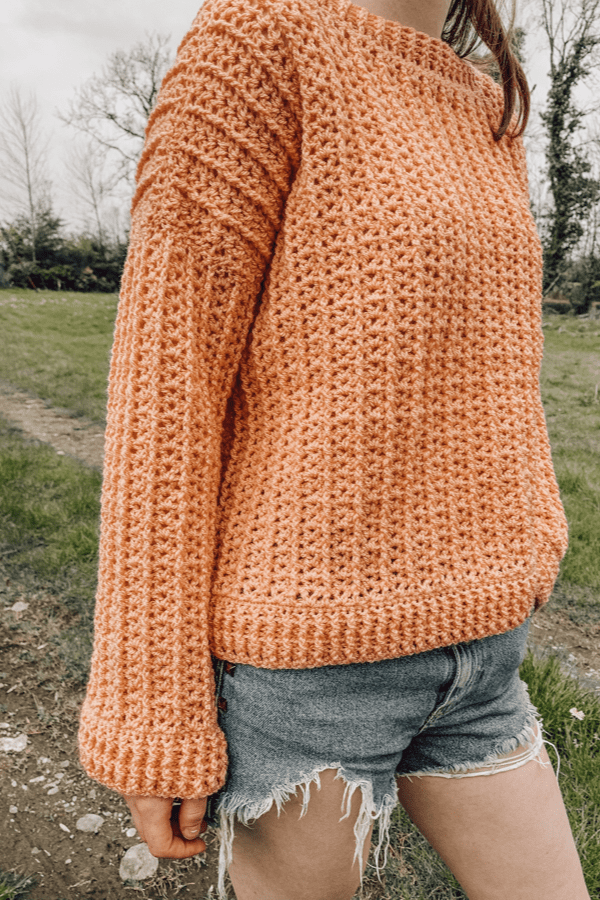
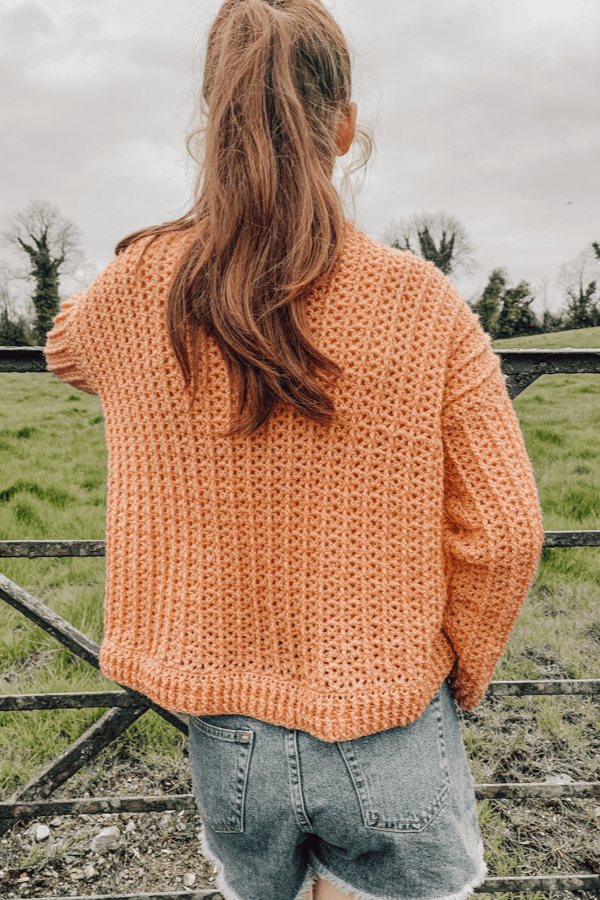
The Juniper sweater is designed from the bottom up. First we will begin crocheting the bottom ribbing, followed by a two row repeat throughout the sweater. Once we are happy with the length of the sweater we will begin a small bit of neck shaping followed by a bit of ribbing around the neckline. The sleeves are designed to be wide and oversized, including the cuffs which too are slouchy and oversized.
YARN
**This post contains affiliated links for which I make a small commission. It is of no cost to you but it does help me out**
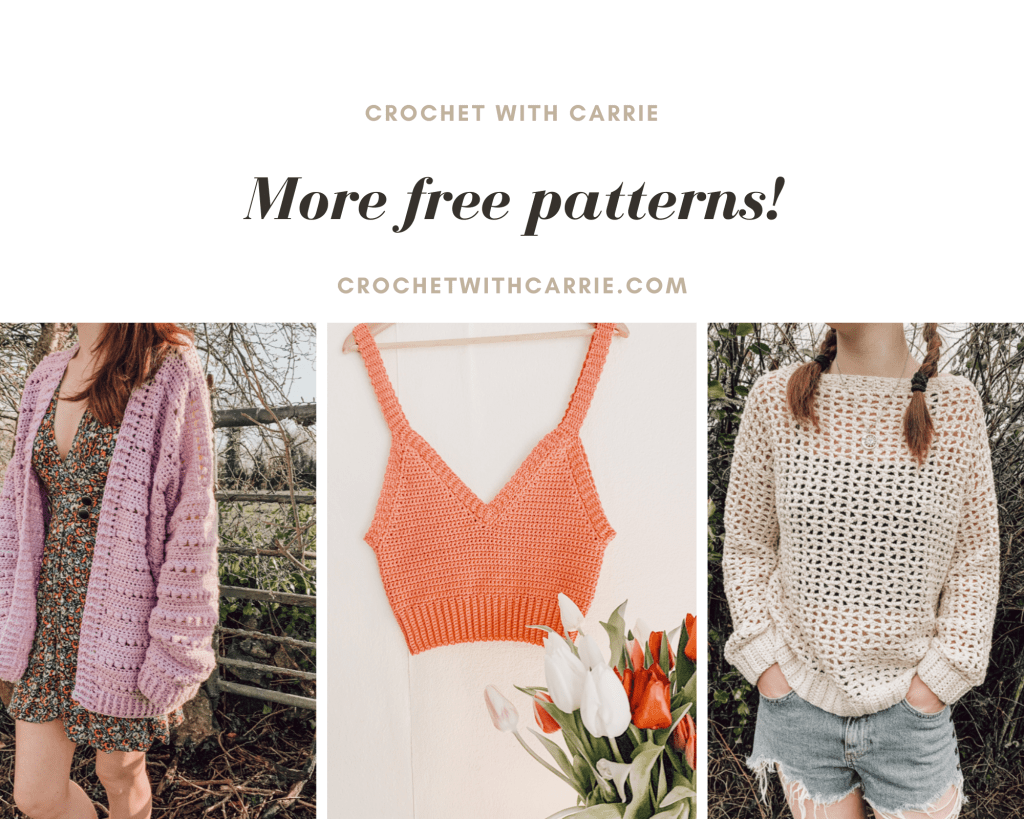
The Juniper Sweater uses Paintbox Simply Dk which is a premium 100% acrylic yarn, making it light and airy, perfect for any season of the year. This yarn is a weight 3 and comes in 50 beautiful shades so there will definitely be a shade for everyone. I wanted a colour that screamed summer so I chose the shade Melon Sorbet and I’m totally in love with it.
MEASUREMENTS
S/M( L/XL, 2XL/3XL)
To fit bust: 32-38(40-46, 48-54) inches
Actual sweater bust: 48( 56, 64) inches
Length: 20( 22, 24) inches
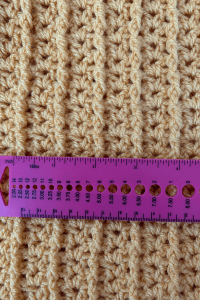
GAUGE: 9 sts x 10 rows in 4″
MATERIALS
Yarn – Paintbox Simply Dk – weight 3/ light/ Dk/ 8 ply
Approximately 6( 6, 7) balls
5mm crochet hook
Stitch marker
Yarn needle
Scissors
STITCHES & ABBREVIATIONS
ch = chain
sc =. single crochet
dc = double crochet
v-st = v stitch
slst = slip stitch
FPDC = front post double crochet
BPDC = back post double crochet
st = stitch
rep = repeat
SPECIAL STITCH: V stitch (v-st): (dc, ch 1, dc) in designated stitch.
CROCHET JUNIPER SWEATER PATTERN
BACK PANEL
Ch 103( 123, 139)
ROW 1: dc in 4th ch from hook, dc in each ch across. Turn.
ROW 2: ch 3, FPDC in next st, *BPDC in next, FPDC in next, rep from * across ending row with a dc on top of ch 3. Turn.
ROW 3: ch 3, BPDC in next st, *FPDC in next, BPDC in next, rep from * across ending row with a dc on top of ch 3, turn.
ROWS 4-5: rep rows 2-3.
ROW 6: ch 1, sc in each st across. Turn.
ROW 7: ch 3, *skip next st, v-st in next, skip next st, dc in next st, rep from * across. Turn.
ROW 8: ch 3, *v-st in centre of next v-st, FPDC in next dc, rep from * across ending row with a dc on top of ch 3. Turn.
ROW 9: ch 3, *v-st in centre of next v-st, BPDC in next st, rep from * across ending the row with a dc on top of ch 3. Turn.
Rep rows 8-9 until you have completed 43( 47, 51) rows of v-st pattern (not incl. the rows of ribbing). You can add more rows here if you want a longer top but make sure you end on row 9. DO NOT FASTEN OFF
Now with the right side facing you count 8( 10, 12 ) FPDC in from where your hook is now. Place a stitch marker in that st.
NEXT ROW: ch 3, *v-st in centre of next v-st, FPDC in next st, rep from * across placing a dc into st with the stitch marker. TURN
NEXT ROW: ch 3, *v-st in centre of next v-st, BPDC in next st, rep from * across placing a dc on top of ch 3. Fasten off.
Now turn your sweater around so the right side is facing you. Count 8( 10, 12) FPDC in from the other side and attach your yarn to that st.
NEXT ROW: ch 3, *v-st in centre of next v-st, FPDC in next st, rep from * across placing a dc in ch 3. Turn.
NEXT ROW: ch 3, *v-st in centre of next v-st, BPDC in next st, rep from * across placing a dc in ch 3. Fasten off.
FRONT PANEL
Rep the same as the back panel but stop at row 43( 47, 51). Do not include the rows of ribbing. Just count your v-st rows!
With the right side of sweater facing you count 8( 10, 12 ) FPDC in from where you are now. Mark that stitch.
NEXT ROW: ch 3, *v-st in centre of next v-st, FPDC in next st, rep from * across placing a dc in the st with the st marker. Turn.
NEXT ROW: ch 3, * v-st in centre of next v-st, BPDC in next st, rep from * across placing a dc in ch 3. Turn.
Rep last 2 rows one more time. Fasten off leaving a long tail.
With the right side facing attach yarn into the 8th ( 10th, 12th ) FPDC in from the other side.
NEXT ROW: ch 3, *v-st in centre of next v-st, FPDC in next st, rep from * across placing a dc on top of ch 3. Turn.
NEXT ROW: ch 3, *v-st in centre of next v-st, BPDC in next st, rep from * across placing a dc on top of ch 3. Turn.
Rep last 2 rows one more time. Fasten off leaving a long tail.
SLEEVES:
Ch 63( 67, 71)
ROW 1: dc in 4th ch from hook, dc in each ch across. Turn.
ROW 2: ch 3, FPDC in next st, *BPDC in next st, FPDC in next st, rep from * across placing a dc on top of ch 3, turn.
ROW 3: ch 3, BPDC in next st, *FPDC in next st, BPDC in next st, rep from * across placing a dc on top of ch 3. Turn.
ROWS 4-5: rep rows 2-3.
ROW 6: ch 1, sc in each st across. Turn.
ROW 7: ch 3, *skip next st, v-st in next st, skip next st, dc in next st, rep from * across. Turn
ROW 8: ch 3, *v-st in centre of next v-st, FPDC in next st, rep from * across ending the row with a dc on top of ch 3. Turn.
ROW 9: ch 3, *v-st in centre of next v-st. BPDC in next st, rep from * across ending row with a dc on top of ch 3. Turn.
Rep rows 8-9 until you have completed 33( 35, 37) rows of v-st. Do not include your ribbing rows. You can add more rows here if you need sleeve longer. Fasten off leaving a long tail.
Go ahead and make your second sleeve!
ASSEMBLY:
Lay your back panel on a flat surface with the right side facing up. Place your front panel on top of the back panel with the wrong side facing up. With a yarn needle and long tail seam across the shoulders connecting the two panels together.
Now lay the entire piece out flat with the wrong side facing up. Take a sleeve and mark the middle st with a stitch marker. Connect that stitch marker with the shoulder seam of your sweater. Now seam the sleeve to the shoulder seam. Rep on the other side.
Fold your sweater over and seam along the under edge of the sleeves and down along the edge of the sweater.
Turn your sweater the right side out.
Attach your yarn to the side of the neck hole, towards the shoulder seam.
Ch 1 and place 1 sc in each space, sc2tog at the first corner of the neckline, continue placing a sc in each dc st around the neckline. You will be skipping over the ch1-sp of every v-st. As you come near every neck corner you will sc2tog.
Once you have single crocheted all the way around the neckline slst into the first sc to close the round.
NEXT ROUND: ch 3, dc in every st around the neckline. Slst to ch 3 to close the round.
NEXT 3 ROUNDS: FPDC, BPDC ribbing all the way around. Slst to ch 3 to close the round. Fasten off and weave in all your ends.
You have now completed your Crochet Juniper Sweater!
Hi, can you please tell what stitch to use for the gauge?
I was going to say the same thing. I just started it with dc row and then did the fpdc n bpdc to try to get gauge but pattern really needs this information.
I would like to agree with the gauge comments, this is coming up MASSIVE. back panel pretty much completed and small is going to fit a massive 56” chest! There’s no way I can be that far off regardless how tight or loose I crochet…
The gauge: 9 sts x 10 rows in 4”
https://www.crochetwithcarrie.com/wp-content/uploads/2021/05/1E0C0AF7-BF66-4557-AD11-DA5ADAAD0EFF-683×1024.png
Reading the pattern details…. it states that the juniper sweater is designed to be oversized
I’m about 20 rows in…. thinking of frogging my work. Making the larger size and it seems WAY TOO BIG. I understand it’s supposed to be oversize but this looks *wrong*. Do I frog it or finish it off to become a pretty blanket…. ????
Hi Carrie: the gauge does not make sense. Weight 3 yarn is usually 15 or so stitches per 4″. Although it is over sized, it still would be too large. I was wondering if you can check that for me. thank you,
Esther
Hi Carrie, I am having the same issues as the others. I did a swatch in DC and had to go up a hook size. I’m on row 15 and need to frog it. Measuring the width of this panel shows an ease of 8.5 inches. That would be a total of 17 inches of ease. That can’t be right, can it?? It would be helpful to know the amount of ease expected in this oversized dweater. Thanks for your help.
Hi Carrie, On front panel instructions, shouldn’t the first instruction be to stop at row 41(45,49)?
According to the video you’re right…
Where is the pattern between the arm and the body of the sweater? The picture shows a different stich pattern of about 3 to 4 inches but it is not in the written instructions or the video. Please help… This pattern has been more than difficult. Thanks, Sue
Is there a printable version of this pattern?
Worked up perfect for me. I used #3 baby yarn.Only problem was I put one side on the wrong way and didn’t catch it until I had the neck done so it will stay that way. I will make another one. Thanks for the pattern
Carrie you could be more specific in your instructions. Does ch 3 count has a stitch? or how many stitches after ending each row. Never seen patterns like this
I usually make an extra large when making a sweater but I found it came out so big. So I frogged it and am working on the smallest size but it still seems too big. I did however add a few extra rows because I would like mine longer. So we shall see when it’s completed.
Also, there is an error when working on front panel it says to crochet the same amount of rows for the front, but you need to stop two rows prior to the decrease of the neck in order to make the rows even with each other.