
Learn to crochet this quick and easy crochet Spring mesh sweater. Designed to be slightly slouchy and screaming everything that is Spring/Summer this sweater will be a must have to your wardrobe.
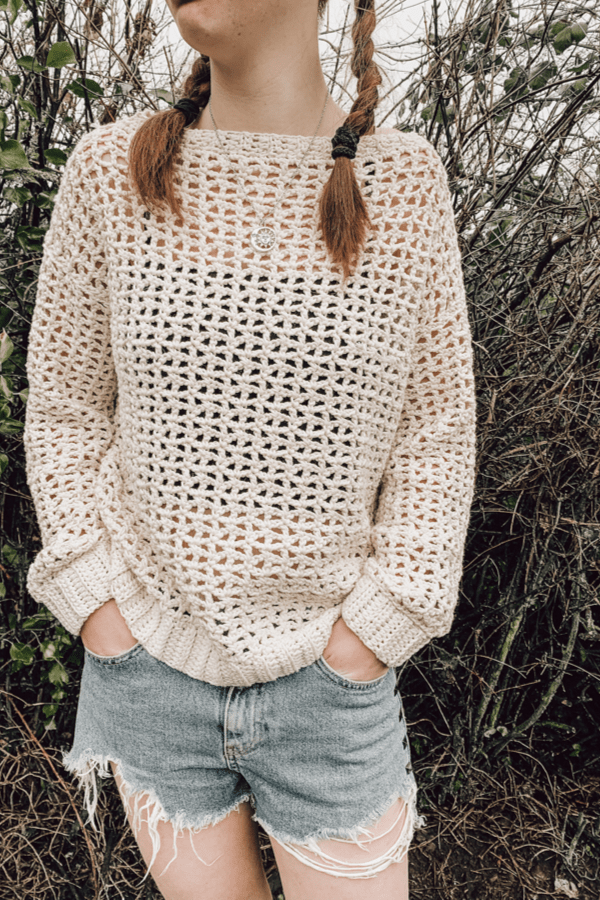
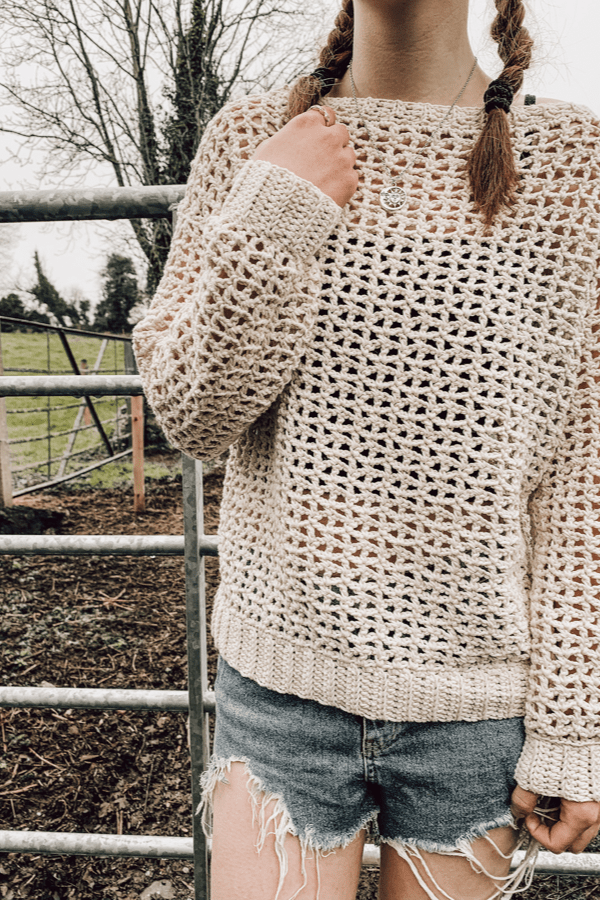
This sweater is the ultimate Spring sweater! It can be paired with jeans or shorts, worn over a bikini, or worn with a simple tank top underneath. It truly is a beautiful sweater, and of course it does have that boho vibe to it which I absolutely love.
Made using Drops Paris, a weight 4 cotton yarn. I chose cotton for it breathability and wonderful drape, however you can use any yarn you have in your stash.
This sweater is worked up in four panels, a front, a back and 2 sleeves. Both the front and back panel are worked from the bottom up, beginning with the ribbed hem. The main part of the sleeve is crocheted separately from its ribbed cuff, that is later sewn on. Once all sweater pieces are crocheted and sewn together we will finally work along the neck hole creating a ribbed finish. Easy peasy!
The written pattern comes with an accompanying step by step video tutorial. Please scroll down to view.
MATERIALS
Yarn – Drops Paris – weight 4/aran/10 ply (82 yards/75 meters/50 g
Approximately 9(9, 10, 11, 11, 12) balls
5 mm crochet hook
Stitch markers
Yarn needle
Measuring tape
STITCHES & ABBREVIATIONS
ch = chain
sc = single crochet
hdc = half double crochet
dc = double crochet
slst = slip stitch
rep = repeat
BLO = back loop only
dc2tog = double crochet 2 together
MEASUREMENTS
To fit bust 32-34(36-38, 40-42, 44-46, 48-50, 52-54) inches.
Back width: 20(22, 24, 26, 28, 30) inches.
Length: 22(22, 23, 23, 24, 24) inches
GAUGE: 13 sts or 6 “squares” across in 4 inches.
This pattern uses standard American crochet terms.
PIN IT FOR LATER!
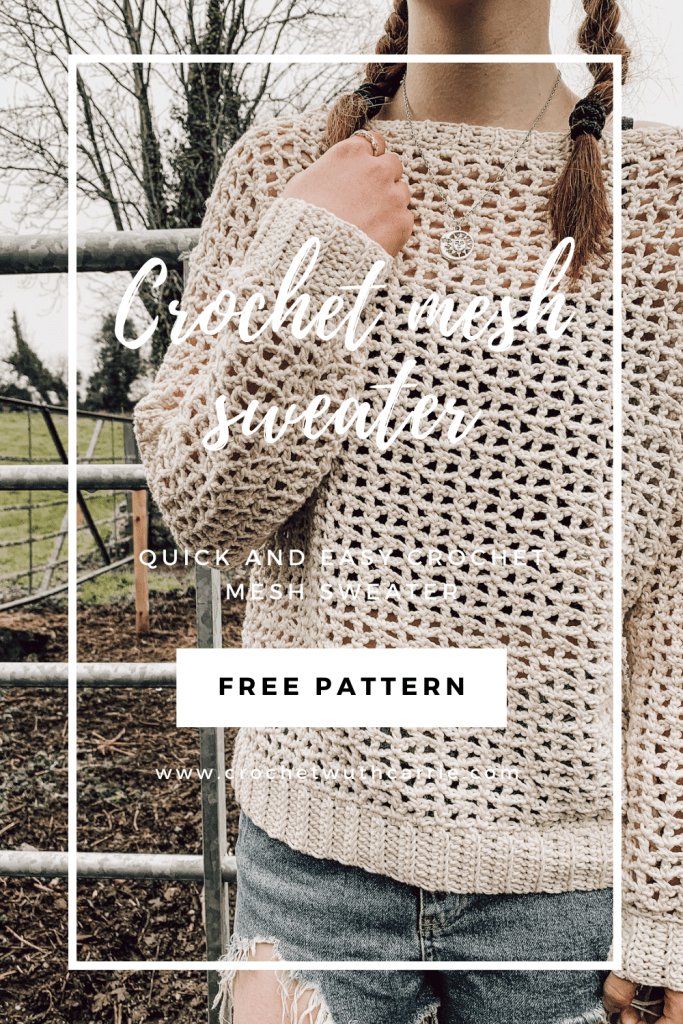
CROCHET SPRING MESH SWEATER PATTERN
BACK PANEL
Ch 9
Row 1: hdc in 2nd ch from hook, hdc in each ch across. Turn.
Row 2: ch 1 hdc BLO in each st across. Turn.
Repeat row 2 until you have 44(48, 50, 56, 62, 64) rows in total.
Now turn your piece so you’re working on the long edge of the ribbing:
Next row: ch 1, make 65(73, 77, 85, 93, 97) sc across. Turn.
Next row: ch 1, sc in first st, *ch 2, skip 1, dc in next st, ch 2, skip 1, sc in next st, rep from * across. Turn.
Next row: ch 5 (counts as dc and ch 2),* sc in next dc, ch 2**, dc in next sc, ch 2, rep from * across, ending last rep at **, dc in last sc. Turn
Next row: ch 1, sc in first st, *ch 2, dc in next sc, ch 2, sc in next dc, rep from * across placing last sc in 3rd ch of turning chain. Turn.
Next row: ch 5 (counts as dc and ch 2),* sc in next dc, ch 2**, dc in next sc, ch 2, rep from * across, ending last rep at **, dc in last sc. Turn
Repeat last 2 rows until sweater measures 22(22, 23, 23, 24, 24) inches long. For a longer sweater add more rows.
Fasten off.
FRONT PANEL:
Repeat as for the back panel but do 4 rows less. DO NOT FASTEN OFF
FOR SIZE SMALL: count 10 spaces in and mark the dc after the 10th space.
FOR SIZE MEDIUM: count 12 spaces in and mark the dc after the 12th space.
FOR SIZE LARGE: count 14 spaces in and mark the dc after the 14th space.
FOR SIZE XL: count 16 spaces in and mark the dc after the 16th space.
FOR SIZE 2XL: count 18 spaces in and mark the dc after the 18th space.
FOR SIZE 3XL: count 20 spaces in and mark the dc after the 20th space.
ALL SIZES:
NEXT ROW: ch 1, sc in first st, *ch 2, dc into next sc, ch 2, sc into next dc, rep from * across until you reach the dc before the stitch marker (placing a sc into that dc), ch 2, dc2tog over the next sc and the dc with the marker. Turn.
NEXT ROW: ch 3, dc into next sc, *ch 2, sc into next dc, ch 2, dc in next sc, rep from * across. Turn.
NEXT ROW: ch 1, sc in first st, *ch 2, dc in next sc, ch 2, sc in next dc, rep from * across until you reach the second last dc (placing a sc into that dc), ch 2, dc2tog over the next sc and the turning ch 2. Turn.
Next row: ch 1, sc in first st, ch 2, dc in next sc, *ch 2, sc in next dc, ch 2 dc in next sc, rep from * across.
Fasten off leaving a long tail.
For the other shoulder:
FOR SIZE SMALL: count 10 spaces in from the edge and attach yarn to the dc after that 10th space.
FOR SIZE MEDIUM: count 12 spaces in from the edge and attach yarn to the dc after that 12th space.
FOR SIZE LARGE: count 14 spaces in from the edge and attach yarn to the dc after the 14th space.
FOR SIZE XL: count 16 spaces in from the edge and attach yarn to the dc after the 16th space.
FOR SIZE 2XL: count 18 spaces in from the edge and attach yarn to the dc after the 18th space.
FOR SIZE 3XL: count 20 spaces in from the edge and attach yarn to the dc after the 20th space.
ALL SIZES:
NEXT ROW: ch 3, dc in next sc, ch 2, sc in next dc, ch 2, dc in next sc, rep from * across ending ro with ch 2, sc into 3rd ch of turning ch. Turn.
NEXT ROW: ch 5, sc in next dc, *ch 2, dc in next sc, ch 2, sc in next dc, rep from * across until you reach the 2nd last dc (Put a sc in that dc), ch 2, dc2tog over next sc and the ch 3 turning ch. Turn.
NEXT ROW: ch 3, dc in next sc, ch 2, sc in next dc, ch 2, dc in next sc, rep from * ending row with ch 2, sc in the 3rd ch of turning ch. Turn.
NEXT ROW: ch 5, sc in next dc, *ch 2, dc in next sc, ch 2, sc in next dc, rep from * across ending row with ch 2 sc in next dc, then dc on top of ch 3 turning ch.
Fasten off leaving a long tail.
SLEEVES:
Ch 42(46, 50, 54, 58, 64)
ROW 1: sc in 2nd ch from hook, *ch 2, skip 1, dc in next, ch 2, skip next, sc in next, rep from * across. Turn.
ROW 2: ch 5, *sc in next dc, ch 2**, dc in next sc, ch 2, rep from * ending last rep at **, dc in last sc. Turn.
ROW 3: ch 1, sc in first st, *ch 2, dc in next sc, ch 2, sc in next dc, rep from * across, placing last sc in 3rd ch of turning ch. Turn.
Rep rows 2-3 until sleeve measures 15(15, 15, 16, 16, 16.5) inches long. Fasten off leaving a long tail.
Now we make the ribbed cuff separately:
Ch 9
ROW 1: hdc in 2nd ch from hoo, hdc in each ch across. Turn.
ROW 2: ch 1, hdc BLO in each st across. Turn.
Repeat row 2 until you have a total of 20(21, 22, 23, 24, 24) rows completed. Fasten off leaving along tail.
With your yarn needle and hook, sew the ribbed cuff to the main part of the sleeve. You might have to stretch the cuff slightly.
SWEATER ASSEMBLY:
Lay the front panel on top of the back panel and with your yarn needle and long tails sew across the shoulders.
Next lay the entire piece out flat with the wrong side facing you. Grab a sleeve and mark the middle stitch (on the upper arm side of sleeve). Line that marker up with the shoulder seam and connect the two pieces. Using yarn needle and long tail sew sleeve to body of sweater. Rep for other sleeve.
Next fold sweater over and sew along the under edge of sleeves and down along edges of sweater.
Now turn sweater right side out.
Attach your yarn to the side of neck hole where the shoulder seam is.
ROUND 1: ch 1, sc all the way around the neckline. Slst to first sc to close the round.
ROUND 2: ch 4, hdc in 2nd ch from hook, hdc in next 2 chains, slst in each of the next 3 sc on the neckline, *turn your work, skip the 3 slsts, hdc BLO in next 3 hdc, ch 1, turn, hdc BLO in next 3 hdc, slst in each of the next 3 sc on the neckline, rep from * all the way around the entire neckline.
Fasten off leaving a long tail. Using your yarn needle sew the two ends together. Weave in any ends you might have and you are now finished your crochet spring mesh sweater.
Hi, why is the front panel 4 rows less? Thay part i dont understand, why.
4 rows less in Ribbing?
It’s not 4 rows less in the ribbing, it’s 4 rows less in the main body of the work. Your ribbing will be exactly the same as the back but you work the main panel until you have 4 rows less. Then follow the instructions for the final 4 rows which make the shoulder parts and then both pieces should be exactly the same length
Hope this helps
There isn’t a link to pin this. Help!
Do you have the pattern in a printable format?
I`ve already made this sweater and the harvest moon pocket shawl, they turned out just great. I love your patterns, you are very talented and generous.
This is a great pattern! I just finished making mine last night and I absolutely love it. I’m really tall and it was very easy to adapt the measurements so that the finished thing fit me really well.
Hallo ich bin gerade mit vorder und Rückseite gleich lang. Das mit den 4 Reihen weniger bei Front verstehe ich noch nicht so ganz. Wenn ich deinen Antwort Kommentar betrachte: sehe ich es richtig das in der Höhe von Bündchen beide gleich sein müssen. Aber in der gesamten breite links und rechts bei der Front vier x2 lm weniger gearbeitet werden?
Gruß Michaela
Great pattern. Easy to follow and super quick to crochet too. I used variegated yarn, a mix of cotton & acrylic and it looks really good. I made the cuff bands a bit smaller (tighter) and crocheted the sleeve upwards, which worked well for me.
So impressed am I that I’ve just started another for my daughter-in-law’s birthday!
Love your designs and patterns. Thank you so much. Linda
Hello,
Does the 22” in length include the band?
Thank you
Josephine Cendejas
so i just started making this for the 3rd size listed (50 rows and 77 sc), and im so confused how after the 2nd row (after the 77 sc step) i keep ending on a dc.. i don’t know how i got it wrong. im counting all my stitches correctly.