
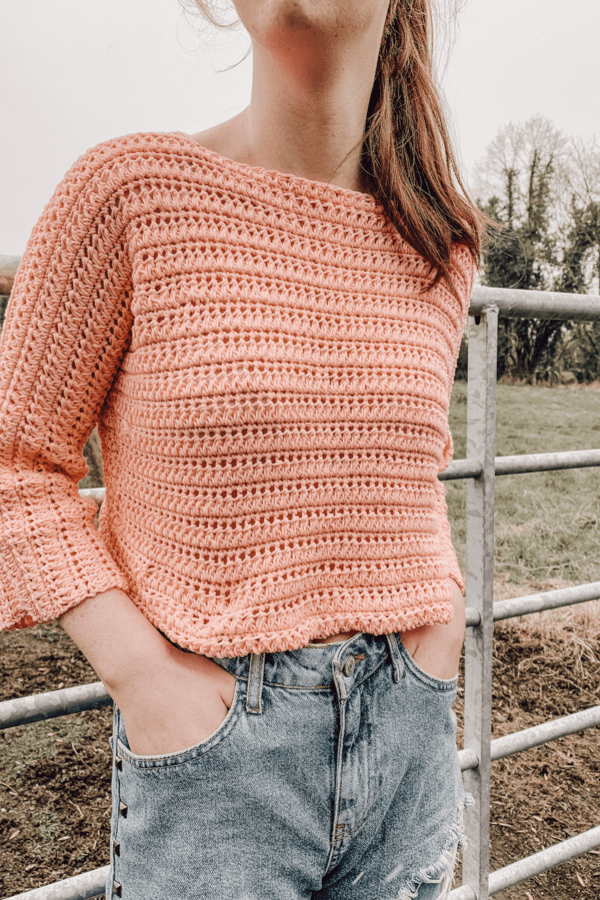
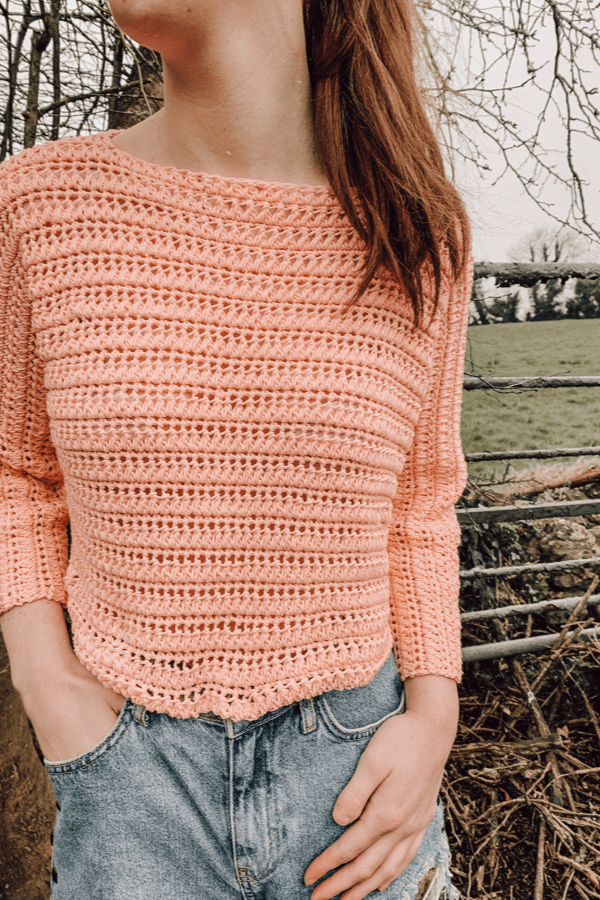
Learn to crochet this quick and easy crochet spring top. Light and airy, this crochet top will be perfect for you this spring.
This written pattern is accompanied with a free step by step video tutorial. Please scroll down to view.
So I realised it had been a while since I designed a little cropped moment. Yes, I know we are still in depths of winter, and yes many countries are buried in snow, but what’s the harm with getting your spring/summer wardrobe ready right now!
I wanted to create a top that was simple and quick with very little shaping involved. I call it the “Netflix and Chill Project”! Something that you can crochet without too much thinking involved while you watch your fave show. Perfect, right?
This crochet top is made from two identical T shaped pieces. Both the front and back panels are the exact same. Once your two pieces are crocheted we just seam them together and that’s it. Easy peasy!
MATERIALS
Yarn – Drops Cotton Light – weight 3/ light/ dk/ 8 ply
Approximately 1035(1050, 1150, 1180, 1230) yards.
6mm crochet hook
Measuring tape
Yarn needle
Scissors
Sizes
S(M, L, XL, 2XL)
Gauge = 13 sts x 11 rows = 4″ in cluster stitch.
MEASUREMENTS
To fit bust 32-34(36-38, 40-42, 44-46, 48-50) inches
Back width: 19( 21, 23, 25, 27) inches
Length: 16( 16.5, 17, 17.5, 18) inches
Sleeve length: 12( 12, 13, 13, 14) inches
STITCHES & ABBREVIATIONS
ch = chain
sc = single crochet
hdc = half double crochet
FC = forked cluster
st = stitch
rep = repeat
SPECIAL STITCH: Forked Cluster (FC): yo, insert hook in same sc as 2nd leg of last FC and draw up loop, yo, insert hook in next sc and draw up loop (5 loops on hook), (yo, draw through 3 loops) twice.
CROCHET SPRING TOP PATTERN
Front and Back Panels
Ch 65(71, 77, 84, 91)
Row 1: yo, insert hook into 4th ch from hook and draw up loop, yo, insert hook in next ch and draw up loop (5 loops on hook), (yo, draw through 3 loops) twice (your first FC made!), *yo, insert hook in same ch as 2nd leg of last FC and draw up loop, yo, insert hook in next ch and draw up loop. (yo, draw through 3 loops) twice, rep from * across, placing last leg in last ch, dc in same ch. Turn
Row 2: ch 1, sc in every st across, leaving the ch3 unworked. Turn.
Row 3: ch 3 (does not count as st here or throughout), FC over 1st and 2nd sc, FC across placing last leg in last sc, dc in same sc. Turn.
Row 4: ch 1, sc in each st across, leaving ch 3 unworked. Turn.
Rep rows 3-4 until piece measures 10(10.5, 11, 11.5, 12) inches long. This top is designed to be cropped. If you want it longer add more rows here but make sure your last row that you complete is a sc row.
At the end of your last sc row ch 36( 38, 40, 42, 44). Then ch 1, cut yarn and fasten off.
Now attach yarn to the end stitch on the other side and ch 36. Then ch 1 cut yarn and fasten off. Now flip your piece over.
Attach yarn to the very end ch on the right hand side.
Next row: ch 3, FC over 1st and 2nd ch, FC across entire top until you reach the end of the other ch 36, placing a dc in same ch as the last FC. Turn.
Next row: ch 1, sc in each st across, leaving the ch 3 unworked at the end. Turn.
Next row: ch 3, FC over 1st and 2nd sc, FC across placing last leg in last sc, dc in same sc. Turn
Rep last 2 rows until this section measures 6(6.5, 7, 7.5, 8.5) inches. You can add more rows here if you want a looser sleeve but make sure the last row you complete is a Fork Cluster row.
Shaping for shoulders:
Using stitch markers mark out the neckline. It should be the centre of the top and the opening should be 7.5(7.5, 8, 8, 8.5, 8.5) inches wide. So lay your panel out flat and mark out the centre amount of inches needed for your size. Make sure you have the same amount of stitches each side after your stitch markers.
Now continuing on from where your crochet hook is now:
ch 1 hdc across until you reach a stitch marker. Fasten off leaving long tail. Attach yarn to where the 2nd stitch marker is and ch 1, hdc across. Fasten off leaving long tail.
Now lay one panel on top of the other one. With yarn needle and tail sew across shoulders and up along the sides of top and the under edge of sleeves.
Weave in all ends and turn your top right side out. You are now finished.
Thank you for sharing this pattern. It’s lovely, and I look forward to making it.
Your designs are simply awesome. I was looking for some designs for so long and happens o find your website and that’s it. I have got some acrylic wool that is 12 ply and the recommended hook size is 5.5. most of your designs are 5mm and some in 6mm. How do I adapt these to 5.5 mm. Pls advise.
To make this longer, what do you suggest?
I can’t wait to start this. Thank you so much for sharing & explaining the fork stitch, I absolutely love the texture this adds to the sweater. ❤️🧶
This pattern looks very simple, yet beautiful
Add more rows before adding chains for sleeves.
Heather, Just add more rows I love this stitch an never heard of it but I will be adding more rows to make mine longer.
Kim