
Learn how to crochet this easy fall cardigan with pockets! This easy to follow crochet cardigan pattern is perfect for those who have just ventured into the crochet world and want to try something wearable.
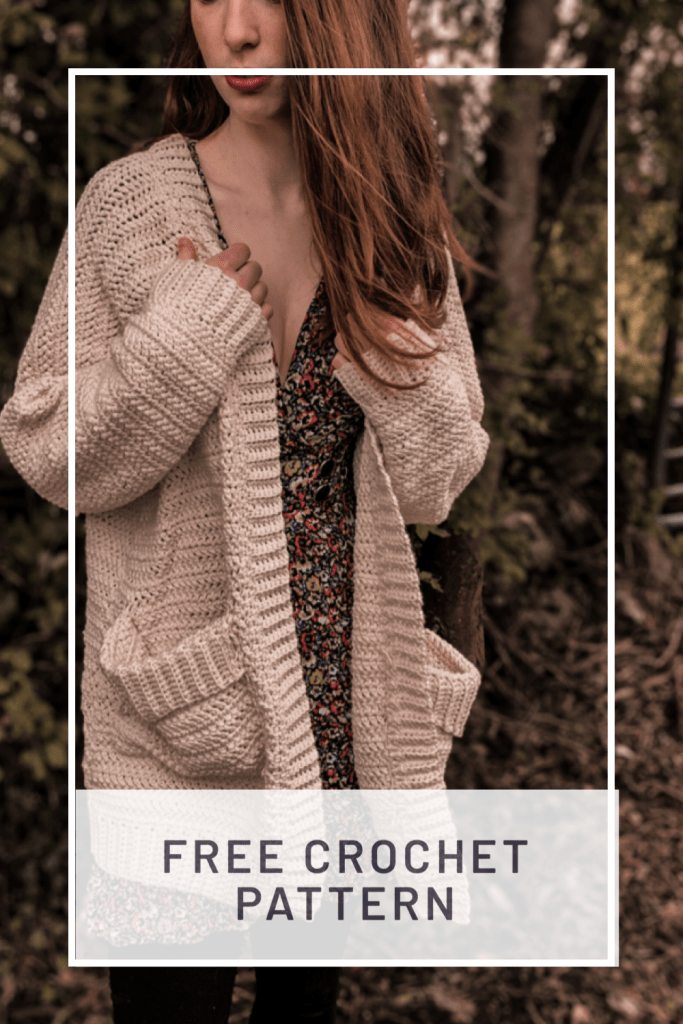
This free crochet cardigan is accompanied with a step by step video tutorial.
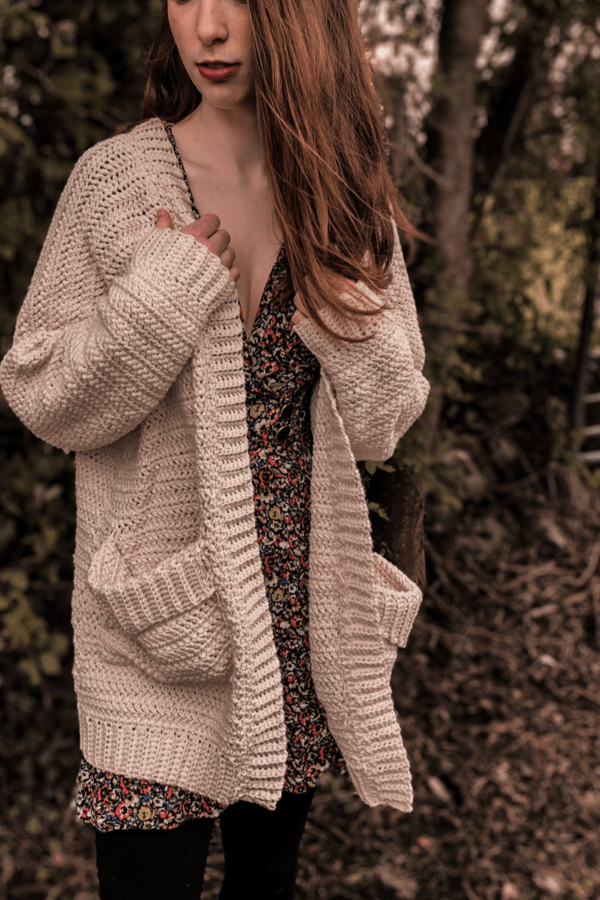
The Grainne [grawn-ye] crochet cardigan is the perfect Fall cardigan. I’ve had so many requests to design a cardigan with pockets, something cozy for breezy autumn days, yet something that is pretty easy to make.
This everyday crochet cardigan was design making five panels, the back, two fronts and two sleeves. All panels are worked from the bottom up beginning with a ribbed hemline or ribbed sleeve cuff.
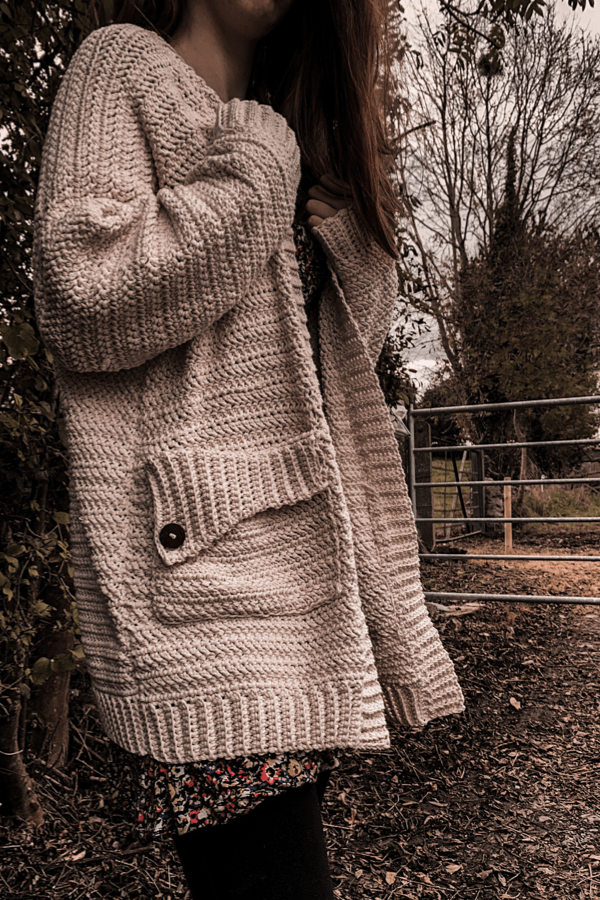
When all panels are made they are stitched together using your preferred stitch i.e. mattress stitch or whip stitch etc, then the ribbed neckline is created. Once the bulk of the cardigan is created we move onto making the super trendy pockets. Each pocket is created with a fold over ribbing and secured with a button. I get so many questions on how to make button holes, so I guess this pattern gives you some learning on how to do so.
This crochet cardigan is worked using the Herringbone Double Crochet stitch and gives the cardigan a beautiful look and feel.
YARN
This crochet cardigan pattern uses Drops Paris which is a weight 4 yarn and 100% cotton. However, any brand or fibre can be used to make this cardigan. I would recommend a wool blend yarn for something that’s needed in late autumn or winter. I would imagine it would feel like you are wearing a blanket all day as this cardigan is designed to be slightly oversized.
PIN ME FOR LATER!
NOTES:
- The sizing guide is S(M, L, XL, 2XL, 3XL)
- The turning chain 2 DOES count as a stitch.
- This pattern uses standard US crochet terms
- This cardigan is constructed using five panels, the back, two front panels and two sleeves. Each panel begins by working a ribbed edge. The ribbing is worked lengthways and the cardigan body and sleeves are worked directly along the long edge of the ribbing.
Level:
Easy.
MEASUREMENTS:
To fit bust 34(38, 42, 46, 50, 54)”
Back width: 22(24, 26, 28, 30, 32)”
Length: 26(26, 26.5, 26.5, 27, 27)”
Sleeve length: 17(17, 17, 18, 18, 18)”
MATERIALS:
Yarn – Drops Paris – weight 4/medium/aran/10 ply
Approximately 750(815, 890, 955, 1020, 1090)g or 1740(1890, 2060, 2210, 2370, 2530)yds
5mm crochet hook
Yarn needle
Measuring tape
2-3 stitch markers
2 large buttons
STITCHES & ABBREVIATIONS:
Ch = chain
Sc. =. single crochet
Hbdc. = herringbone double crochet
Slst = slip stitch
BLO = back loop only
Sc2tog = single crochet 2 together.
Gauge: 13 hbdc in 4″
Herringbone double crochet (hbdc): yo, insert hook into designated stitch, yo, draw through the stitch and first loop on hook, yo and go through first loop only making a chain stitch, yo and draw through remaining loops on hook.
The Grainne Cardigan Pattern
BACK PANEL
Ch 10
Row 1: sc in 2nd ch from hook, sc to end. Turn.
Row 2: Ch 1, sc in BLO across. Turn.
Repeat row 2 until you have 71(79, 85, 91, 97, 103) row in total. Turn
Now working along the long edge of the ribbing:
Next row: Ch 1, sc 71(79, 85, 91, 97, 103) sts across. Turn.
Next row: Ch 2 (counts as first dc here and throughout), hbdc in each st across. Turn.
Repeat last row for a further 53(53, 53, 55, 55, 55) rows. Add more rows here if you want the cardigan longer. Fasten off.
FRONT PANELS: make 2.
Ch 10
Row 1: sc in 2nd ch from hook, sc in each st across. Turn
Row 2: Ch 1, sc in BLO in each stitch across. Turn.
Repeat row 2 until you have 23(27, 30, 33, 36, 39) rows in total. Turn.
Now working along the long edge of the ribbing :
Next row: Ch 1, sc 23(27, 30, 33, 36, 39) sts across. Turn.
Next row: Ch 2 (counts as first dc), hbdc in each st across. Turn.
Repeat last row until you have a total of 53(53, 53, 55, 55, 55) rows. Add more rows here if you want the cardigan longer. Fasten off leaving a long tail.
SLEEVES: make 2.
Ch 10
Row 1: sc in 2nd ch from hook, sc across. Turn.
Row 2: Ch 1, sc in BLO in each st across. Turn.
Repeat row 2 until you have a total of 29(29, 29, 31, 31, 31) rows.
Now working along the long edge of the ribbing:
Next row: Ch 1, sc 29(29, 29, 31, 31, 31) sts across. Turn.
Next row: Ch 2, hbdc in same st as ch2 (increase made), hbdc in each st across placing 2hbdc in last st. Turn.
Next row: Ch 2, hbdc in next st, hbdc in each st to end. Turn.
Next row: Ch 2, hbdc in same st as ch 2 (increase made) hbdc in each st across placing 2hbdc in last st. Turn.
Repeat last 2 rows until you have 45(49, 53, 55, 59, 61) sts. Turn.
Next row: Ch 2, hbdc in next st and in each st across. Turn. Repeat this row until entire sleeve measures 17(17, 17, 18, 18, 18) inches long. Fasten off leaving a long tail.
POCKETS: make 2
Ch 19
Row 1: sc in 2nd ch from hook, sc in each st across. Turn.
Row 2: Ch 1, sc in BLO across until 2 sts remain, sc2tog. Turn.
Row 3: Ch 1, sc in BLO in next 3 sts, ch 2, skip 2 sts, sc in BLO in remaining sts. Turn.
Row 4: Ch 1, sc in BLO in next 12 sts, 2 sc in ch2-sp, sc in BLO in next st, sc2tog. Turn.
Row 5: Ch 1, sc in BLO across until 2 sts remain, sc2tog. Turn.
Repeat rows 5-6 until 9 sts remain. Turn.
Next row: Ch 1, sc in BLO across to end of row. Turn. Repeat this row a further 7 times.
Now working along the straight edge of the ribbing:
Next row: Ch 1, sc 29 sts across. Turn.
Next row: Ch 2, hbdc in next st and in each st across. Turn.
Repeat last row for a further 13 more rows. Add more rows here if you want deeper pockets. Fasten off leaving a long tail.
ASSEMBLY:
Lay the back panel flat on a hard surface. Place the two front panels on top of the back panel and with your yarn needle stitch the front panels to the back panel.
Now lay the entire piece out flat. Take a sleeve and place a stitch marker into the middle stitch. Line that marker up with the shoulder seam and attach the marker to shoulder seam. With yarn needle sew sleeve to body. Repeat for the other sleeve.
Fold cardigan over and sew along the underneath of sleeve and down along the side of the cardigan. Repeat on the other side. Weave in all ends.
Now turn your cardigan right side out. Attach your yarn to the bottom inner corner on the right side.
Ch 8, sc in 2nd ch from hook, sc in next 6 chains, slip stitch, to next 2 sc on the main body of the cardigan. Turn.
Next row: sc in BLO in next 7 sc, being careful not to work into the 2 slipped sts. Turn.
Next row: Ch 1, sc in BLO in next 7 sc, slst in next 2 sc on the main body of cardigan, turn.
Repeat last two rows around the entire inner edge of the cardigan until you reach the other side. Fasten off and weave in all ends.
Now take a pocket and fold over the ribbed edge. Mark out where you think the button should be and attach button to pocket. Sew the pocket to your cardigan. Repeat for the other pocket.
You are now finished your cardigan. Enjoy.
This is Beautiful & easy for me to Crochet, & thank you for sharing..
I wish you had the patterns for sale without the ads? I would happily pay to download instead of ads, wasted paper, ink, time wasted cut & pasting. Your patterns are beautiful and worth it.
Hi there. I’m currently hoping to have them for sale very very soon.
Is this available in print form or can this be printed from here?
Lovely cardigan, be on my to do list.
Just can’t keep up with all your lovely patterns, but trying hard. Thank you Carrie for another lovely pattern.
Another ripper of a pattern, Carrie ! – the crocheting world has good reason to be grateful to you.
Once question: I’m a big old lady, and have measured my bust as being 59″ (it’s me back that’s fat, I don’t have big boobs !). I believe there to be many like me ..
And yet I’m always outside provided measurements. Sighhhh ..
Is it just a matter of common sense for increasing to my measurement ?
Hi, love this pattern, could I please ask what colour you used?
Love your patterns, absolutely fabulous, really appreciate you sharing them. . I would like the neckline to be nearer to my neck do you have any tips?
Thank you very much, I cannot wait to crochet this. I love your dress you are wearing in the pics. Did you sew that?
Hi, Carrie! Can I ask the total number of yarns you spend in this cardigan?
Trying this gorgeous pattern out now… 2 questions… #1 Did you block your sweater at all? I know when I do the rubbing then work along the long side it can make the ribbing a little a crunchy (if that makes sense) just curious about what you did for the pictured sweater.
#2 Do you have an suggestions for adding a hood??
Thanks in advance 😬😉
If I see the front panels to the back panel then where is the opening for the sleeves?
I’m just making my pockets – after row 5 I’m told to repeat “rows 5 – 6” until 9 sts remain. But there are only 5 rows… Do you mean “repeat rows 4 – 5”? Thank you!
I want to make a medium size with is pattern and I don’t see anything that tells you how many chains I have to do for a size medium, I’ve tried to do the large it was to big
For a size medium how many chains I have to make
Hey, there! I had the exact same problem… I think row 5 is a sc back loop only row all the way across and then row 6 is the decrease row, I went to her harvest moon shawl pattern since the pockets look similar and just used the pocket pattern for it for this cardigan, although I did hbdc instead of hdc for the body of the pocket, hope this helps 🙂
If you read carefully all the sizes begin with chain 10, because the cardigan is made from the ribbing up. Just follow instructions for your size: small is outside of the parentheses and all the other sizes are inside the parentheses. I hope this helps.
. You don’t make a starting chain because it’s worked on top of the ribbing. It’s says for size M back pan do 79 rows of ribbing and for the front panels it’s 27 rows of ribbing
It’s made with a ch10 width for all sizes. For a M you SC 79 rows. The M size is reference by the first number in the ().
ie S(M,L,XL,2X,3X)
Really cute sweater, but I’m having trouble with my sleeves being tighter fitting, not loose like the picture. I even went a larger needle, and still didn’t come out like yours.
I want to start off by saying thank you for this pattern, it’s working up lovely! I can see myself making many more in all colours!! I just wanted to let you know that for the pockets, you’ve put row 5 instructions then said repeat row 5 – 6 without row 6 instructions, i managed to watch the YouTube video to get the info needed, also when working along straight edge in written pattern you put 29sc across but in video you say to do 25sc across. I look forward to having a ago at some of your other creations 🙂
Approximately what size buttons did you use? Or what sizes would work for this?
Could you give the dimensions of each panel, please? My daughter has requested a yarn that is slightly smaller so I need to rely on measurements rather than stitches. Thank you!
Do you have pictures of the progress of this project?