
I am so excited to introduce my latest design, a stunning, texture rich cardigan. The Tully Cardigan boasts and exciting centre back detail that is encapsulated with a pretty knit-like stitch. This simple knit-like stitch follows through to the front panels and of course the sleeves. Please don’t be fooled into thinking this piece is way beyond your crochet capabilities. Each stitch used throughout is simple and basic, making this pattern perfect for someone who wants to explore their newly found creativity.

To make the process of crocheting this cardigan go smoothly for you, I have included a video tutorial on my Youtube channel that walks you through everything.
Scroll down for the free crochet cardigan pattern or purchase the ad-free printable PDF here.
CARDIGAN CONSTRUCTION
The Tully Cardigan is worked from the centre outwards. The centre section of the back panel is worked first. Think of it as one long rectangle, that once finished will have rows upon rows of a knit-like stitch crocheted along the two long edges of the rectangle, building up the width of the back panel.
Each of the front panels will be constructed in the same manner but this time you will only be crocheting along one of the long edges of the rectangle.
The sleeves will be worked sideways using the special knit-like stitch and a simple slip stitch for the cuff.
Once all pieces are worked up and sewn together you will finally crochet the collar and hemline separately using a slip stitch, and sewing to their respective edges.
LOOKING FOR MORE FREE PATTERNS?
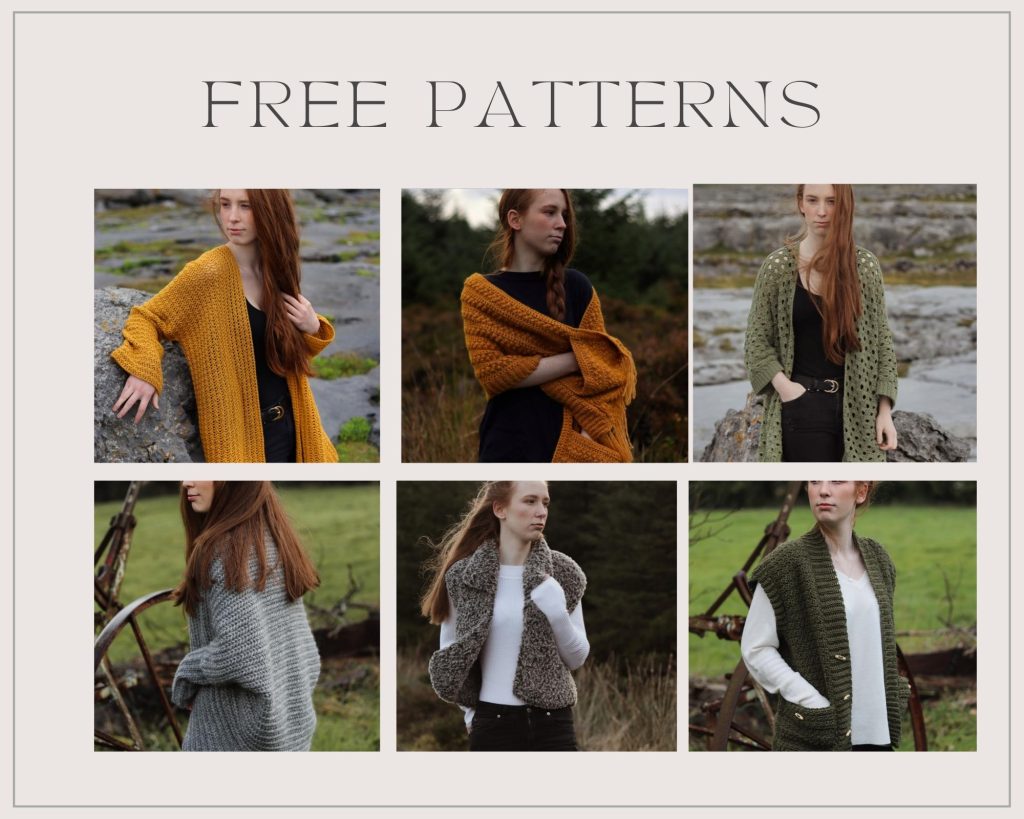
- Ethniu Cardigan 2. Harvest Moon Pocket Shawl 3. Summer Breeze Cardigan 4. Geimhreadh Cardigan 5. Rugged Landscapes Gilet Easy Crochet Vest
NOTES
The sizing in this patterns follows size S(M, L, XL, 2XL, 3XL).
The ch 1 at the beginning of rows does not count as a stitch
The ch 2 at the beginning of rows does count as a stitch.
Total number of stitches are indicated between []
This pattern uses US crochet terms.
To make your cardigan shorter/longer, do less/more repeats of the centre back section, add the total number of rows you have done, and crochet that number of stitches down along the sides of the back centre section. The number of stitches you should have must be an even number.

MATERIALS
Drops Lima, 65% wool, 35% alpaca or any Dk/weight 3/8 ply yarn.
50g/100m/109yds
Approximately 16(17, 18, 18, 19, 19) balls
4.5mm/US G-7 crochet hook
Measuring tape.
Yarn needle
Locking stitch markers (optional)
STITCHES & ABBREVIATIONS
Ch = chain
sl st = slip stitch
Sc = single crochet
Hdc = half double crochet
Dc = double crochet
HdcBLO = half double crochet back loop only
SlstBLO = slip stitch back loop only
PST = popcorn stitch
FPDC = front post double crochet
FPTC = front post treble crochet
St/s = stitch/es
Ch1-sp = chain one space
Rep = repeat
SPECIAL STITCH
Popcorn stitch (PST): work 5 dc in designated st, remove hook, insert hook into 1st dc you made from front to back and also into the working loop, pull top loop through bottom loop on hook.
GAUGE 18 sts and 20 rows worked in “knit” stitch.
Knit stitch refers: Make a swatch of 25 chains.
Row 1: Ch 1, hdc in 2nd ch from hook, sl st in next ch, *hdc in next st, slst in the next, rep from * across, turn
Row 2: Ch 1, *slstBLO in next st, hdcBLO in the next, rep from * across, turn.
Row 3: Ch 1, *hdcBLO in next st, slstBLO in the next, rep from * across, turn.
SIZING & MEASUREMENTS
The Tully Cardigan follows size S(M, L, XL, 2XL, 3XL)
Finished bust: 44(46, 48, 50, 52, 57)”
Length: 22(22, 22, 22, 22, 22)”.
CROCHET TULLY CARDIGAN PATTERN
CENTRE BACK SECTION
Ch 32
Row 1: Sc in 2nd ch from hook and in each ch across, turn. [31 sc]
Row 2: Ch 2, dc in each st across, turn.
Row 3: Ch 1, sc 2, FPDC 2, sc 5, ch 1, skip 1, sc 5, PST in next st, sc 5, ch 1, skip 1, sc 5, FPDC, sc 2, turn.
Row 4: Ch 1, sc in each st across, turn.
Row 5: Ch 1, sc 2, FPDC 2, sc 3, FPTC in ch1-sp, skip st directly behind, sc in next st, ch 1, skip 1, sc in next st, skip st directly behind, FPTC in same ch1-sp, skip st directly behind, sc 2, PST in next st, sc in next st, PST in next, sc 2, FPTC in next ch1-sp, skip st directly behind,sc in next st, ch 1, skip 1, sc in next st, FPTC in same ch1-sp, skip st directly behind, sc 3, FPDC 2, sc 2, turn.
Row 6: Ch 1, sc in each st across, turn.
Row 7: Ch 1, sc 2, FPDC 2, sc 3, FPTC in next ch1-sp, skip st directly behind, sc in next st, ch 1, skip 1, sc in next st, FPTC in same ch1-sp, skip st directly behind, sc in next st, PST in the next st, sc in the next, PST in the next, sc in next, PST in the next, sc in the next, FPTC in next ch1-sp, skip st directly behind, sc in next st, ch 1, skip 1, sc in the next st, FPTC in same ch1-sp, skip st directly behind, sc 3, FPDC 2, sc 2, turn.
Row 8: Ch 1, sc in each st across, turn.
Row 9: Rep Row 5.
Row 10: Ch 1, sc in each st across, turn.
Row 11: Ch 1, sc 2, FPDC 2, sc 3, FPTC in next ch1-sp, skip st directly behind, sc in next st, ch 1, skip 1, sc in next st, FPTC in same ch1-sp, skip st directly behind, sc 3, PST in next st, sc 3, FPTC in next ch1-sp, skip st directly behind, sc in next st, ch 1, skip 1, sc in next st, FPTC in same ch1-sp, skip st directly behind, sc 3, FPDC 2, sc 2, turn.
Row 12: Ch 1, sc in each st across, turn.
Row 13: Ch 1, sc 2, FPDC 2, sc 3, FPTC in next ch1-sp, skip st directly behind, sc in next st, ch 1, skip 1, sc in next st, FPTC in same ch1-sp, skip st directly behind, sc 7, FPTC in next ch1-sp, skip st directly behind, sc in next st, ch 1, skip 1, sc in next st, FPTC in same ch1-sp, skip st directly behind, sc 3, FPDC 2, sc 2, turn.
Row 14: Ch 1, sc in each st across, turn.
Row 15: Rep Row 13.
Row 16: Ch 1, sc in each st across, turn.
Row 17: Rep Row 13.
Row 18: Ch 1, sc in each st across, turn.
Row 19: Rep Row 11.
Row 20: Ch 1, sc in each st across, turn.
Row 21: Rep Row 5.
Row 22: Ch 1, sc in each st across, turn.
Row 23: Rep Row 7.
Row 24: Ch 1, sc in each st across, turn.
Row 25: Rep Row 5.
Row 26: Ch 1, sc in each st across, turn.
Row 27: Rep Row 11.
Row 28: Ch 1, sc in each st across, turn.
Rep Rows 13-28 4 more times.
Then rep Rows 13-18 one more time. Do not fasten off. We will now extend one side of the back panel.
You should now have 98 rows. This piece should roughly measure 20″ long. Now is a good time to block it. I pinned it to a blocking mat to 20″ and gave it a quick stream. Let it dry before continuing onto the next section.
To add more length to your cardigan you can do 5 reps of rows 13-18, then rep rows 13-18 one more time. Count the number of rows you have (which should be an even number) and do that same number in sc along the long edge of section 1. Rep same for section 2. Also do that same number of rows for the front panel.
SECTION 2 OF BACK PANEL
Row 1: Ch 1, work 98 sc down along the long side of the centre back section, turn.
Row 2: Ch 1, *hdcBLO in next, slstBLO in next st, rep from * across, turn.
Row 3: Ch 1, *slstBLO in next, hdcBLO in the next st, rep from * across, turn.
Rep Rows 2-3 until this section 2 measures 7.5(8, 8.5, 9, 9.5, 10.75)” wide. Fasten off.
SECTION 3 OF BACK PANEL
Join yarn to the other corner with a sl st.
Row 1: Ch 1, work 98 sc along the long edge of the centre back section, turn.
Row 2: Ch 1, *hdcBLO in next st, slstBLO in the next, rep from * across, turn.
Row 3: Ch 1, *slstBLO in the next st, hdcBLO in the next, rep from * across, turn.
Rep Rows 2-3 until this section measures 7.5(8, 8.5, 9, 9.5, 10.75)” wide. Fasten off.
Now is a good time to return to your blocking mat and give your piece a steam to even everything out. You may find there is still a bit of unevenness between the centre back section compared to the two side sections. This is perfectly normal and will be fine later when everything is seamed together.
FRONT PANEL (MAKE 2)
SECTION 1
Ch 24
Row 1: Sc in 2nd ch from hook and in each ch across, turn. [23 sc]
Row 2: Ch 2, dc in each st across, turn.
Row 3: Ch 1, sc 2, FPDC 2, sc 3, ch 1, skip 1, sc 3, PST in next st, sc 3, ch 1, skip 1, sc 3, FPDC 2, sc 2, turn.
Row 4: Ch 1, sc in each st across, turn.
Row 5: Ch 1, sc 2, FPDC 2, sc in next st, FPTC in next ch1-sp, skip st directly behind, sc in next st, ch 1, skip 1, sc in next st, FPTC in same ch1-sp, skip st directly behind, sc 3, FPTC in next ch1-sp, skip st directly behind, sc in next st, ch 1, skip 1, sc in next st, FPTC in same ch1-sp, skip st directly behind, sc in next st, FPDC 2, sc 2, turn.
Row 6: Ch 1, sc in each st across, turn.
Row 7: Rep Row 5.
Row 8: Ch 1, sc in each st across, turn.
Row 9: Ch 1, sc 2, FPDC 2, sc in next st, FPTC in next ch1-sp, skip st directly behind, sc in next st, ch 1, skip 1, sc in next st, FPTC in same ch1-sp, skip st directly behind, sc in next st, PST in next st, sc in next st, FPTC in next st, skip st directly behind, sc in next st, ch 1, skip 1, sc in next st, FPTC in same ch1-sp, skip st directly behind, sc in next st, FPDC 2, sc 2, turn.
Row 10: Ch 1, sc in each st across, turn.
Row 11: Rep Row 5.
Row 12: Ch 1, sc in each st across, turn.
Row 13: Rep Row 5.
Row 14: Ch 1, sc in each st across, turn.
Rep Row 9-14 a further 14 more times. Do not fasten off. We will now work section 2 of the front panel.
SECTION 2 FRONT PANEL
Row 1: Ch 1, work 98 sc along the long edge of section 1, turn.
Row 2: Ch 1, *hdcBLO in next st, slstBLO in the next, rep from * across, turn.
Row 3: Ch 1, *slstBLO in the next st, hdcBLO in the next, rep from * across, turn.
Rep Rows 2-3 until section 1 and 2 have a combined width of 8.5(9, 9.5, 10, 10.5, 11.75)”. Fasten off.
When completing the second front panel you will rep this entire process, however you will have to join your yarn to the opposite corner (on the other long edge) and work your 98 sc along the opposite long edge of section 1.
SLEEVES (MAKE 2)
Ch 81
Row 1: Hdc in 2nd ch from hook, sl st in the next st, *hdc in the next, sl st in the next st, rep from * across until 8 sts rem, 8 sl st, turn.
Row 2: Ch 1, slstBLO 8, *slstBLO in next st, hdcBLO in the next, rep from * across, turn.
Row 3: Ch 1, *hdcBLO in next st, slstBLO in the next, rep from * across until 8 sts rem, 8 slstBLO, turn.
Rep Rows 2-3 until the main body of the sleeve measures 15(16, 16, 17, 17, 18)” wide. Fasten off.
Fold your sleeve in half lengthways and sew edges together.
ASSEMBLY
Lay the two front panels on top of the back panel, right sides facing each other. Make sure the V’s on all panels are facing upwards. I made the mistake of seaming my back panel the wrong way round, but we will keep that little secret between us!! Using your yarn needle and some yarn sew across the shoulders with a whipstitch or your preferred way of seaming. Fasten off.
Rejoin yarn to one of the bottom corners and seam up along the side of the cardigan leaving 7.5(8, 8, 8.5, 8.5, 9)” of an opening for the armhole. Repeat on the other side.
BOTTOM HEMLINE
Ch 10
Row 1: Sl st in 2nd ch from hook and in each ch across, turn. [9 sl sts]
Row 2: Ch 1, slstBLO in each st across, turn.
Rep Row 2 until the ribbing is long enough to go around the entire bottom edge of the cardigan. Fasten off. Using your yarn needle and some yarn sew this ribbed piece to the bottom edge of the cardigan. You might find it easier to use some locking stitch markers to hold the ribbed hem in place while sewing.
COLLAR
Ch 10
Row 1: Sl st in 2nd ch from hook and in each ch across, turn. [9 sl sts]
Row 2: Ch 1, slstBLO in each st across, turn.
Rep Row 2 until the ribbed collar is long enough to go around the entire inner edge of the cardigan. Using your yarn needle and some yarn sew the ribbed piece in place. Again you may find it easier to use locking stitch markers to hold it in place while you are sewing.
Weave in all ends.
FINISHING
For a professional finish and to prevent any curling it is highly recommended to lightly steam block your finished piece.
ENJOY X