
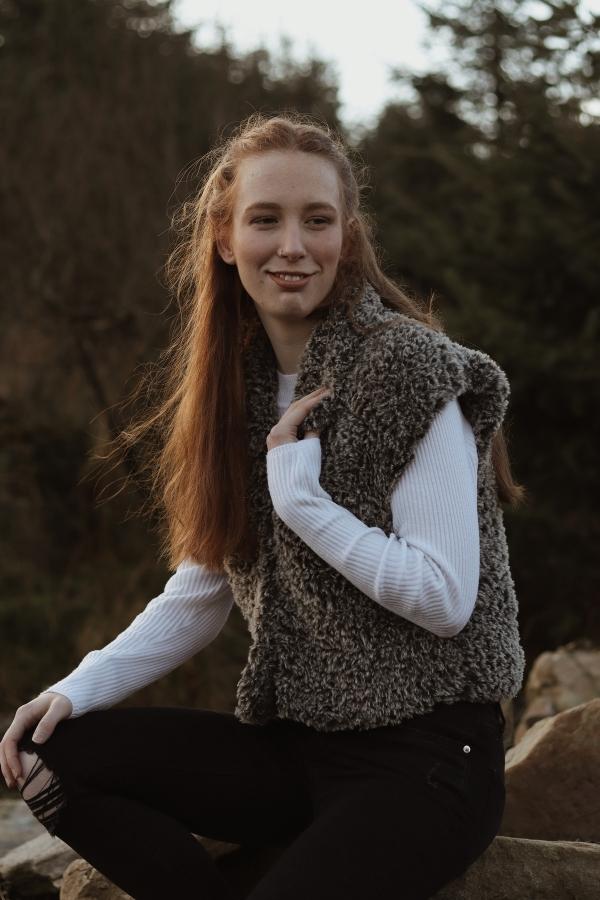
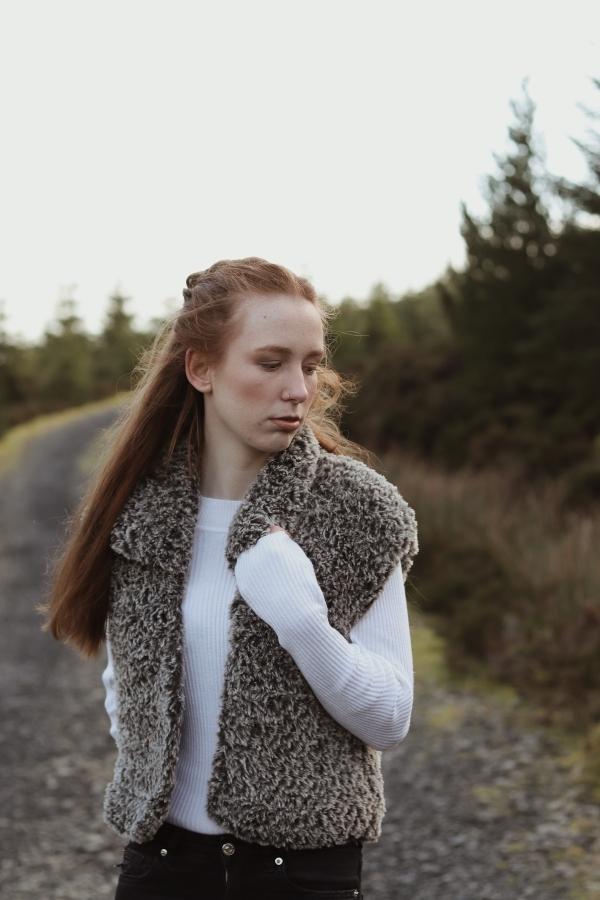
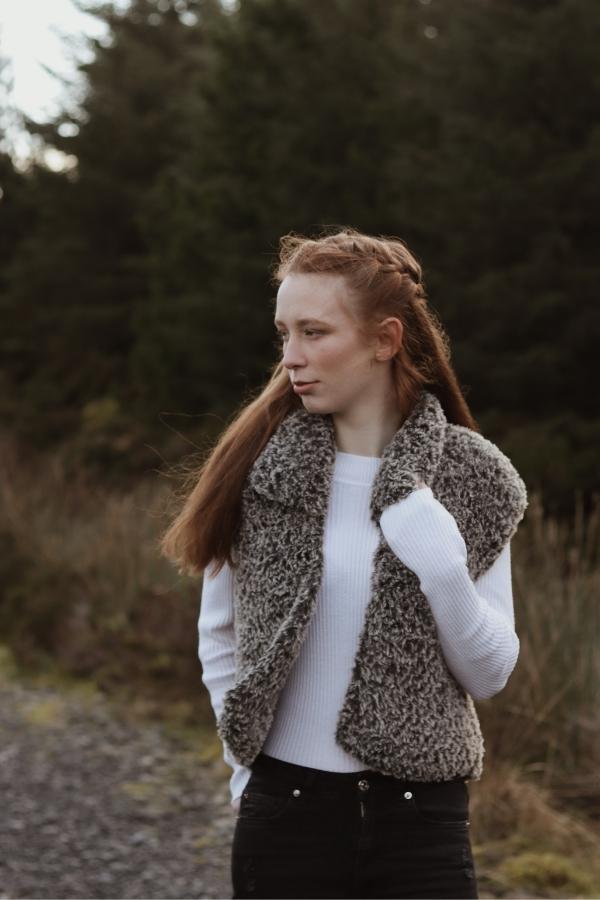
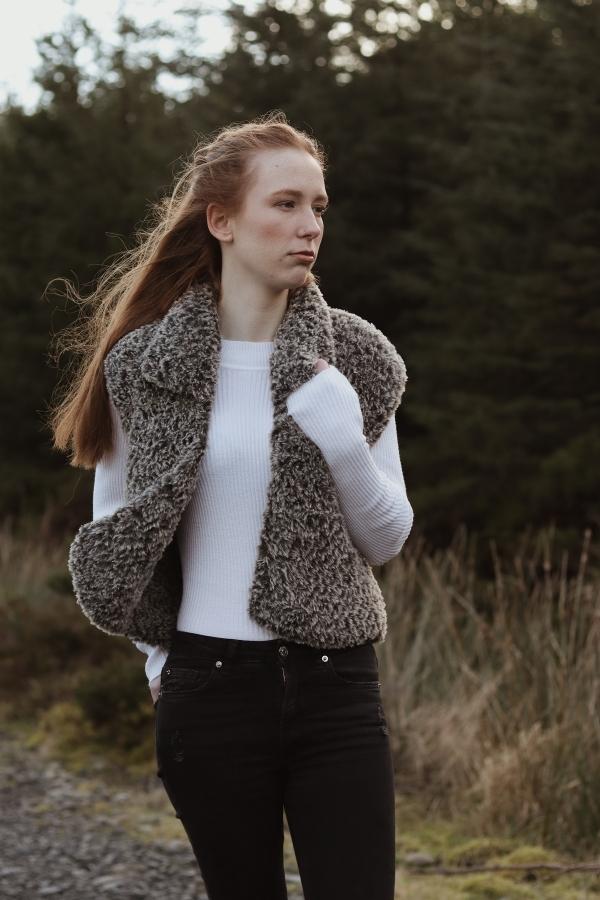
The Rugged Landscape Gilet will be one of your favorite pieces in your wardrobe this winter. Made from a luxurious faux fur yarn, this stylish crochet gilet is a quick and easy piece that’s perfect for the chilly months ahead.
If you would prefer the ad free and printable pattern you can find it here.
This post contains affiliate links for which I make a small commission. It is no cost to you whatsoever but it does help me out
Fall has finally arrived and that means cozy sweater making is abundant in my household. I think it’s no secret to anyone that this cozy season is my favorite of the year. There’s just something about curling up in front of the fire with a hook and yarn, am I right?
If this is your first time using faux fur yarn you might feel slightly intimidated at first. Due to the fluffy nature of the yarn you will not be able to see any of your stitches so my best advice to anyone is to feel your stitches. Since the gilet uses only half double crochets you will be able to feel between each stitch and the tops of every stitch. I promise you that you will find it easier after a few rows. Another piece of advice would be to keep track of your stitch count at the end of every row, that way you won’t be missing or adding any unwanted stitches.
CONSTRUCTION
The Rugged Landscape Gilet is worked up using four different pieces, the back panel, two front panels and finally the collar. The back and two front panels are worked up first and then seamed together along the shoulders and up along the sides leaving openings for the arms. Next, the collar is worked flat and finally seamed to the top of the gilet.
Each piece is crocheted from the bottom up and worked up entirely using the half double crochet stitch. There is no shaping whatsoever throughout the piece, making this a quick and easy project, perfect to work up while cozying up in front of the fire!
YARN
The Rugged Landscape Gilet uses Sirdar Alpine Faux Fur in the color Brindle. When choosing my shade I wanted something that reminded me of the wild or something that resembled natural animal fur. I think Brindle reminds me of the coat of a wolf and I get cool Viking vibes from this colorway! With ten shades in the line there is something to suit everyone.
Sirdar Alpine Faux Fur is super chunky and 100% polyester. One of the best things about this yarn is that you can machine wash on a cool cycle and even throw it into the tumble dryer on the cool setting. perfect, right?
SIZING
S(M, L, XL, 2XL, 3XL)
Finished bust: 38(42, 46, 50, 54, 58) inches (96[106, 116, 127, 137, 147]) cm
For reference, the model is 5 feet 8 inches (173 cm) tall with a 34 inch (86 cm) bust and wearing a size small with a finished garment bust measurement of 38 inches (96 cm).
MATERIALS
YARN:
Super Bulky, weight 6, Sirdar Alpine Faux Fur (100% polyester), 36 yds (33 m) per 50 g skein.
Yardage/Meterage
324(342, 360, 378, 396, 414)yds / or 297(314, 330, 347, 363, 380)m
Shown in: Brindle colorway.
A good substitute for Sirdar Alpine is Knit Picks Fable Fur. If you are looking for a gilet without the fur look, any super bulky or weight 6 yarn will work as long as it matches the gauge.
Hook
Size U.S. M/13 (9 mm) or size needed to obtain gauge.
Notions
Tapestry needle, several locking stitch markers to help with seaming.
Gauge
7 sts x 4 rows = 4 inches (10 cm) in half double crochet
Abbreviations
Written in U.S. crochet terms
ch: chain
hdc: half double crochet
rep: repeat
sl st: slip stitch
st(s): stitch(es)
RUGGED LANDSCAPES GILET PATTERN
Back Panel
Ch 35( 37, 41, 45, 49, 51).
Row 1: Hdc in 2nd ch from hook and in each ch across, turn. [ 34(36, 40, 44, 48, 50) sts]
Row 2: Ch 1 (does not count as a st here and throughout), hdc in each hdc across, turn.
Rep Row 2 until piece measures 12(12.5, 13, 13.5, 14, 14.5)” or 30(32, 33, 34, 35, 37) cm. You can add more length now for a longer gilet if needed.
Armhole: Sl st in next 2 hdc, hdc across leaving last 2 hdc unworked, turn. [30(32, 36, 40, 44, 46) sts]
Next row: Ch 1, hdc in each st across, turn. Work until the armhole measures 8(8.5, 9, 9.5, 10, 10.5)” or 20(21, 23, 24, 25, 27) cm. Fasten off and weave in all ends.
Front Panel (Make 2)
Ch 18(19, 21, 23, 25, 26).
Row 1: Hdc in 2nd ch from hook and in each ch across, turn. [17(18, 20, 22, 24, 25) sts]
Row 2: Ch 1, hdc in each hdc across. Turn.
Rep row 2 until piece measures 12(12.5, 13, 13.5, 14, 14.5)” or 30(32, 33, 34, 35, 37) cm
Armhole: Sl st in next 2 hdc, hdc across leaving last 2 hdc unworked, turn [13(14, 16, 18, 20, 21) sts]
Next row: Ch 1, hdc in each st across, turn. Work until the armhole measures 8(8.5, 9, 9.5, 10, 10.5) “ or 20(21, 23, 24, 25, 27) cm. Fasten off leaving a long tail for seaming the shoulders.
Collar
Ch 38(38, 40, 40, 40, 42)
Row 1: Hdc in 2nd ch from hook and in each ch across, turn. [37(37, 39, 39, 39) sts]
Row 2: Ch 1, hdc in each hdc across, turn.
Rep row 2 until you have completed 7(7, 7, 8, 8, 8) rows. Fasten off leaving a 16- inch (41- cm) tail.
Assembly
Lay the front panels on top of the back panel. You can use your interlocking stitch markers to hold the pieces together. Whip stitch across the shoulders and up along the sides making sure to leave the armholes open.
Turn the sweater right side out so the seams are on the inside. Fold the collar in half lengthwise and attach the foundation center edge to the center of the neckline with an interlocking stitch marker. Space out the collar evenly and secure with several interlocking stitch markers and whip stitch the collar to the neckline.
Weave in any remaining ends.
Can’t wait to make this! Love, love, love it, Carrie!! Thank you for sharing ❤️
HI Carrie Love your patterns …. love em ,,,, do you have a video for Ruggered ued landscape Gilet ?