
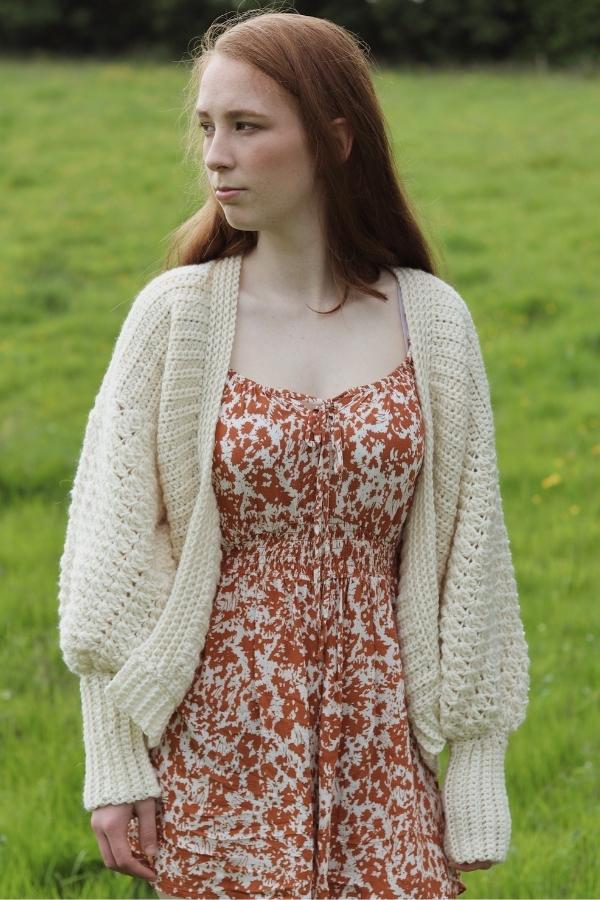
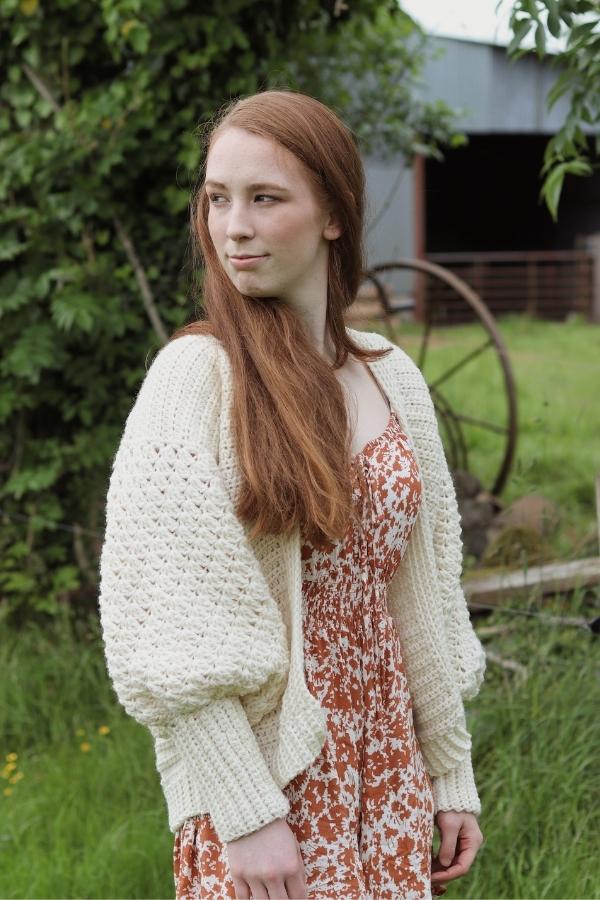
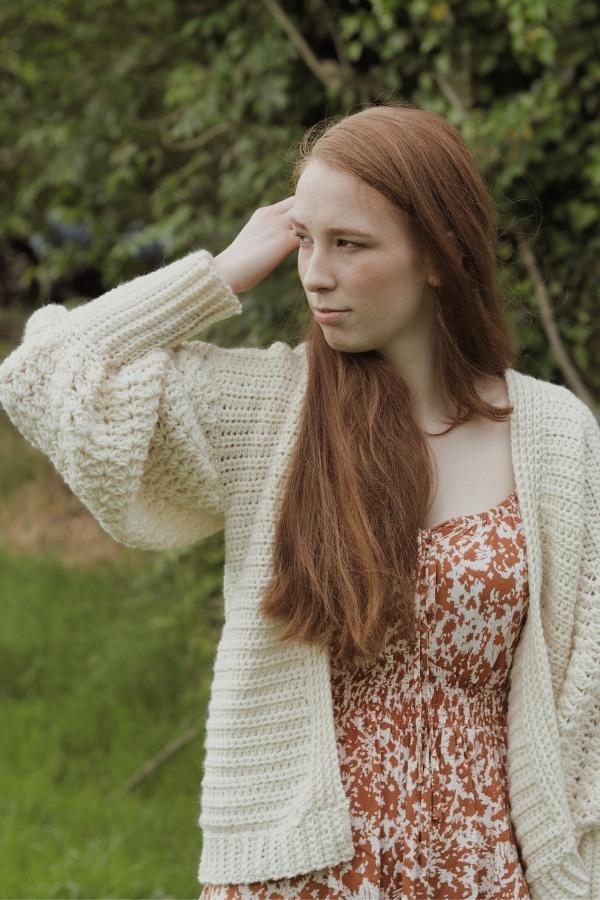
Learn to crochet this beautiful crochet balloon sleeve cardigan. Featuring oversized sleeves with beautiful texture through out and a more simple yet elegant cardigan body, this piece is perfect to wear regardless of the season.
This free crochet cardigan pattern is accompanied with a step-by-step video tutorial. You can scroll down this page to view it.
If you prefer an ad free pattern you can purchase the pattern here
One of the most requested patterns I receive is for me to create a crochet balloon sleeve cardigan. So when I started to design this piece I wanted something that was completely versatile. The beauty of this cardigan is that it can be worn with anything, be that a simple pair of jeans, thrown over a dress or layered over a tee or light sweater.
CONSTRUCTION
This crochet balloon sleeve cardigan is made by crocheting seven separate pieces; a back panel, two front panels, two sleeves and two sleeve cuffs. The back and front panels are worked from the bottom up beginning with the ribbed hem. The main body of both sleeves are worked in simple stitches and crocheted in the round. Next we will crochet the ribbed sleeve cuffs that are later stitched to the main body of the sleeves. Once all pieces are assembled and stitched together we will crochet the collar using a few rows of simple single crochet.
The bulk of the cardigan is worked up using simple half double crochet and the balloon sleeves are worked up in both single and double crochets giving a very pretty and unique look and texture.
MATERIALS
If you prefer a pattern without all the ads you can purchase the PDF here
Yarn – Lionbrand Woolease in shade Fisherman – worsted/medium 4/aran/10 ply
197 yds (180 m) per 85 g skein
Another good substitute is Drops Alaska
7(7, 8, 8, 8, 9) balls
Hooks – 6 mm and 8 mm
Notions – Tapestry needle, scissors, locking stitch markers, measuring tape.
STITCHES & ABBREVIATIONS
ch = chain
sc = single crochet
scBLO = single crochet back loop only
hdc = half double crochet
dc = double crochet
st(s) = stitch(es)
rep = repeat
SPECIAL STITCH: Shell; (sc, 2dc) in designated stitch.
Gauge: 12 hdc x 10 rows = 4″ (10 cm)
SIZING & MEASUREMENTS
S(M, L, XL, 2XL, 3XL)
| S | M | L | XL | 2XL | 3XL | |
| Finished Bust | 42” | 46” | 50” | 5 | 58 | 62” |
| Length | 23” | 23” | 23.5” | 24” | 24” | 24.5” |
| Arm Circumference | 18” | 18” | 18.5” | 19” | 19” | 19.5 |
| Sleeve Cuff Length | 7” | 7” | 7” | 7” | 7” | 7” |
| Total Sleeve Length | 18” | 18” | 18” | 18” | 18” | 18” |
CROCHET BALLOON SLEEVE CARDIGAN PATTERN
BACK PANEL
Bottom Hem
Using 6 mm hook
Ch 8
Row 1: sc in 2nd ch from hook and in each ch across, turn [7 sc]
Row 2: ch 1, scBLO in each sc across, turn.
Rep Row 2 until you have a total of 64(68, 74, 80, 86, 92).
Turn your work to begin working across the ends of the rows you just completed.
BODY
Row 1: ch 1, work 1 hdc into the ends of each row you just completed, turn [64(68, 74, 80, 86, 92)]
Row 2: ch 1, hdc in each st across, turn.
Rep Row 2 until the end of row 58(58, 60, 62, 62, 64).
Fasten off.
FRONT PANEL (MAKE 2)
BOTTOM HEM
Using 6 mm hook
Ch 8
Row 1: sc in 2nd ch from hook and in each ch across, turn [7 sc]
Row 2: ch 1, scBLO in each st across, turn.
Rep Row 2 until you have 24(28, 30, 34, 36, 38) rows completed.
Turn your work to begin working across the ends of the rows you just completed.
BODY
Row 1: ch 1, work 1 hdc into the ends of each row you just completed, turn [24(28, 30, 34, 36, 38)].
Row 2: ch 1, hdc in each st across, turn.
Rep Row 2 until the end of row 58(58, 60, 62, 62, 64)
Fasten off leaving a long tail.
SLEEVES
MAIN SLEEVE BODY
Using 8 mm hook
Ch 60(60, 63, 66, 66, 69)
Sl st the ends together to form a circle.
Round 1: ch 1, sc in same space, sc in remaining 59(59, 62, 65, 65, 68) sts [60(60, 63, 66, 66, 69) sc]
Round 2: ch 1, Shell in same st, skip 2 sc, *Shell in next, skip 2 sc, rep from the * around, sl st in beginning sc to close the round.
Round 3: ch 1, Shell in same st, skip 2 dc, *Shell in next sc, skip 2 dc, rep from the * around, sl st to beginning sc to close the round.
Rep Round 3 until sleeve measures 11 inches in length.
Switch to 6 mm hook
Next round: ch 1, sc in each st around. This will make the end of the sleeve a little smaller but if you want it smaller again you can simply sc in every other stitch. At the end of the round sl st to the first sc to close the round.
Fasten off.
SLEEVE CUFF
Using 6 mm hook
Ch 23
Row 1: sc in 2nd ch from hook and in each ch across, turn [22 sc]
Row 2: ch 1, scBLO in each st across, turn.
Rep Row 2 until the end of Row 30(30, 32, 32, 34, 34).
Fasten off leaving a long tail.
ASSEMBLY
Lay the two front panels over the back panel. Use locking stitch marker to help line up the panels stitch-for-stitch along the shoulders and sides of the cardigan making sure to leave openings for the armholes. Use a tapestry needle and long tails to seam the pieces together.
Next seam the sleeves to the armhole. Seam the cuff to the main body of the sleeve.
COLLAR
With the right side of the cardigan facing out, attach yarn to one of the bottom inner corners.
Row 1: ch 1, sc all the way around the entire collar until you reach the other side, turn.
Row 2: ch 1, scBLO in each stitch around.
Rep row 2 until the end of Row 10.
Fasten off and weave in any remaining ends.
Hi Carrie, I absolutely love all your beautiful projects but my question is when will you be selling pdf’s. I really hope you will consider soon. Thank you for sharing your Amazing Talent ♥️