
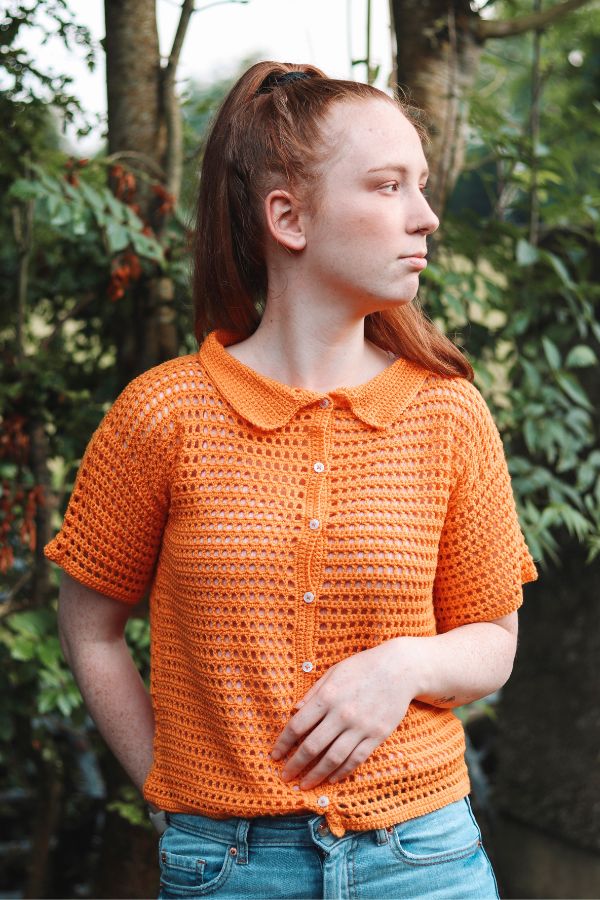
The Iris Vest Top features a slightly fitted silhouette with elegant crochet mesh stitching throughout, offering a breathable and stylish look. Designed with three front ties, the crochet vest top is constructed in three simple pieces: the back and two front panels.

To ensure you have a great experience making this vest top we have created a free and easy to follow step-by step video tutorial so you can follow along. Crafted using Sirdar Stories yarn -a lightweight cotton-acrylic blend- it provides gentle stretch and comfort, making it ideal for warm weather wear.
The Iris Crochet Vest Top pattern is available in sizes Small to 3XL and is beginner-friendly, making it perfect for crocheters of all skill levels looking to create a versatile, modern layering piece for their summer wardrobe.

Easy Crochet Vest Top Pattern
Need an easy and quick crochet vest top pattern? We have you covered with the Crochet Iris Vest Top pattern!
This pattern using simple and basic crochet stitches, perfect for even a beginner. Although this vest is designed to be slightly fitted, you can make a size bigger for a more relaxed fit. Want a longer top? Simply add more rows for the perfect fit!

Sizing Chart & Yarn Requirements
The crochet Iris Vest Top is designed to be close fitting. Choose your sized based on your preferred bust measurement. For a more loose or relaxed fit opt for one size larger but keep in mind you will require more yarn.
Please note that yarn amounts noted are estimates. Different yarn labels or your own tension will affect amounts so it is a good idea to have a ball or two on hand to be safe!

Skill Level
Easy, written in standard US crochet terms.
Gauge
18 sts and 12 rows = 4″ in mesh pattern.
Please note that a ch1-sp counts as a stitch.
Materials Needed
- 4 mm crochet hook
- 3.5 mm crochet hook
- Yarn needle
- Stitch markers
- Scissors

Abbreviations
ch = chain
sc = single crochet
dc = double crochet
ch1-sp = chain 1 space
sc2tog = single crochet 2 together
st(s) = stitch(es)
rep = repeat
slst = slip stitch
tch = turning chain
Video Tutorial for the Lavender Vest Top
If you are looking for some help throughout your crochet Iris Vest Top journey, we have created a step-by-step video tutorial to help you along the way.
In this video you will learn all the stitches and techniques needed to create your very own crochet vest top. We will begin by crocheting the back panel followed by the two front panels. Next we will seam the panels together at the shoulders and along the sides, making sure to leave the armholes open! Once everything is seamed we will do some neckline detailing with added front ties and finally putting the finishing touches around the armholes.
Don’t forget to subscribe to our channel. Come along and say hi!!

WATCH THE YOUTUBE VIDEO HERE

TO BUY THE PRINTABLE DOWNLOAD ON ETSY CLICK HERE
CROCHET IRIS VEST TOP PATTERN
S(M, L, XL, 2XL, 3XL)
Choose your size based on preferred bust measurement (from the above sizing chart above). For a more relaxed fit size up.
Notes
- The crochet vest top is crocheted by creating three separate pieces that are seamed together.
- Each piece is worked from the bottom up.
- Ch 1 at the beginning of the row does not count as a stitch
- The pattern is written for the smallest size, with the larger sizes in parenthesis (). If there is only one number, it applies to all sizes.
- Make sure to work a gauge swatch.
- Check out the free step-by-step video tutorial.
BACK
With the larger hook
Ch 76(82, 90, 94, 100, 108)
Row 1: Sc in 2nd ch from hook and in each ch across, turn. [75(81, 89, 93, 99, 107) sts]
Row 2: Ch 4 (counts as first dc and ch 1), skip next sc, dc in next, *ch 1, skip next sc, dc in next, rep from * across, turn.
Row 3: Ch 1 (not counted as a st here and throughout), sc in each dc and ch1-sp across, placing a sc in the ch 4 turning ch and another in the 3rd ch, turn. [75(81, 89, 93, 99, 107) sts]
Row 4: Ch 4 (counts as first dc and ch 1), skip next sc, dc in next, *ch 1, skip next sc, dc in next, rep from * across, turn.
Rep Rows 3-4 until the end of Row 26(28, 32, 32, 34, 36). Fasten off
Armhole shaping: We we will reset back to Row 1 again for simplicity. Make sure you have turned your work after your last row. Your tail end should be on your right now.
Skip first 6(6, 6, 8, 8, 8) sts and attach yarn to the next st.
Row 1: Ch 1, sc in same st, sc in each st across leaving the last 6(6, 6, 8, 8, 8) sts unworked, turn. [63(71, 77, 77, 83, 91) sts]
Row 2: Ch 3 (counts a first dc), skip next st, dc in next st, *ch 1, skip 1, dc in next st, rep from * across until 2 sts remain, skip next st, dc in last st, turn.
Row 3: Ch 1, skip first st, sc in next st and in each st across until 2 sts remain, sc2tog (this is worked over last dc and the top of ch3, turn.
Row 4: Ch 3 (counts as first dc), skip 1, dc in next st, *ch 1, skip 1, dc in next st, rep from * across until 2 sts remain, skip 1, dc in last st, turn.
Row 5: Ch 1, sc in each st across, turn. [57(65, 71, 71, 77, 85) sts]
Row 6: Ch 4 (counts as first dc and ch 1), skip 1, dc in next st, *ch 1, skip 1, dc in next st, rep from * across, turn.
Row 7: Ch 1, sc in each st across, turn.
Rep Rows 6-7 until the end of Row 23(25, 25, 27, 29, 29). Fasten off.
FRONT PANEL (MAKE 2)
Ch 34(36, 40, 42, 46, 50)
Row 1: Sc in 2nd ch from hook and in each ch across, turn. [33(35, 39, 41, 45, 49) sts]
Row 2: Ch 4 (counts as first dc and ch 1), skip next sc, dc in next, *ch 1, skip next sc, dc in next, rep from * across, turn.
Row 3: Ch 1 (not counted as a st here and throughout), sc in each dc and ch1-sp across, placing a sc in the ch 4 turning ch and another in the 3rd ch, turn. [33(35, 39, 41, 45, 49) sts]
Row 4: Ch 4 (counts as first dc and ch 1), skip next sc, dc in next, *ch 1, skip next sc, dc in next, rep from * across, turn.
Rep Rows 3-4 until the end of Row 26(28, 32, 32, 34, 36). Fasten off
Armhole Shaping: We will now reset back to Row 1 for simplicity. Make sure you have turned your work after your last row. The yarn tail you just cut should be on your right.
Skip the first 6(6, 6, 8, 8, 8) sts and attach yarn to the next st.
Row 1: Ch 1, sc in each st across, turn. [27(29, 33, 33, 37, 41) sts]
Row 2: Ch 4 (counts as first dc and ch 1), skip next sc, dc in next, *ch 1, skip next sc, dc in next, rep from * across until 2 sts remain, skip next sc, dc in last sc, turn.
Row 3: Ch 1, skip first sc, sc in next st and in each st across, turn.
Row 4: Ch 4 (counts as first dc and ch 1), skip next sc, dc in next, *ch 1, skip next sc, dc in next, rep from * across until 2 sts remain, skip next sc, dc in last sc, turn.
Row 5: Ch 1, sc in each st across until 2 sts remain, sc2tog (this is worked over the 4th ch and 3rd ch of tch) turn.
Row 6: Ch 3 (counts as first dc) skip next st, dc in next, *ch 1, skip next sc, dc in next sc, rep from * across, turn.
Row 7: Ch 1, sc in each st across until 2 sts remain, sc2tog, turn.
Rep Rows 6-7 until the end of Row 13(13, 15, 15, 17, 19) [15(17, 19, 19, 21, 23) sts]
Row 14(14, 16, 16, 18, 20): Ch 4 (counts as first dc and ch 1), skip next st, dc in next, *ch 1, skip 1, dc in next st, rep from * across, turn.
Row 15(15, 17, 17, 19, 21): Ch 1, sc in each st across, turn.
Rep last 2 rows a further 4(5, 4, 5, 5, 4) more times. Fasten off.
ASSEMBLY
Lay the two front panels on top of the back panel. Seam across the shoulders. I prefer to use a yarn needle and some yarn whilst using the mattress stitch. However, you can also slip stitch together.
Next seam up along the sides making sure not to close the armholes!
Turn your piece right side out so the seams are to the inside.
Neckline
Change to smaller hook
Attach yarn to the bottom right hand corner of the top.
Row 1: Ch 1 sc all the say along the inner edge of the top until you reach the opposite corner. When it comes to the placement of stitches I like to place 2 sc into the edge of every dc row and 1 sc into the edge of every sc row, turn.
Row 2: Ch 1, sc in each st around, turn.
Now is a good time to lay your top out flat. Grab yourself 6 stitch markers and mark out where you would like your 6 straps. There will be 3 straps each side. Make sure they are evenly placed as possible.
Row 3: Ch 1, sc across until you reach first st marker, *sc in marked st, ch 51 (or more if needed). Sc in 2nd ch from hook and each of the next 49 chains, sc into the next st on the body of the top, sc in each st across until you reach the second st marker. Rep from * 2 more times.
Continue placing a sc into each st around until you reach the 4th st marker. *Sc in the marked st, ch 51, sc in 2nd ch from hook and in each of the next 49 chains, sc into the next st on the body of the top, sc in each st across until you reach the 5th st marker. Rep from * a further two more times. Sc in all remaining sts. Fasten off.
Armholes
Using the smaller hook
Attach yarn to the underarm, near the side seam of the top.
Row 1: Ch 1, sc around the entire armhole, slst to first sc to close.
Row 2: Rep Row 1.
Fasten off and weave in all your ends.
Enjoy!
You might enjoy some of the following free patterns!


.