
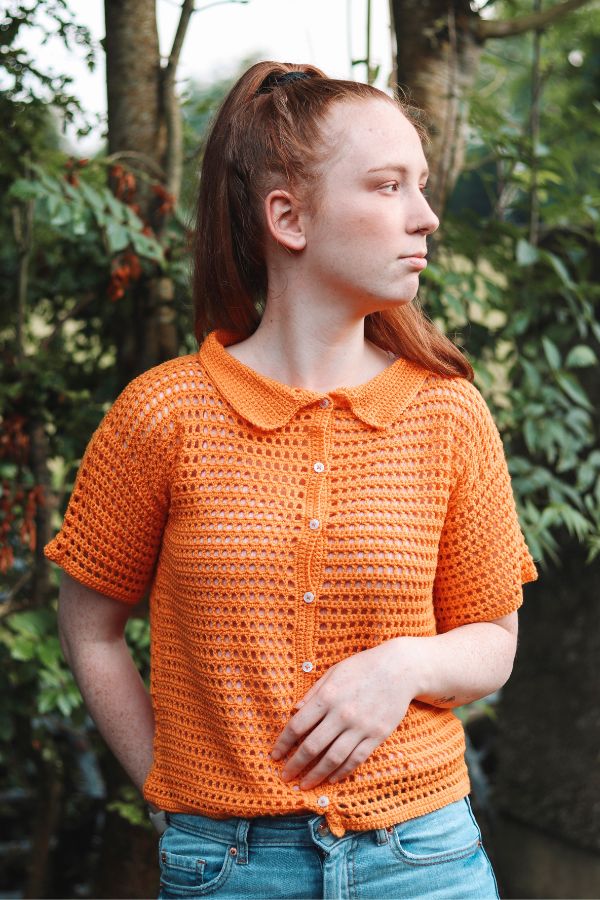
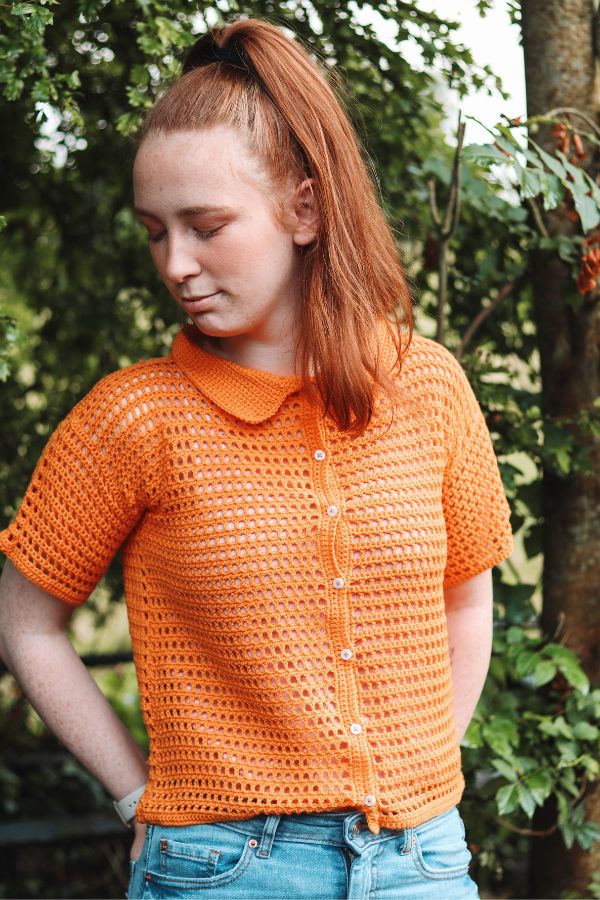
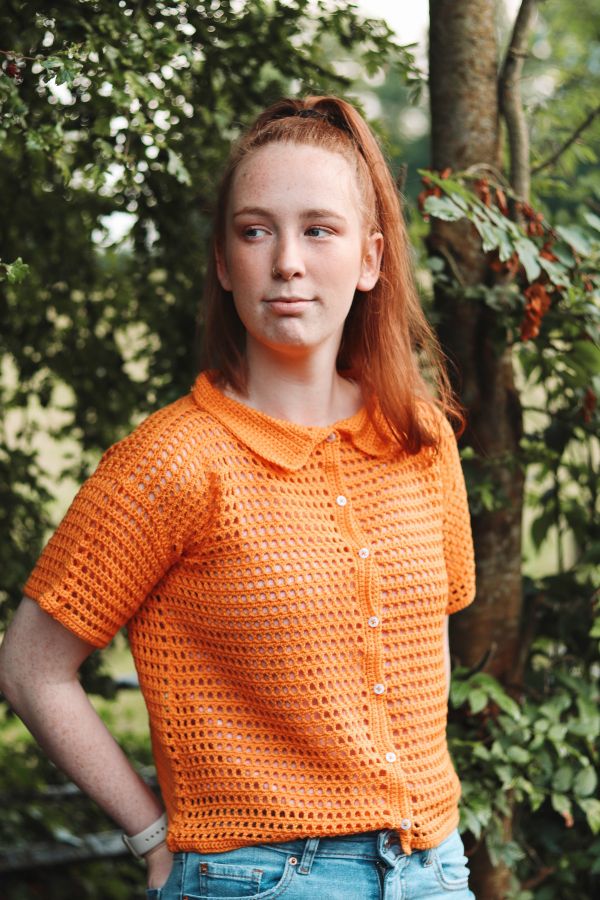
Learn to crochet the Selene Shirt, a simple button up top with a simple collar giving this piece a fun yet preppy feel, making it a perfect summer staple.
Scroll down to view the free written pattern. This pattern is also accompanied with a step by step video tutorial. You can also purchase the inexpensive, printable and ad-free pdf here.
If there’s one item of clothing I’m noticing this summer it has to be a crochet shirt. I’m seeing them everywhere, so you know I had to design one. Mesh is also trending this season so I wanted to mix the two together and with that the Selene Shirt was born.
You can wear it layered over a cami top, bralette or even as a cover up on the beach. It looks really cute when paired with jeans or a pair of shorts. It really is the ultimate summer piece for your wardrobe.
CONSTRUCTION
The Selene Shirt consists of a back panel, two front panels and two sleeves. Each piece is crocheted from the bottom up and then seamed together. The collar and button bands are crocheted directly onto the shirt.
Basic single and double crochets as well as chain stitches are used throughout the pattern making this a beginner friendly and relatively quick piece to work up.
The length of the top is completely adjustable by adding or subtracting rows.
SIZING & MEASUREMENTS
The Selene Shirt fits size S(M, L, XL, 2XL, 3XL)
Finished bust: 40(44, 48, 52, 56, 60)”
Width across back: 20(22, 24, 26, 28, 30)”
Sleeve width: 7(7.5, 8, 8.5, 9, 9.5)”
Length: 18(18, 19, 20, 21, 21)”
STITCHES & ABBREVIATIONS
ch = chain
sc = single crochet
dc = double crochet
ch1-sp = chain one space
st(s) = stitch(es)
rem = remain(ing)
tch = turning chain
rep = repeat
GAUGE: 21 sts = 4″
MATERIALS
Yarn – Hobbii Friends Extra Fine Merino – superwash merino – weight 2/sport – 165m/180yds/50g per ball
Approximately 6(6, 6, 7, 7, 8) balls
Hook – 3.75mm
Buttons
Yarn needle
Stitch markers
CROCHET SELENE SHIRT PATTERN
BACK PANEL
Ch 106(116, 126, 136, 146, 158)
Row 1: sc in 2nd ch from the hook and in each ch across, turn. [105(115, 125, 135, 145, 157 sc]
Row 2: ch 1, sc in each st across, turn.
Row 3: repeat row 2.
Row 4: ch 4 (counts as a dc and ch 1), skip next st, dc in next, *ch 1, skip next st, dc in next, rep from * across, turn.
Row 5: ch 1, sc in each dc and ch1-sp across to the ch4 tch, sc in next ch, sc in 3rd ch of tch, turn.
Rep rows 4-5 until back panels measures 18(18, 19, 20, 21, 21)”.
Fasten off.
FRONT PANEL (Make 2)
Ch 50(56, 60, 66, 70, 76)
Row 1: sc in 2nd ch from hook and in each ch across, turn. [49(55, 59, 65, 69, 75)]
Row 2: ch 1, sc in each st across, turn.
Row 3: rep row 2.
Row 4: ch 4 (counts as a dc and ch 1), skip next st, dc in next, *ch 1, skip next st, dc in next, rep from * across, turn.
Row 5: ch 1, sc in each dc and ch1-sp across to the ch4 tch, sc in next ch, sc in 3rd ch of tch, turn.
Rep rows 4-5 until back panels measures 18(18, 19, 20, 21, 21)”.
Fasten off leaving a long tail.
SLEEVES (Make 2)
Ch 74(78, 84, 84, 88, 94)
Row 1: sc in 2nd ch from hook and in each ch across, turn. [73(77, 83, 83, 87, 93)]
Row 2: ch 1, sc in each st across, turn.
Row 3: rep row 2.
Row 4: ch 4 (counts as a dc and ch 1), skip next st, dc in next, *ch 1, skip next st, dc in next, rep from * across, turn.
Row 5: ch 1, sc in each dc and ch1-sp across to the ch4 tch, sc in next ch, sc in 3rd ch of tch, turn.
Rep rows 4-5 10 more times. You can add or subtract rows here for a longer or shorter sleeve.
Fold the sleeve in half and single crochet up along the side. Fasten off.
ASSEMBLY
Lay the two front panels on top of the back panel. With a yarn needle seam 26(29, 31, 34, 36, 39) sts from the outer edge inwards. Leave remaining sts untouched. Rep on the other side by seaming 26(29, 31, 34, 36, 39) sts from the outer edge inwards.
Next seam up along the sides of the shirt leaving a 7(7.5, 8, 8.5, 9, 9.5) inch opening for the armholes.
Seam sleeves to the armholes making sure the seam is facing downwards.
COLLAR
Turn the shirt the right side out. Attach yarn to corner single crochet on the right front panel.
Row 1: ch 1, sc across remaining sts of the front panel, across the back of neck, until you reach the second collar corner, turn.
Row 2-12: ch 1, sc around collar. Fasten off.
Attach yarn to bottom right inner corner. Ch 1, sc up along the inner edge of the shirt, up along the side of collar, along the top edge of collar, down along the collar edge on the other side, and down along the inner edge of the shirt on the other side until you reach that corner, turn.
Next row: ch 1, sc around entire inner edge and collar until you reach the other corner on the other side. DO NOT FASTEN OFF.
Now you are going to decide how many buttons you want and where to place them. I decided on 7 buttons but that’s entirely up to you. Grab some stitch markers and mark out where you want the buttonholes. Make sure they are all spaced out as evenly as possible.
Next row: ch 1, sc in each st until you reach the stitch right before the first marker, ch 1, skip the stitch with the marker, sc in next st and every st *until you reach the st before next marker, ch 1, skip st with the marker, sc in each st, rep from * for all button holes. At the same time you will stop crocheting once you reach the collar. Here you will turn your work.
Next row: ch 1, sc in each sc and ch1-sp to the end. Fasten off.
Attach yarn to the bottom inner edge on the other side and sc in each st up along stopping where the collar begins. Turn your work.
Next row: ch 1, sc in each st across, turn. Fasten off.
Sew on your buttons and weave in all your ends.
You are now finished your Crochet Selene Shirt. Enjoy!
Lovely top thanks for sharing.