
Learn to crochet this quick and easy ear warmer headband. Easily customizable to fit any size head, this crochet ear warmer will be a firm fave in your accessory drawer.
Scroll down to view the free written crochet pattern.
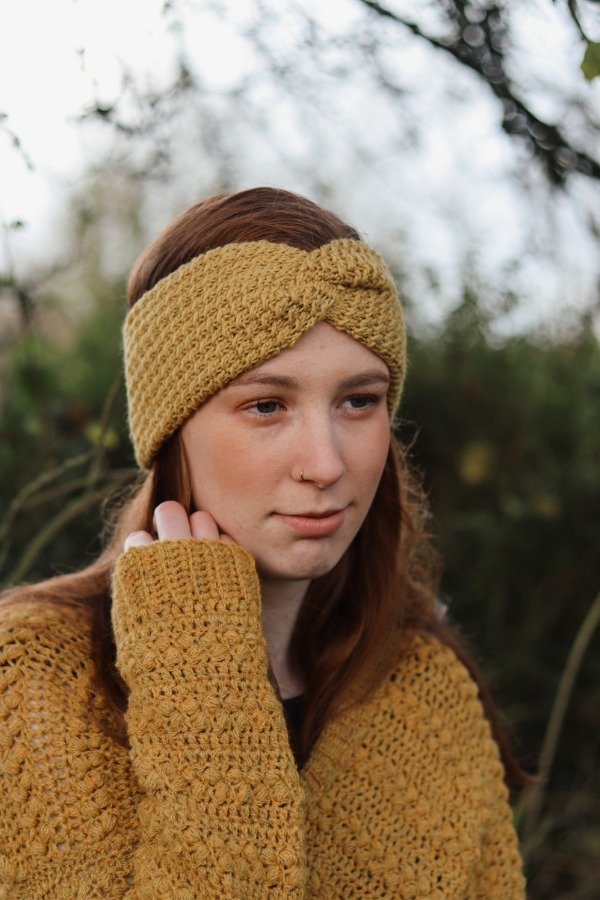
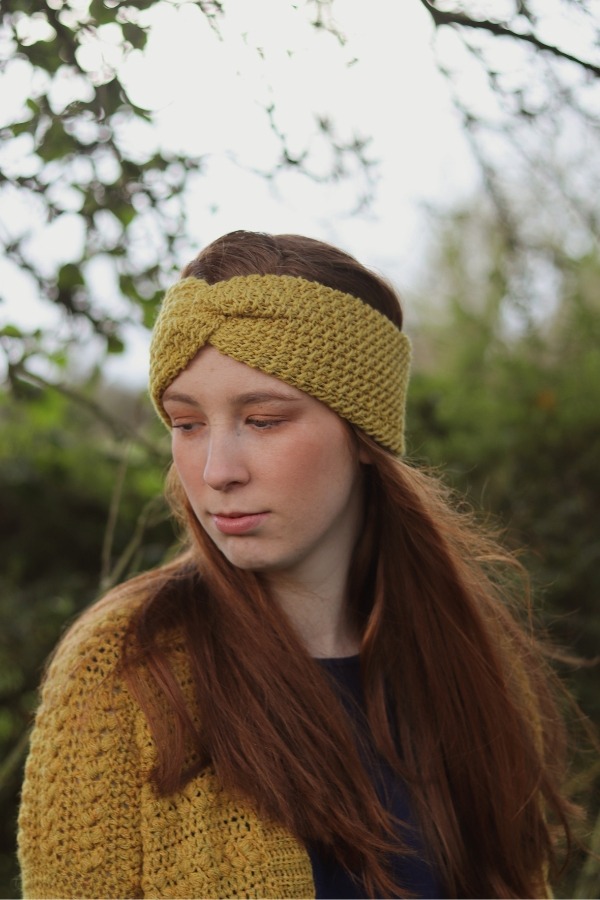
The Trinity Ear Warmer makes a perfect gift for friends and family, whether it be a birthday or Christmas gift. I designed it using a lightweight yarn, however a weight 4 will work perfectly fine for this piece but it will give the headband a very chunky look and feel. It’s really easy to make this ear warmer in any size by simply adjusting the length.
When we begin crocheting this ear warmer, the chain we begin with will determine the width. The pattern written below gives a width of about 5 inches but you can simple adjust be crochet less or more chains but make sure this number is even.
The headband is crocheted in a tubular shape, giving the piece a double layer feel, so keep that in mind when choosing your yarn
When creating this ear warmer I wanted it to have a twist but if you prefer it not to have it you can just easily crochet to the proper length according to the head size and simply seam the ends together. Simple, right!?
YARN
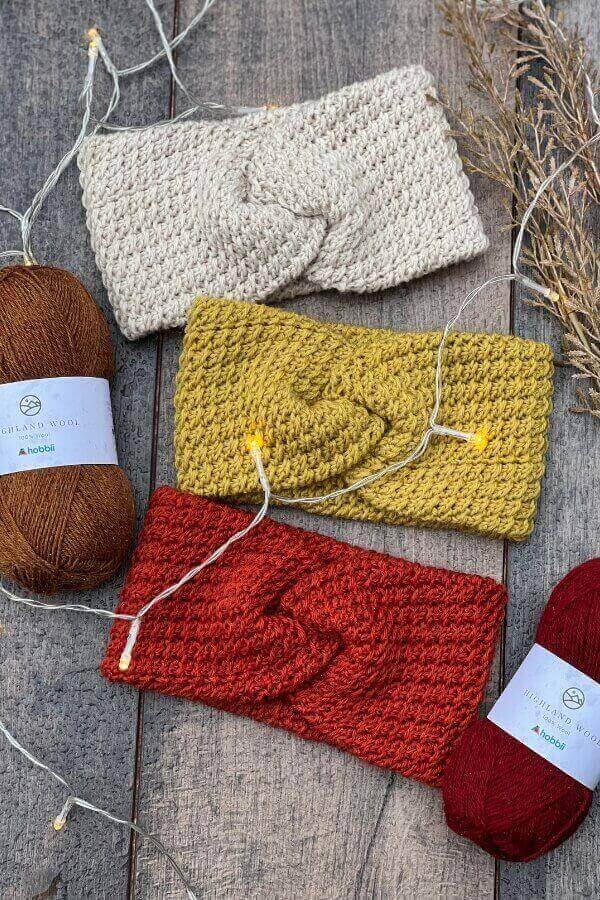
The crochet Trinity Ear warmer was designed using Hobbii Highland Wool which is a light weight or Dk yarn. I opted for a light weight yarn because at the time of making this headband the weather was still mild but you can also make it in a heavier yarn for optimal warmth during the very cold months. The best thing about this ear warmer is that it’s really easy to change things up such as yarn weights, hook sizes and head sizes. Simply adjust the length.
MATERIALS
Yarn – Hobbii Highland Wool – 100% highland wool – 175m (191yds) per 50 g ball.
Approximately 1 ball needed.
Hook – 4.5mm
Notions – yarn needle, measuring tape, scissors.
STITCHES & ABBREVIATIONS
ch = chain
sc = single crochet
dc = double crochet
rep = repeat
st(s) = stitch(es)
NOTE: this pattern use standard US crochet terms
DO NOT TURN AFTER EVER ROUND
CROCHET TRINITY EARWARMER HEADBAND PATTERN
Leaving about 9-10 inches of a tail, ch 40 (or any other number of chains you want as long as this number is even) Taking care not to twist your chain, slst to the first ch you made to create a circle.
Round 1: ch 1, sc in same space, sc in each ch around. Slst to first sc to close the round. DO NOT TURN.
Round 2: ch 1, skip first st (the same st that your ch 1 is coming out of) sc in next st, working in front of sc just made, dc into the skipped st, *skip next st, sc in next st, dc into skipped st, rep from * around. Slst into beginning sc to close the round. DO NOT TURN.
Rep row 2 until the headband is long enough to go around the head. Please take into account that we will be twisting the headband so it is recommended to close slightly bigger than the head.
Next row: ch 1, sc in same space, sc in each st around. Slst to beginning sc to close the round.
Fasten off leaving a long tail.
Using your yarn needle seam both ends of the “tube” closed.
FINISHING
Take one end in one hand and the other end in the other and sandwich the two ends together. Using your yarn needle and some yarn stitch to secure. Turn headband right side out.

can’t wait to make this!
Thank you 💖
Thank you Carrie and Happy New Year.