
Scroll down to view this free crochet cardigan pattern. Learn to crochet this easy braid-like puff stitch cardigan.
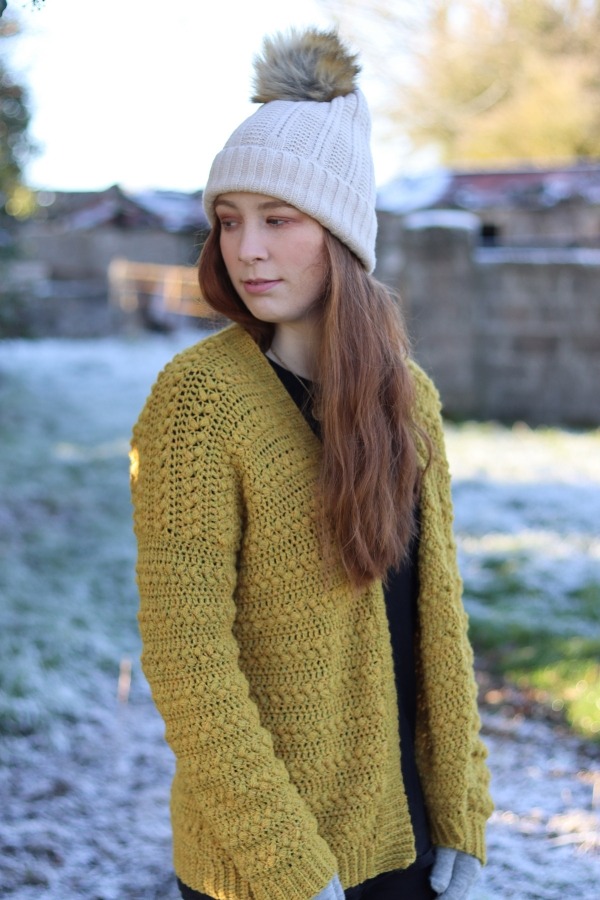
One of my most favorite crochet stitches is the puff stitch. I love how easy it is yet the outcome of this pretty stitch adds endless texture to any crochet piece. With the proper placement of two rows of the puff stitch you can get a really awesome braid effect that brings any garment to another level.
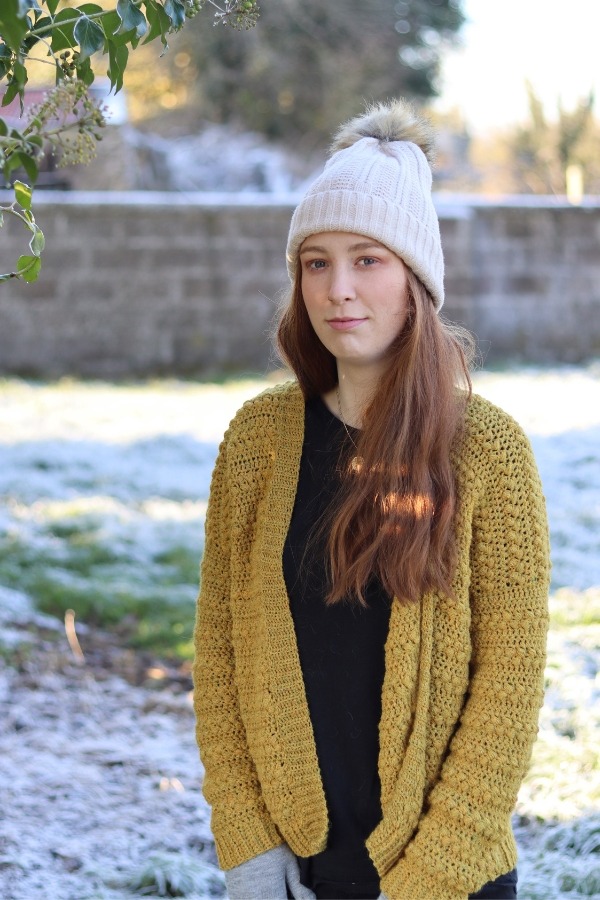
I wanted to create a cardigan that could be worn throughout the year so I opted for a light weight Dk yarn and a hook that’s slightly bigger than what is recommended for the yarn weight. The cardigan is long enough to touch just about hip level but you can easily add more rows to make it longer.
CONSTRUCTION
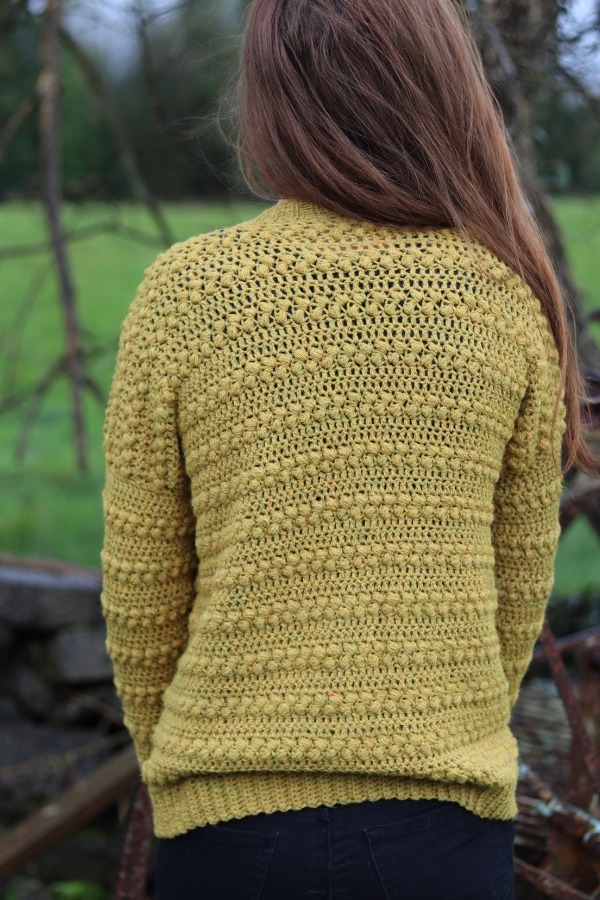
The Moira Cardigan is constructed by crocheting 5 easy panels, the back, two front panels and two identical sleeves. Each piece is worked flat from the bottom up beginning with the hemline or sleeve cuffs. Rows of double crochet followed by rows of puff stitch make up the design of this crochet cardigan.
As mentioned, we begin by crocheting the ribbed hemline. Once we reach a certain amount of rows we will start to work along the long edge of the rib working back and forth in rows. The two sleeves are also worked in the same manner.
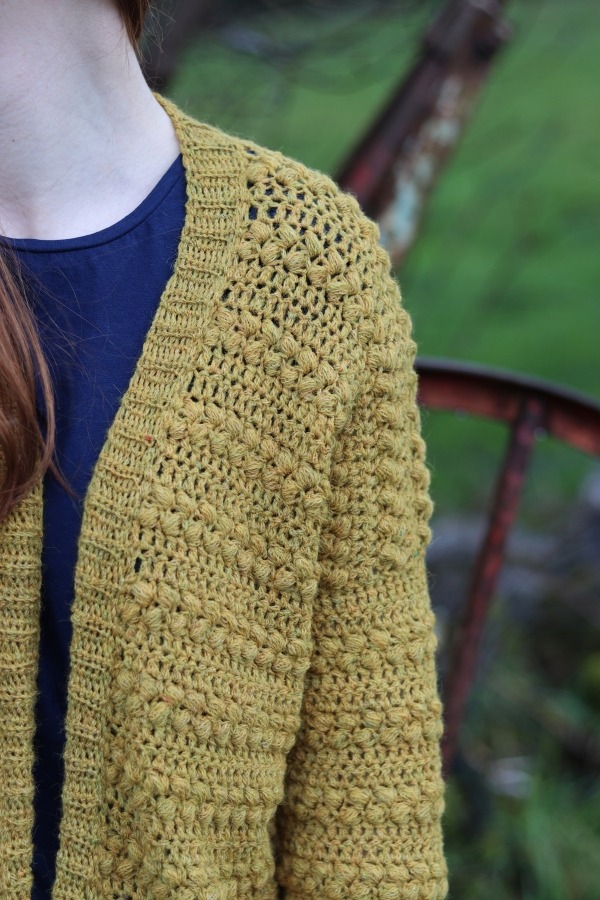
After we have crocheted our back panel, two front panels and both sleeves it is now time to seam all these pieces together. First we begin by whip stitching (or any other seaming stitch that you prefer) across both shoulders and up along the sides making sure to leave gaps for the armholes. Sleeves are the attached to the body of the cardigan and we will then seam along the edges of the sleeves.
Lastly we will crochet some ribbing along the inner edge of the cardigan to finish off.
MATERIALS
Yarn – Drops Sky – Dk/light/weight 3/8 ply – 74% alpaca, 18% nylon, 8% wool – 190m(208yds) per 50g
Approximately 6(6, 7, 7, 8, 8) balls
Hook – 4mm
Notions – yarn needle, locking stitch markers to help with seaming
SIZING & MEASUREMENTS
S(M, L, XL, 2XL, 3XL)
Finished bust: 44(48, 52, 56, 60, 64)”
Width: 22(24, 26, 28, 30, 32)”
STITCHES & ABBREVIATIONS
ch = chain
sc = single crochet
scblo = single crochet back loop only
dc = double crochet
Pst = puff stitch
st(s) = stitch(es)
yo = yarn over
rep = repeat
Special Stitch: Puff Stitch (Pst): yo, insert hook into designated st, yo pull up a loop (3 loops on hook), (yo, insert hook in same st, pull up a loop) twice (7 loops on hook now), yo and pull through 6 loops (2 loops on hook now), yo and pull through the remaining 2 loops on hook.
GAUGE: 14 dc x 10 rows = 4″x4″
CROCHET MOIRA CARDIGAN PATTERN
BACK PANEL
Ribbed Hem
Ch 10
Row 1: sc in 2nd ch from hook and in each ch across, turn. [9 sc]
Row 2: ch 1, scblo in each st across, turn.
Rep row 2 until the end of row 77(83, 91, 97, 105, 111).
Do not fasten off. We will now work along the long edge of ribbing.
Main Body
Row 1: ch 3 (counts as first dc here and throughout), dc a further 76(82, 90, 96, 104, 110) along the long edge of the ribbing, turn [77(83, 91, 97, 105, 111) dc total].
Row 2: ch 3, dc in each st across, turn.
Row 3: ch 1 (not counted as a st here and throughout), (1sc + 1 Pst) in first st, *skip next st, (1 sc + 1 Pst) in next st, rep from * across until 2 sts rem, skip next st, sc in last st, turn.
Row 4: ch 1, (1 sc + 1 Pst) in first st, *skip next st, (1sc + 1 Pst) in next st, rep from * across until 2 sts rem, skip next st, sc in last st, turn.
Row 5: ch 3, dc in each st across, turn.
Row 6: ch 3, dc in each st across, turn.
Row 7: ch 1, (1 sc + 1 Pst) in first st, *skip next st, (1 sc + 1 Pst) in next st, rep from * across until 2 sts rem, skip next st, sc in last st, turn.
Row 8: ch 1 (1 sc + 1 Pst) in first st, *skip next st, (1 sc + 1 Pst) in next st, rep from * across until 2 sts rem, skip next st, sc in last st, turn.
Rep row 5-8 until the end of row 60(60, 64, 64, 68, 68).
Row 61(61, 65, 65, 69, 69): ch 3, dc in each st across, turn.
Row 62(62, 66, 66, 70, 70): ch 3, dc in each st across.
Fasten off.
FRONT PANEL (MAKE 2)
Ribbed Hem
Ch 10
Row 1: sc in 2nd ch from hook and in each ch across, turn [9 sc]
Row 2: ch 1, scblo in each st across, turn.
Rep row 2 until the end of row 29(33, 37, 39, 43, 47)
Do not fasten off. We will now work along the long edge of the ribbing.
Main Body
Row 1: ch 3 (counts as first dc here and throughout), dc a further 28(32, 36, 38, 42, 46) sts along the long edge of the ribbing, turn [29(33, 37, 39, 43, 47) dc total].
Row 2: ch 3, dc in each st across, turn.
Row 3: ch 1 (not counted as a st here and throughout), (1sc + 1 Pst) in first st, *skip next st, (1 sc + 1 Pst) in next st, rep from * across until 2 sts rem, skip next st, sc in last st, turn.
Row 4: ch 1, (1 sc + 1 Pst) in first st, *skip next st, (1sc + 1 Pst) in next st, rep from * across until 2 sts rem, skip next st, sc in last st, turn.
Row 5: ch 3, dc in each st across, turn.
Row 6: ch 3, dc in each st across, turn.
Row 7: ch 1, (1 sc + 1 Pst) in first st, *skip next st, (1 sc + 1 Pst) in next st, rep from * across until 2 sts rem, skip next st, sc in last st, turn.
Row 8: ch 1 (1 sc + 1 Pst) in first st, *skip next st, (1 sc + 1 Pst) in next st, rep from * across until 2 sts rem, skip next st, sc in last st, turn.
Rep row 5-8 until the end of row 60(60, 64, 64, 68, 68).
Row 61(61, 65, 65, 69, 69): ch 3, dc in each st across, turn.
Row 62(62, 66, 66, 70, 70): ch 3, dc in each st across.
Fasten off leaving a long tail.
SLEEVES
Ribbed Cuff
Ch 10
Row 1: sc in 2nd ch from hook and in each ch across, turn. [9 sc]
Row 2: ch 1, scblo in each st across, turn.
Rep row 2 until the end of row 35(35, 35, 37, 37, 39)
Do not fasten off. We will now work along the long edge of the cuff.
Sleeve Body
Row 1: ch 3, dc a further 34(34, 34, 36, 36, 38) sts across long edge of cuff, turn. [35(35, 35, 37, 37, 39) dc total]
Row 2: ch 3, dc in each st across, turn.
Row 3: ch 1 (not counted as a st here and throughout), (1sc + 1 Pst) in first st, *skip next st, (1 sc + 1 Pst) in next st, rep from * across until 2 sts rem, skip next st, sc in last st, turn.
Row 4: ch 1, (1 sc + 1 Pst) in first st, *skip next st, (1sc + 1 Pst) in next st, rep from * across until 2 sts rem, skip next st, sc in last st, turn.
Row 5: ch 3, dc in same st (inc made), dc in each st across placing 2 dc in last st, turn [37(37, 37, 39, 39, 39) dc total], turn.
Row 6: ch 3, dc in same st (inc made), dc in each st across placing 2 dc in last st (inc made), turn [39(39, 39, 41, 41, 41) dc total], turn.
Rep last 4 rows, increasing on every dc row at both ends until you have 53(53, 57, 59, 63, 67) dc.
Continue in stitch pattern WITHOUT increasing until the end of row 42.
Fasten off leaving a long tail.
ASSEMBLY
Lay the front panels on top of the back panel and using a whip stitch (or any other preferred way of seaming) across the shoulders.
Whip stitch up along the sides of the cardigan leaving gaps for the armholes.
Attach sleeves to the body of the cardigan and seam down along the sides of the sleeves.
Turn cardigan right side out so the seams are in the inside.
COLLAR RIBBING
Attach yarn to the bottom right hand corner.
Row 1: ch 1, sc all the way around the inner edge of the cardigan until you reach the other side, turn.
Row 2: ch 10, sc in 2nd ch from hook and into each of the next 8 chains, slst in each of the next 2 sc on inner edge of cardigan, turn.
Row 3: skip the 2 slsts you just completed, scblo in next 9 sc, turn.
Row 4: ch 1, scblo in next 9 sts, slst in next 2 sc on the inner edge of cardigan, turn, rep from row 3-4 all the way around inner edge.
Fasten off.
Weave in all your ends.